Setting Up Your VCR
Making the right connections
It's essential that your VCR be properly hooked up for proper results. Follow these steps carefully. THESE STEPS MUST BE COMPLETED BEFORE ANY VCR OPERATION CAN BE PERFORMED.
ARECORDER-TO-TV CONNECTION
RF CONNECTION
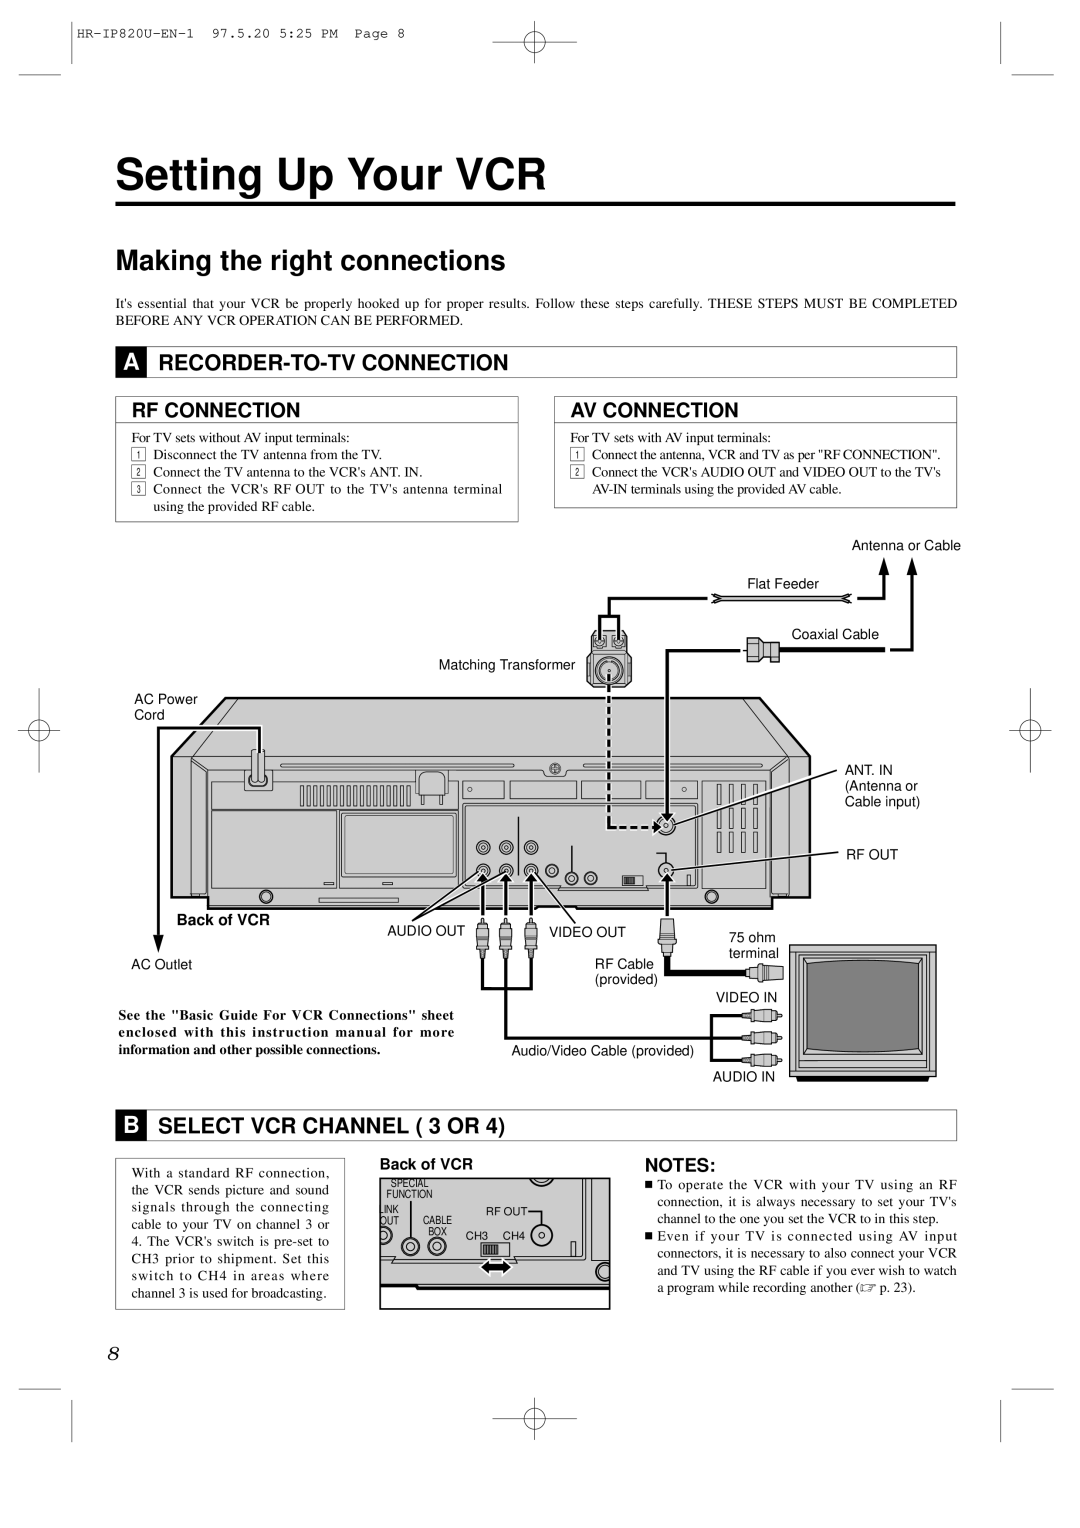
For TV sets without AV input terminals:
1Disconnect the TV antenna from the TV.
2Connect the TV antenna to the VCR's ANT. IN.
3Connect the VCR's RF OUT to the TV's antenna terminal using the provided RF cable.
AV CONNECTION
For TV sets with AV input terminals:
1Connect the antenna, VCR and TV as per "RF CONNECTION".
2Connect the VCR's AUDIO OUT and VIDEO OUT to the TV's
Antenna or Cable
Flat Feeder
Matching Transformer
Coaxial Cable
AC Power
Cord
Back of VCR
![]() AUDIO OUT AC Outlet
AUDIO OUT AC Outlet
See the "Basic Guide For VCR Connections" sheet enclosed with this instruction manual for more information and other possible connections.
VIDEO OUT | 75 ohm |
| terminal |
RF Cable (provided)
VIDEO IN
Audio/Video Cable (provided)
AUDIO IN
ANT. IN (Antenna or Cable input)
RF OUT
BSELECT VCR CHANNEL ( 3 OR 4)
With a standard RF connection, the VCR sends picture and sound signals through the connecting cable to your TV on channel 3 or
4.The VCR's switch is
Back of VCR
SPECIAL |
|
| |
FUNCTION |
|
| |
LINK | CABLE | RF OUT | |
/OUT |
|
| |
| BOX | CH3 | CH4 |
|
| ||
NOTES:
■To operate the VCR with your TV using an RF connection, it is always necessary to set your TV's channel to the one you set the VCR to in this step.
■Even if your TV is connected using AV input connectors, it is necessary to also connect your VCR and TV using the RF cable if you ever wish to watch a program while recording another (☞ p. 23).
8