8 EN
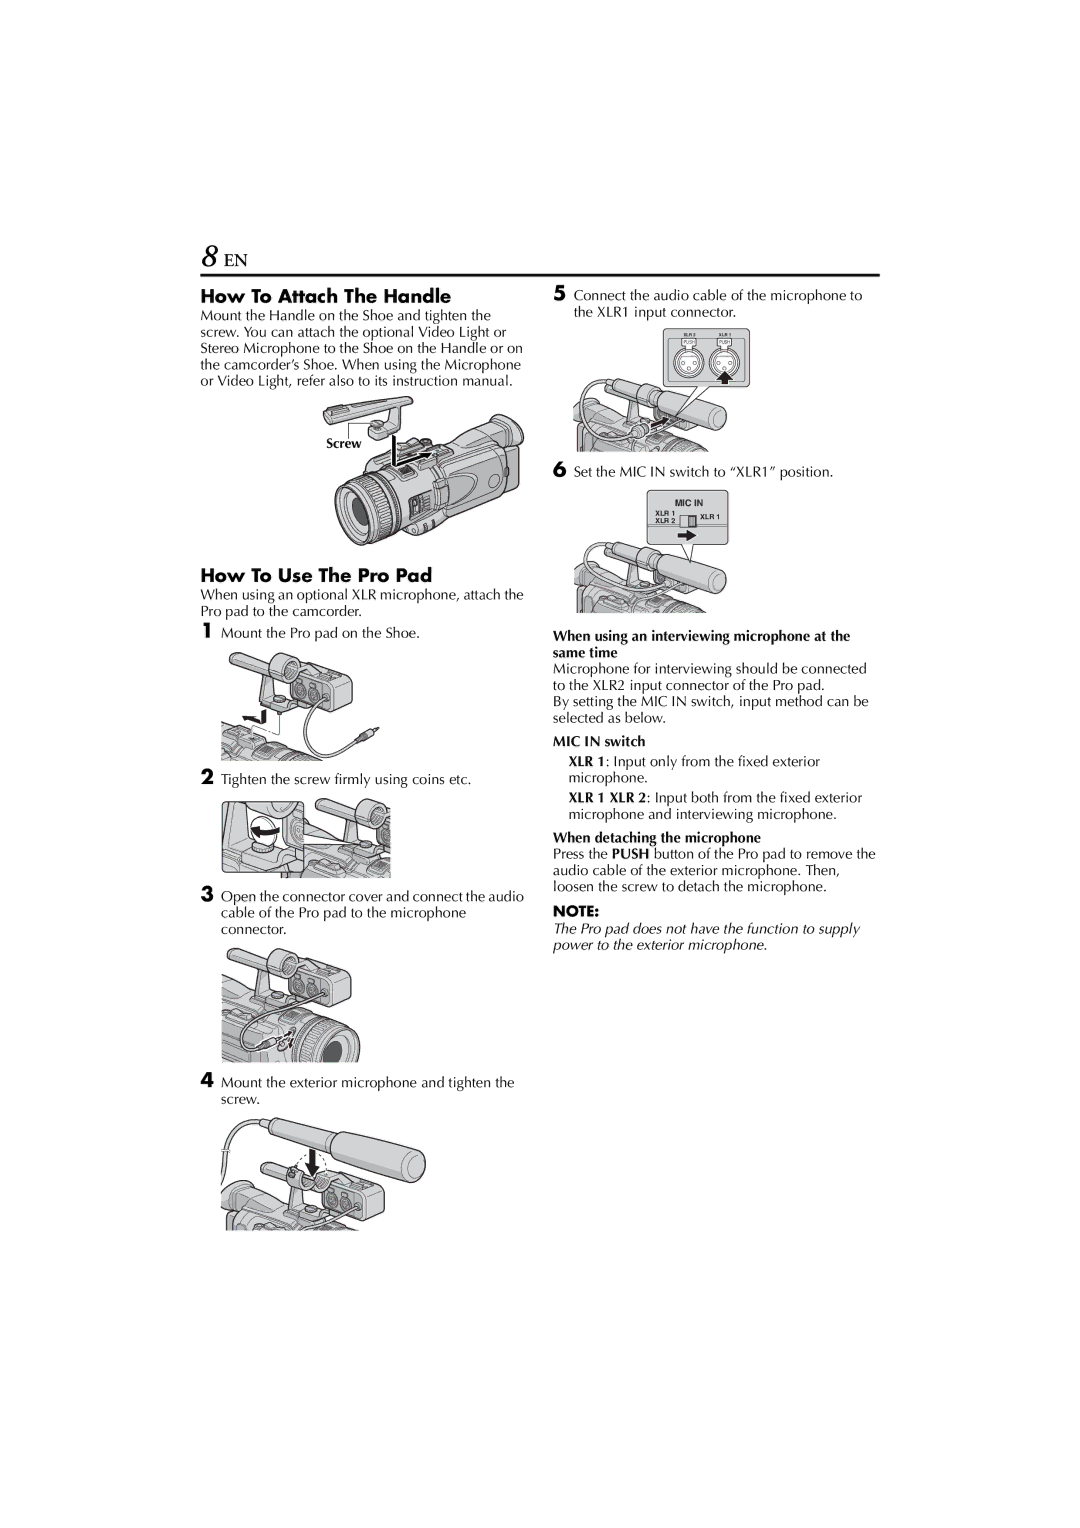
How To Attach The Handle
Mount the Handle on the Shoe and tighten the screw. You can attach the optional Video Light or Stereo Microphone to the Shoe on the Handle or on the camcorder’s Shoe. When using the Microphone or Video Light, refer also to its instruction manual.
Screw
5Connect the audio cable of the microphone to the XLR1 input connector.
XLR 2 | XLR 1 |
PUSHPUSH
6Set the MIC IN switch to “XLR1” position.
MIC IN
XLR 1 |
| XLR 1 |
XLR 2 |
|
|
|
|
|
How To Use The Pro Pad
When using an optional XLR microphone, attach the Pro pad to the camcorder.
1Mount the Pro pad on the Shoe.
2Tighten the screw firmly using coins etc.
3Open the connector cover and connect the audio cable of the Pro pad to the microphone connector.
When using an interviewing microphone at the same time
Microphone for interviewing should be connected to the XLR2 input connector of the Pro pad.
By setting the MIC IN switch, input method can be selected as below.
MIC IN switch
XLR 1: Input only from the fixed exterior microphone.
XLR 1 XLR 2: Input both from the fixed exterior microphone and interviewing microphone.
When detaching the microphone
Press the PUSH button of the Pro pad to remove the audio cable of the exterior microphone. Then, loosen the screw to detach the microphone.
NOTE:
The Pro pad does not have the function to supply power to the exterior microphone.
4Mount the exterior microphone and tighten the screw.
