Food Processor
Hassle-Free Replacement Warranty
Product Registration Card
Table of Contents
Important Safeguards
KitchenAid Food Processor Warranty USA
How To Arrange For Service USA Only
Length Warranty
KitchenAid Will Pay For
Standard First Year Warranty
How To Arrange For Service Outside The USA
If You Need Service or Assistance
Required Warranty Service for Puerto Rico
How To Obtain Service
Electrical Requirements
Food Processor Features
Medium 4 mm Shredding Disc features
Medium 4 mm Slicing
Assembling Your Food Processor
Select blade or disc
They are properly aligned and fall into place
To Disassemble
Egg Whip Professional Model KFPM650 Only
To Assemble Egg Whip
Operating Your Food Processor
Disassembling Your Food Processor
Care and Cleaning
Using Multipurpose Blade
Food Processing Tips
Using a Slicing Or Shredding Disc
Using the Dough Blade
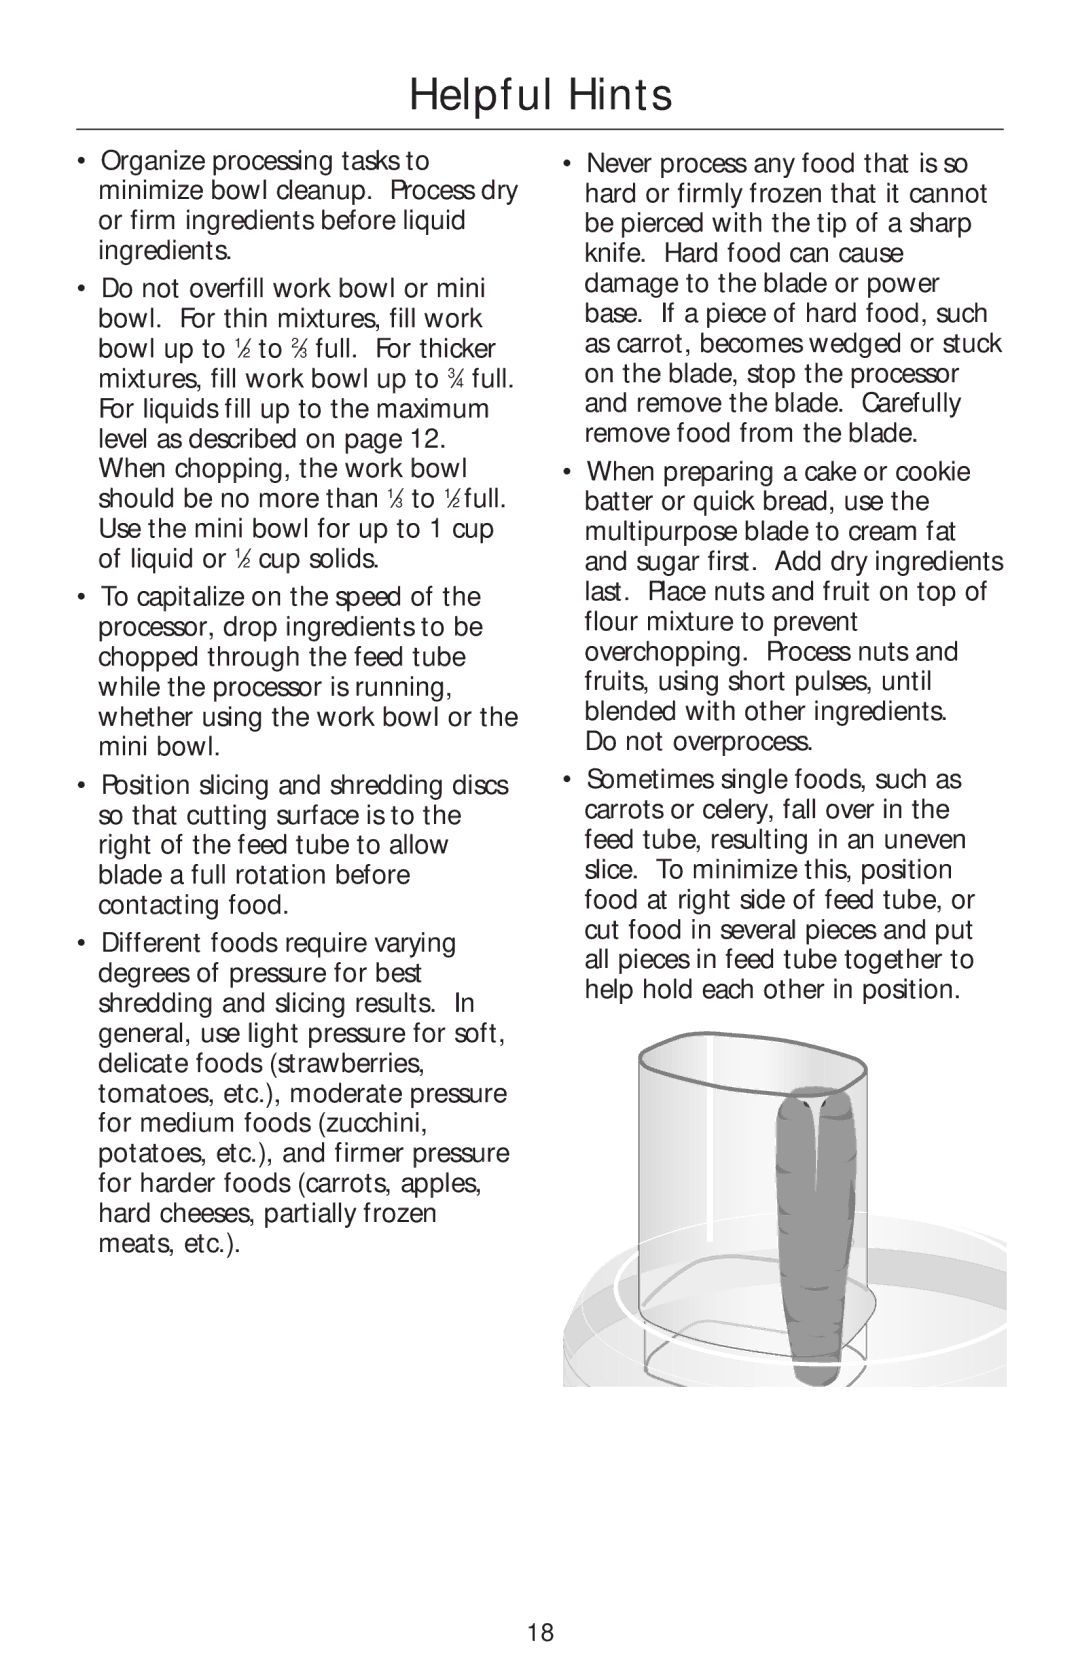
Helpful Hints
Helpful Hints
Stuffed Jumbo Mushrooms
⁄2 teaspoon dry mustard
Smoky Chicken Pate
Seasoned Cheese Straws
Spicy Deviled Eggs
Cheesy Caramelized Onion Squares
Shrimp Dill Dip
Medium onions
Egg white, beaten
Salsa Verde
Clove garlic, quartered
Vegetable Terrine
⁄4 cup water Tablespoon sugar Tablespoon lemon juice
Can 71⁄2 oz. red salmon, bones, skin, and dark meat removed
Gorgonzola Cheese Ball
Cheesy Hot Salmon Dip
Dressing
Chicken Chutney Salad
Spicy Jicama Salad
Chopped Chicken and Vegetable Salad
Chinese Coleslaw
Spicy Dressing
⁄2 medium about 1 lb. Napa cabbage Small red onion
Red Cabbage Slaw
Shredded Summer Squash Salad
Tablespoons orange juice ⁄2 teaspoon grated orange peel
Carrot and Date Salad
Hot Chicken Salad
Hot Potato Salad
Vegetable Crunch Salad
Vinaigrette Dressing
Medium onion, cut in 4 pieces Slices bacon
Creamy Orange Dressing
Spicy Mexican Dressing
⁄3 cup mild salsa
Tablespoons fresh lime juice
Pound broccoli
Creamy Broccoli Soup
Tablespoons fresh parsley
Creamy Lentil Soup
Cups lentils, rinsed, sorted
French Onion Soup en Casserole
Ounces Gruyere or Swiss cheese Large onions
⁄2 teaspoon black pepper
⁄2 cup dry sherry
Winter Root Soup with Potatoes
Calico Corn Chowder
Cheese Sandwich Spread
Ham Sandwich Spread
Chutney Chicken Spread
Bean and Veggie Melt
⁄2 teaspoon ground cumin Soft pita breads
Vegetable Hoagie
⁄4 cup stuffed green olives ⁄4 cup pitted ripe olives
⁄4 red onion
Tablespoons balsamic vinegar ⁄2 teaspoon sugar
Dilled Cucumbers and Onions
Scalloped Potatoes
Small onion
⁄2 cup white wine vinegar ⁄4 cup fresh dill weed
Sauteed Zucchini and Peppers
Shredded Vegetable Sauté
Medium bell peppers, red and/or yellow, cut in quarters
⁄4 teaspoon dried dill weed
Cabbage, Onion and Noodle Casserole
Shredded Beets
Cinnamon, if desired
Honey Glazed Carrots
Zucchini Patties
Rice Pilaf with Vegetables
Layered Eggplant Casserole
Cup uncooked white rice
⁄4-1⁄2teaspoon black pepper
Small carrot
Onion-Cheese Pie
Pastry crust pg.73 Cloves garlic
Beef Fajitas
Tarragon Chicken Patties
⁄3 cup skim or low-fat milk
Szechwan Pork
Teaspoons oyster sauce Teaspoon cornstarch
⁄8 teaspoon ginger
Chicken and Broccoli Stir-Fry
Cloves garlic Egg white
Turkey Slices with Fresh Italian Tomato Sauce
Teaspoons olive oil, divided
⁄2 teaspoon brown sugar ⁄2 teaspoon salt
Pound turkey breast slices
Vegetable Egg Foo Yung
⁄2 teaspoon salt ⁄8 teaspoon black pepper
Spicy Chicken Lo Mein
Beef Chow Mein
Tablespoon plus Teaspoon peanut oil, divided
Tablespoon oyster sauce
Hot cooked rice or chow mein noodles, if desired
Shrimp and Scallop Sauté with Pasta and Vegetables
Tablespoon peanut oil
Vegetarian Pizza
Tablespoon olive oil
Vegetable-Stuffed Chicken Breasts
Chicken-Vegetable Frittata
Medium shallot
Small zucchini
Teaspoons skim milk 1⁄4 teaspoon salt Dash black pepper
Satay Chicken Strips with Peanut Sauce
Ham Loaf
Slices bread, torn in 4 pieces each
⁄2 cup skim or low-fat milk Tablespoon prepared mustard
⁄4 teaspoon salt ⁄4 teaspoon black pepper
Cracked Wheat Bread
White Bread
Cinnamon Bread
Herb Bread
⁄4 cup water ⁄4 cup milk
⁄2 cup half and half
Oatmeal Raisin Scones
⁄2-inch pieces
Coffee Cake
Cranberry Pear Coffee Cake
Topping
Poppyseed Rolls
Biscuits
Cups bread flour
Tablespoons sugar Teaspoon salt Cup poppyseed filling
Zucchini Chocolate Chip Bread
⁄2 cup buttermilk Teaspoon vanilla
Flavored Butters
Tablespoon honey ⁄2 teaspoon cinnamon
Pieces
Carrot Cake
⁄4 teaspoon nutmeg ⁄2 cup pecan halves or pieces
Cheesecake
Tablespoons sugar Tablespoons, margarine or butter, melted
Cup sugar
⁄4 cup fresh lemon juice
Teaspoon water or Egg, beaten Tablespoon water
Fresh Fruit Tart
Pastry crust pg.73
⁄3 cup sugar Teaspoons vanilla
Light Cranberry Cream Cheese Bars
Cup plus Tablespoon all- purpose flour, divided
Instant Chocolate Sauce
Orange-Chocolate Mousse
⁄3 cup packed brown sugar ⁄4 cup sugar
Tablespoons light corn syrup ⁄4 teaspoon vanilla
Pastry Crust
One Crust 6 servings for main dish pie
One Crust 8 servings
Two Crusts 8 servings
Apple Pie
Pastry crusts pg.73 1⁄3 cup sugar ⁄4 cup packed brown sugar
Thumbprint Cookies
⁄2 cup sugar ⁄3 cup margarine or butter, cut up
Cookie Crumb Crust
Chocolate Wafer Crust
Vanilla Wafer Crust
Ginger Snap Crust
Optional Attachments and Accessories
Juice Extractor Model Kfpje
For the WAY IT’S Made