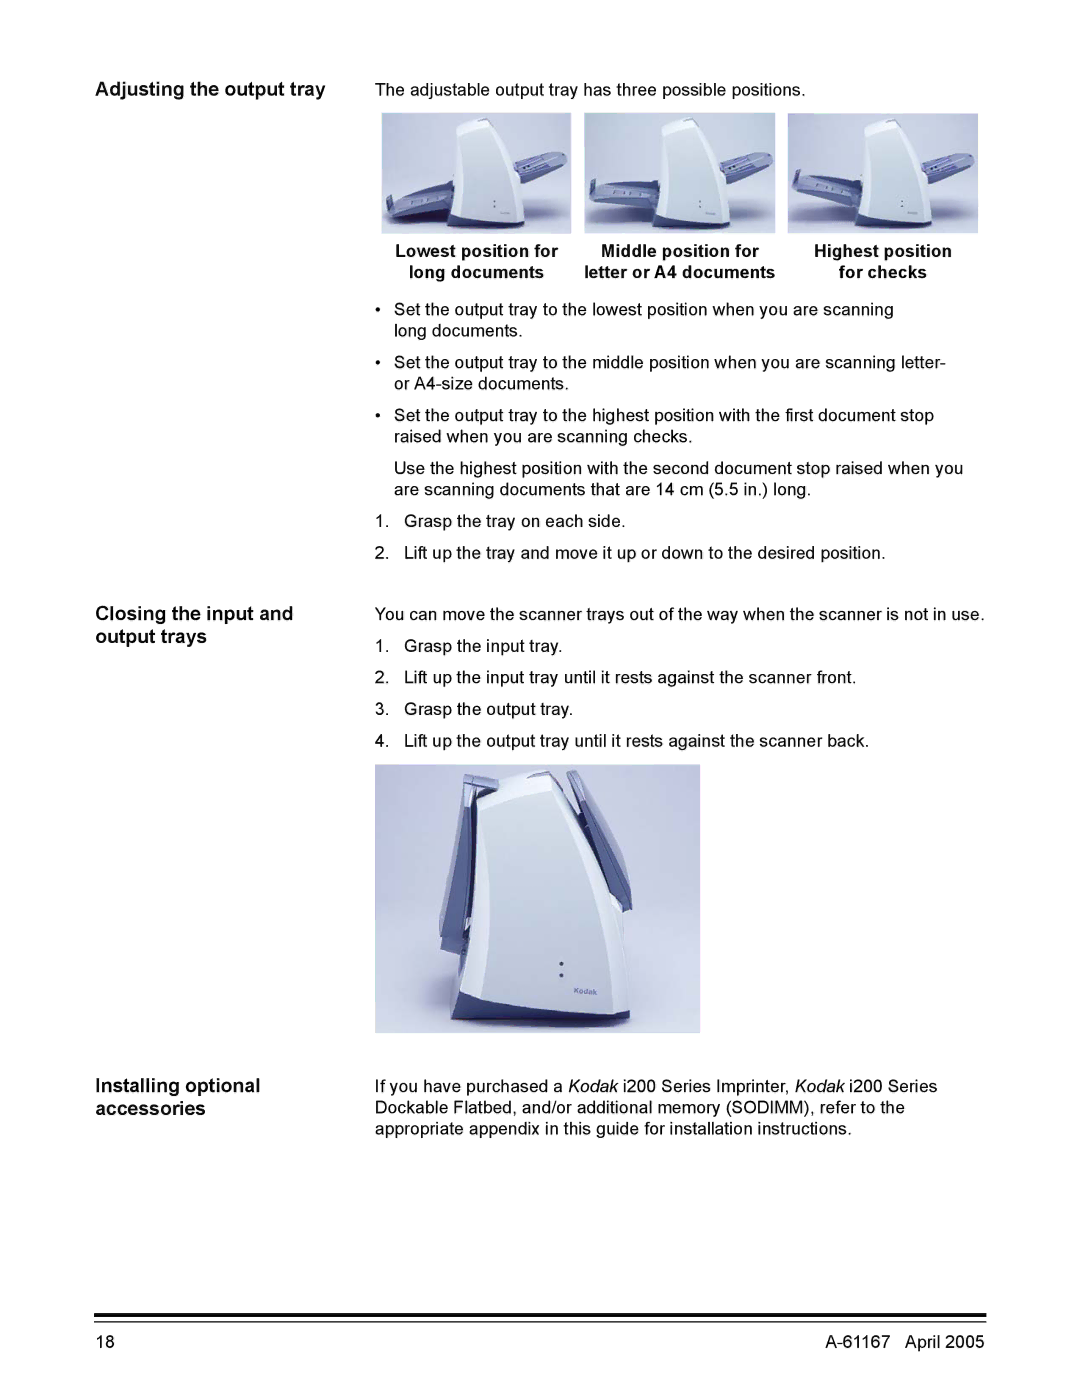
Adjusting the output tray The adjustable output tray has three possible positions.
Closing the input and output trays
Installing optional accessories
Lowest position for | Middle position for | Highest position |
long documents | letter or A4 documents | for checks |
•Set the output tray to the lowest position when you are scanning long documents.
•Set the output tray to the middle position when you are scanning letter- or
•Set the output tray to the highest position with the first document stop raised when you are scanning checks.
Use the highest position with the second document stop raised when you are scanning documents that are 14 cm (5.5 in.) long.
1.Grasp the tray on each side.
2.Lift up the tray and move it up or down to the desired position.
You can move the scanner trays out of the way when the scanner is not in use.
1.Grasp the input tray.
2.Lift up the input tray until it rests against the scanner front.
3.Grasp the output tray.
4.Lift up the output tray until it rests against the scanner back.
If you have purchased a Kodak i200 Series Imprinter, Kodak i200 Series Dockable Flatbed, and/or additional memory (SODIMM), refer to the appropriate appendix in this guide for installation instructions.
18 |