Adjusting the Camera Default Settings
Customize your camera so specific settings are activated automatically each time you turn on the camera. Select settings for Flash, White Balance, Exposure Compensation, Borders, and Effects to suit your particular
Setting a Border Default
Adjust the camera so your favorite frame or graphic is added to each picture you take. This is handy for incorporating your company logo into the pictures. For more information about the Borders feature, see page 23.
Once the picture is taken, borders cannot be removed.
Menu | 1 |
Capture | 2 |
Review |
|
Setup |
|
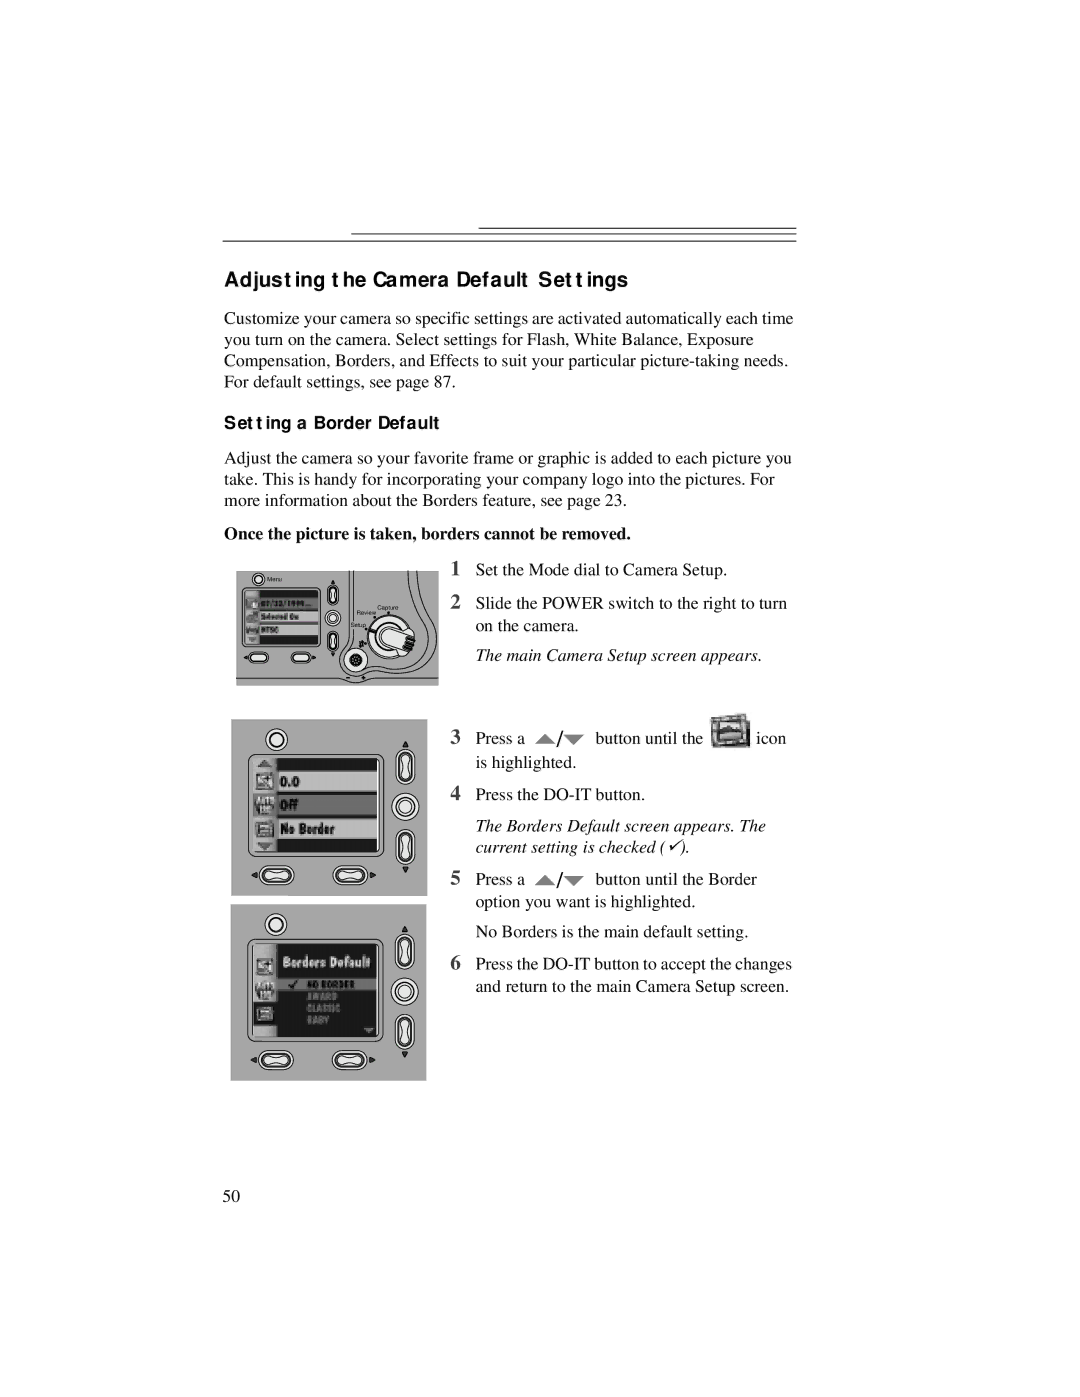
Set the Mode dial to Camera Setup.
Slide the POWER switch to the right to turn on the camera.
The main Camera Setup screen appears.
3Press a ![]() /
/![]() button until the
button until the ![]() icon is highlighted.
icon is highlighted.
4Press the
The Borders Default screen appears. The current setting is checked ().
5Press a ![]() /
/![]() button until the Border option you want is highlighted.
button until the Border option you want is highlighted.
No Borders is the main default setting.
6Press the
50
