Setting the Max In
In order to properly identify missed punches, the recorder has Max In Value that is used to pair punches for calculations. If the next punch following an IN punch exceeds the Max In Value (i.e., 13 hrs.), then it assumed that the employee forgot to punch OUT, and that punch is actually printed as the next IN punch. The employee can override this and force the recorder to make OUT punch by pressing the OUT button before inserting the time card. For this override OUT punch to work, the Button Function must be enabled. (See "Setting the Button Function".)
If the "Max In Override" is set to 'No', then the clock will not assume that a punch was missed, and the clock will calculate as punched.
17 hours | ||
|
|
|
MAX IN
FUNCTION ![]()
![]() CHANGE
CHANGE![]()
![]() SET
SET
Max in override
MAX IN
FUNCTION ![]()
![]() CHANGE
CHANGE![]()
![]() SET
SET
Max in Value (Hour)
MAX IN
FUNCTION ![]()
![]() CHANGE
CHANGE![]()
![]() SET
SET
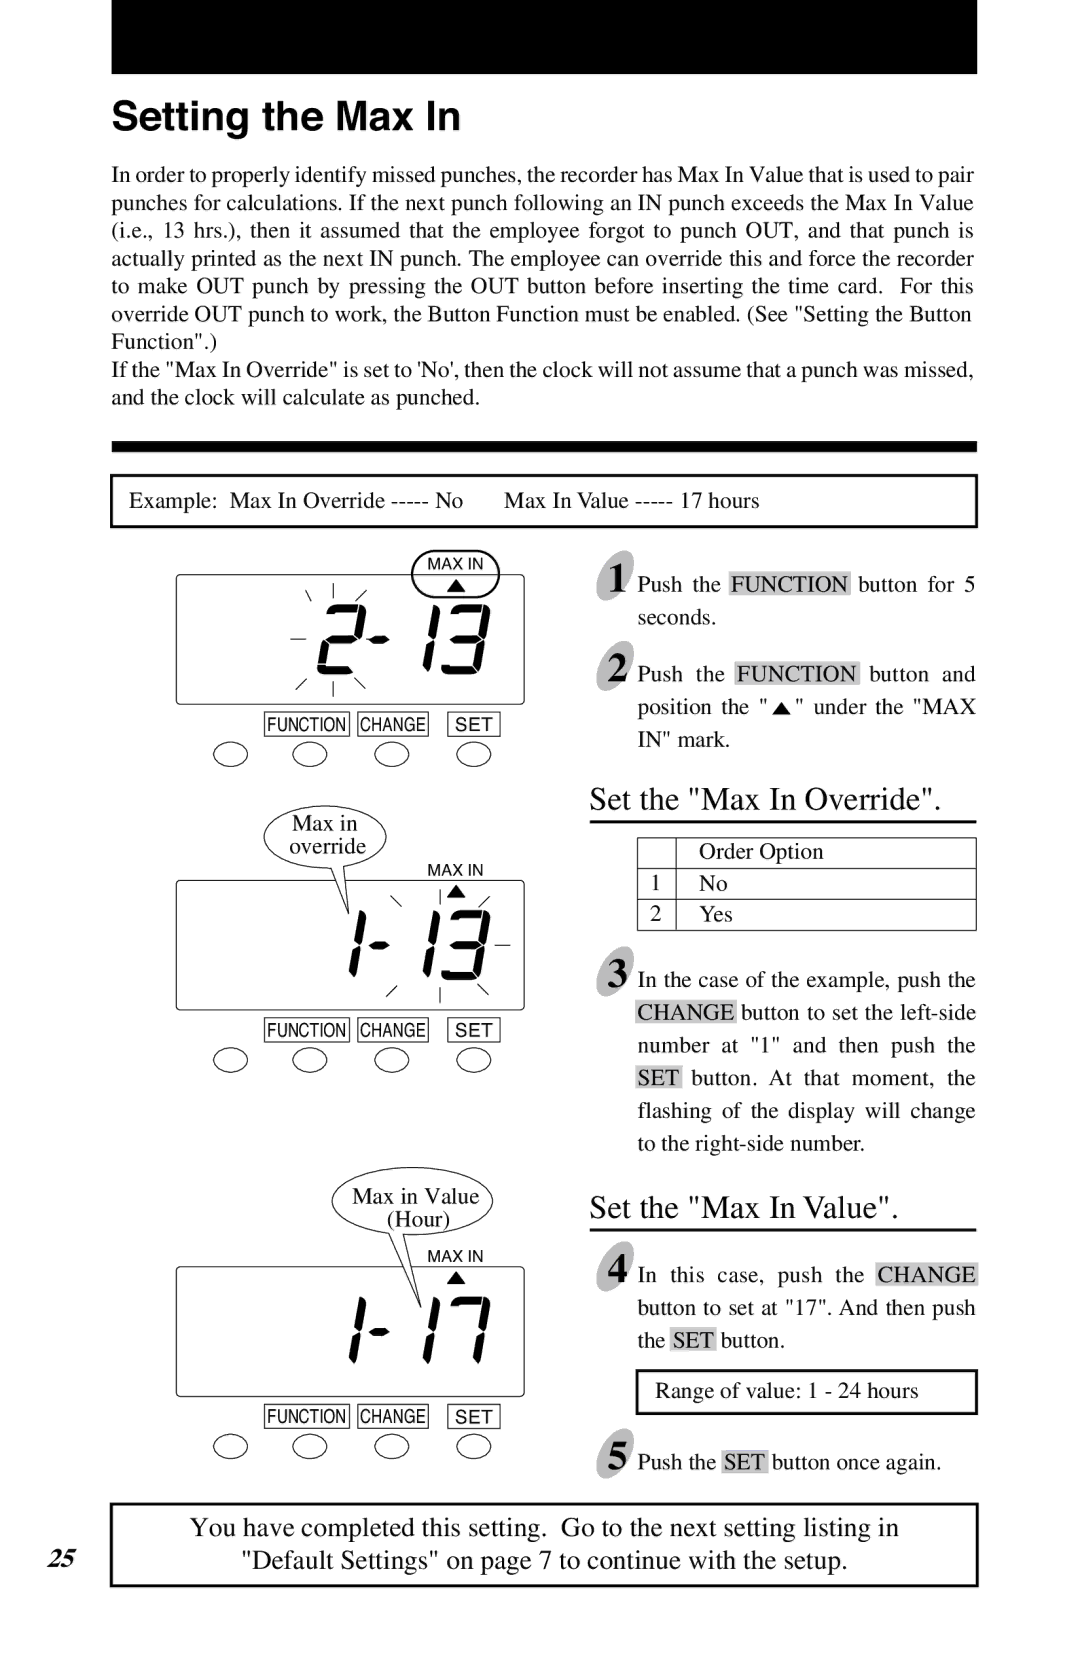
1 Push the FUNCTION button for 5 seconds.
2 Push the FUNCTION button and position the " ![]() " under the "MAX IN" mark.
" under the "MAX IN" mark.
Set the "Max In Override".
Order Option
1No
2Yes
3 In the case of the example, push the CHANGE button to set the
Set the "Max In Value".
4 In this case, push the CHANGE button to set at "17". And then push the SET button.
Range of value: 1 - 24 hours
5 Push the SET button once again.
25
You have completed this setting. Go to the next setting listing in
"Default Settings" on page 7 to continue with the setup.
24