Installer setup − Page 4 of 8
Add/remove/modify non−communicating devices
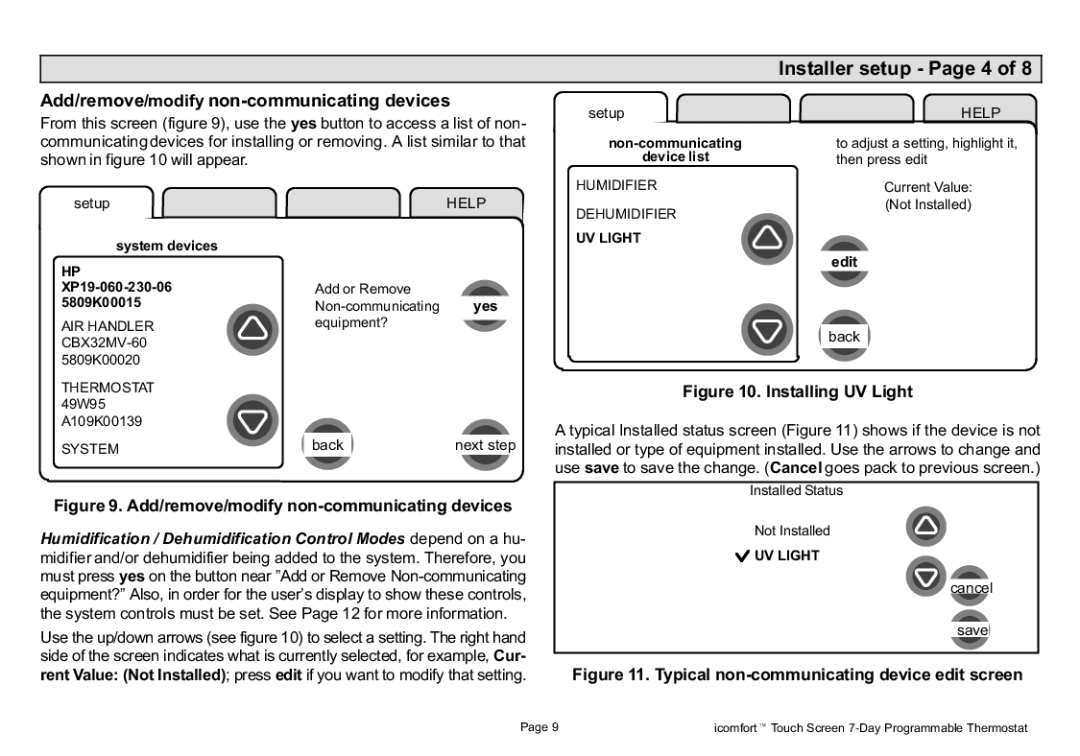
From this screen (figure 9), use the yes button to access a list of non− communicating devices for installing or removing. A list similar to that shown in figure 10 will appear.
setup |
| HELP | |
system devices |
|
|
|
HP |
|
|
|
XP19−060−230−06 | Add or Remove |
|
|
5809K00015 | Non−communicating |
| yes |
AIR HANDLER | equipment? |
|
|
|
| ||
CBX32MV−60 |
|
|
|
5809K00020 |
|
|
|
setup
non−communicating
device list
HUMIDIFIER
DEHUMIDIFIER
UV LIGHT
HELP
to adjust a setting, highlight it, then press edit
Current Value:
(Not Installed)
edit
back
THERMOSTAT |
|
|
49W95 |
|
|
A109K00139 |
|
|
SYSTEM | back | next step |
Figure 9. Add/remove/modify non−communicating devices
Humidification / Dehumidification Control Modes depend on a hu- midifier and/or dehumidifier being added to the system. Therefore, you must press yes on the button near "Add or Remove Non−communicating equipment?" Also, in order for the user’s display to show these controls, the system controls must be set. See Page 12 for more information.
Use the up/down arrows (see figure 10) to select a setting. The right hand side of the screen indicates what is currently selected, for example, Cur- rent Value: (Not Installed); press edit if you want to modify that setting.
Figure 10. Installing UV Light
A typical Installed status screen (Figure 11) shows if the device is not installed or type of equipment installed. Use the arrows to change and use save to save the change. (Cancel goes pack to previous screen.)
Installed Status
Not Installed
![]() UV LIGHT
UV LIGHT
 cancel
save
Figure 11. Typical non−communicating device edit screen
Page 9 | icomfortt Touch Screen 7−Day Programmable Thermostat |