Removing the optical drive
To remove the optical drive, do the following:
1.Turn off the computer.
2.Disconnect all cables, power cords, and external options from your computer. See “Locating connectors on the rear of your computer” on page 68.
3.Place a soft, clean towel or cloth on the desk or surface. Hold the sides of your computer and gently lay it down so that the screen is against the surface and the cover is facing up.
4.Remove the computer cover. See “Removing the computer cover” on page 74.
5.Locate the optical drive. See “Locating major FRUs and CRUs” on page 69.
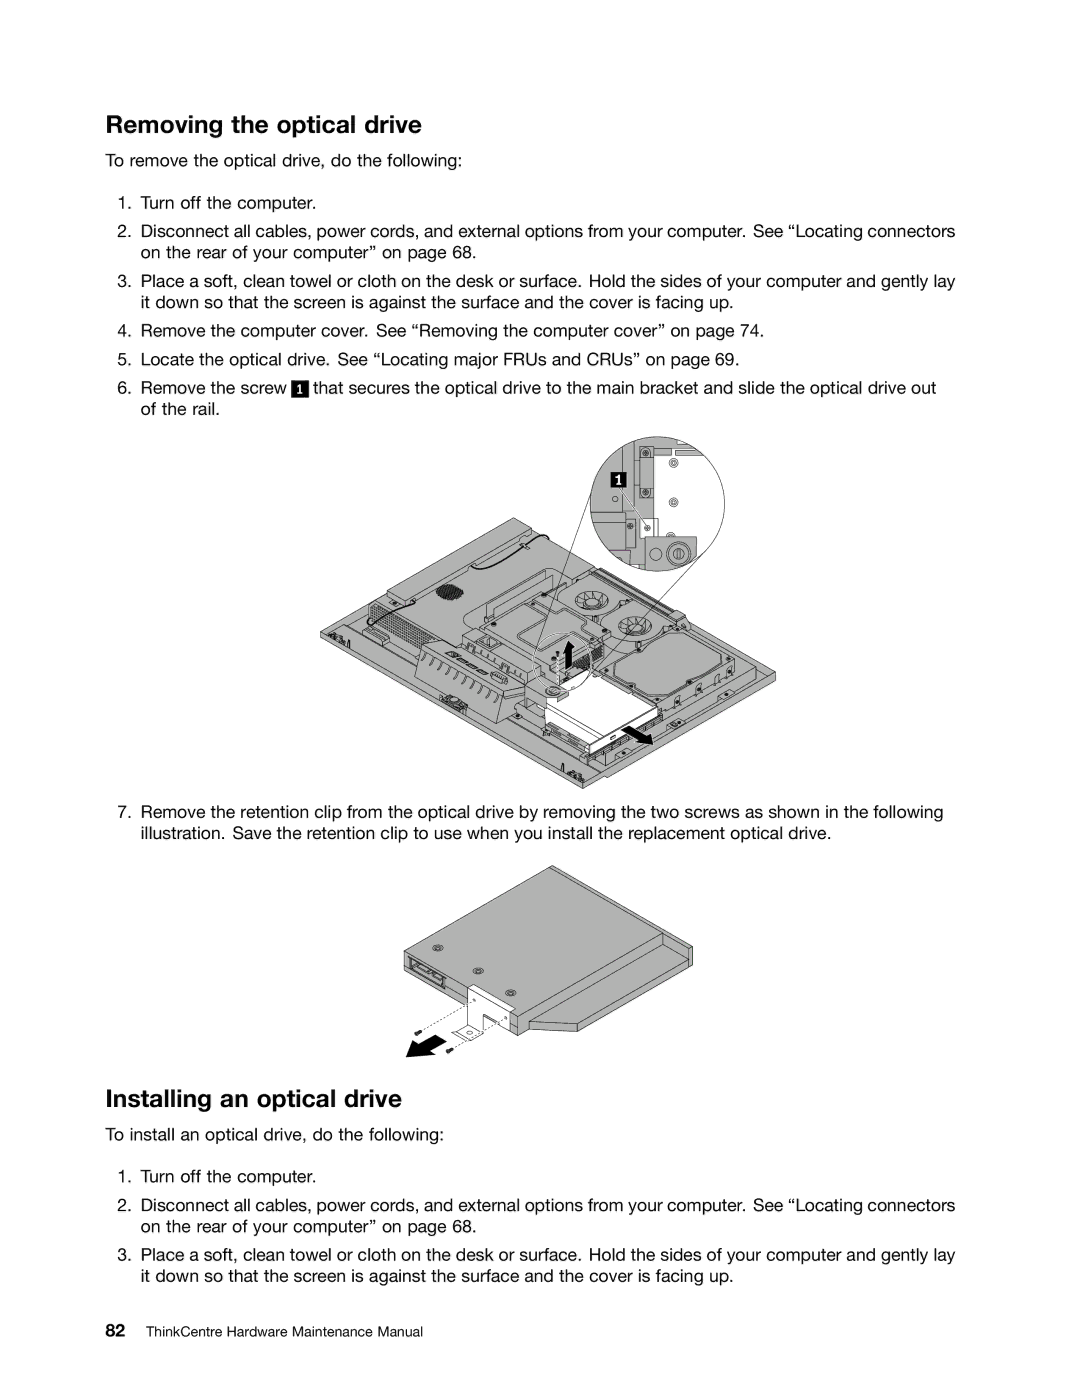
6.Remove the screw of the rail.
1
that secures the optical drive to the main bracket and slide the optical drive out
7.Remove the retention clip from the optical drive by removing the two screws as shown in the following illustration. Save the retention clip to use when you install the replacement optical drive.
Installing an optical drive
To install an optical drive, do the following:
1.Turn off the computer.
2.Disconnect all cables, power cords, and external options from your computer. See “Locating connectors on the rear of your computer” on page 68.
3.Place a soft, clean towel or cloth on the desk or surface. Hold the sides of your computer and gently lay it down so that the screen is against the surface and the cover is facing up.
