2.Disconnect all cables, power cords, and external options from your computer. See “Locating connectors on the rear of your computer” on page 68.
3.Place a soft, clean towel or cloth on the desk or surface. Hold the sides of your computer and gently lay it down so that the screen is against the surface and the cover is facing up.
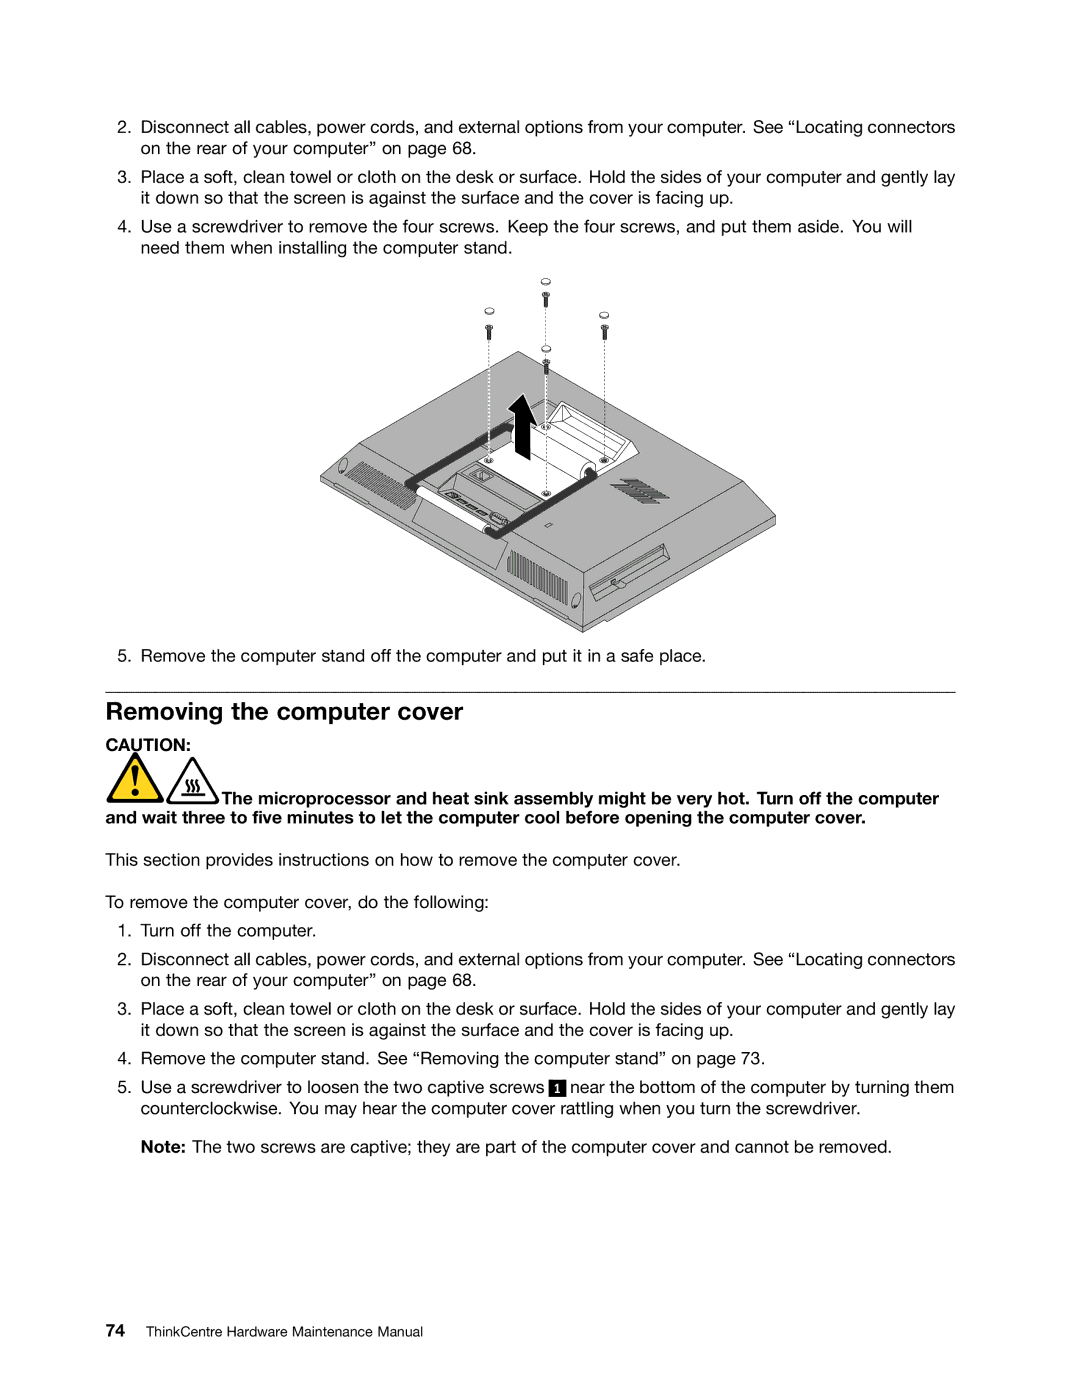
4.Use a screwdriver to remove the four screws. Keep the four screws, and put them aside. You will need them when installing the computer stand.
5. Remove the computer stand off the computer and put it in a safe place.
Removing the computer cover
CAUTION:
![]() The microprocessor and heat sink assembly might be very hot. Turn off the computer and wait three to five minutes to let the computer cool before opening the computer cover.
The microprocessor and heat sink assembly might be very hot. Turn off the computer and wait three to five minutes to let the computer cool before opening the computer cover.
This section provides instructions on how to remove the computer cover.
To remove the computer cover, do the following:
1.Turn off the computer.
2.Disconnect all cables, power cords, and external options from your computer. See “Locating connectors on the rear of your computer” on page 68.
3.Place a soft, clean towel or cloth on the desk or surface. Hold the sides of your computer and gently lay it down so that the screen is against the surface and the cover is facing up.
4.Remove the computer stand. See “Removing the computer stand” on page 73.
5.Use a screwdriver to loosen the two captive screws 1 near the bottom of the computer by turning them counterclockwise. You may hear the computer cover rattling when you turn the screwdriver.
Note: The two screws are captive; they are part of the computer cover and cannot be removed.