LINDY CPU IP Access Switch | User Manual |
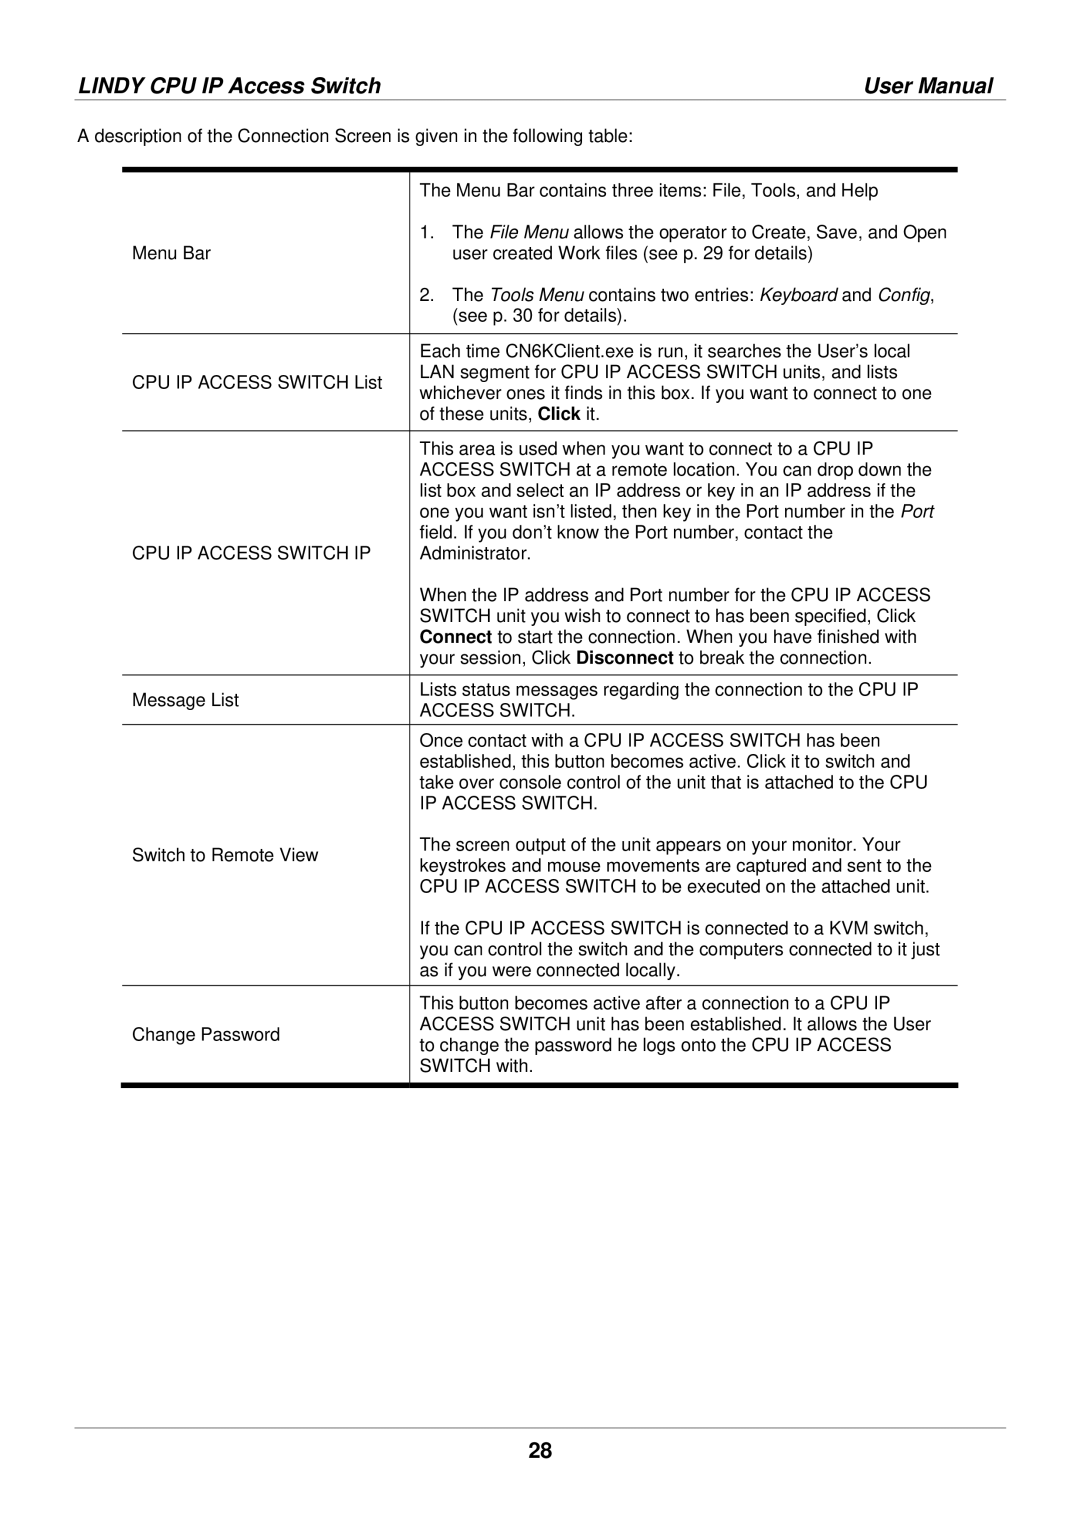
A description of the Connection Screen is given in the following table:
| The Menu Bar contains three items: File, Tools, and Help | |
| 1. The File Menu allows the operator to Create, Save, and Open | |
Menu Bar | user created Work files (see p. 29 for details) | |
| 2. The Tools Menu contains two entries: Keyboard and Config, | |
| (see p. 30 for details). | |
|
| |
| Each time CN6KClient.exe is run, it searches the User’s local | |
CPU IP ACCESS SWITCH List | LAN segment for CPU IP ACCESS SWITCH units, and lists | |
whichever ones it finds in this box. If you want to connect to one | ||
| ||
| of these units, Click it. | |
|
| |
| This area is used when you want to connect to a CPU IP | |
| ACCESS SWITCH at a remote location. You can drop down the | |
| list box and select an IP address or key in an IP address if the | |
| one you want isn’t listed, then key in the Port number in the Port | |
CPU IP ACCESS SWITCH IP | field. If you don’t know the Port number, contact the | |
Administrator. | ||
| When the IP address and Port number for the CPU IP ACCESS | |
| SWITCH unit you wish to connect to has been specified, Click | |
| Connect to start the connection. When you have finished with | |
| your session, Click Disconnect to break the connection. | |
|
| |
Message List | Lists status messages regarding the connection to the CPU IP | |
ACCESS SWITCH. | ||
| ||
| Once contact with a CPU IP ACCESS SWITCH has been | |
| established, this button becomes active. Click it to switch and | |
| take over console control of the unit that is attached to the CPU | |
| IP ACCESS SWITCH. | |
Switch to Remote View | The screen output of the unit appears on your monitor. Your | |
keystrokes and mouse movements are captured and sent to the | ||
| ||
| CPU IP ACCESS SWITCH to be executed on the attached unit. | |
| If the CPU IP ACCESS SWITCH is connected to a KVM switch, | |
| you can control the switch and the computers connected to it just | |
| as if you were connected locally. | |
| This button becomes active after a connection to a CPU IP | |
Change Password | ACCESS SWITCH unit has been established. It allows the User | |
to change the password he logs onto the CPU IP ACCESS | ||
| ||
| SWITCH with. | |
|
|
28