WebView Switches
Wall-Mount Placement
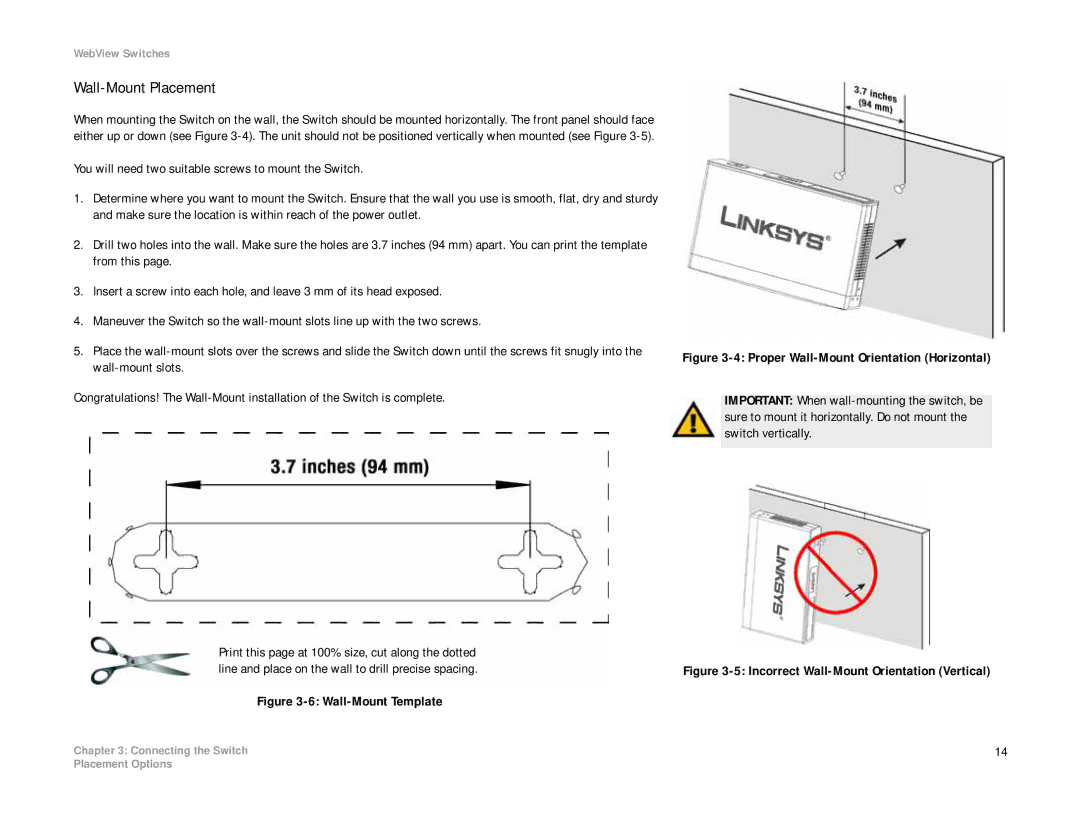
When mounting the Switch on the wall, the Switch should be mounted horizontally. The front panel should face either up or down (see Figure
You will need two suitable screws to mount the Switch.
1.Determine where you want to mount the Switch. Ensure that the wall you use is smooth, flat, dry and sturdy and make sure the location is within reach of the power outlet.
2.Drill two holes into the wall. Make sure the holes are 3.7 inches (94 mm) apart. You can print the template from this page.
3.Insert a screw into each hole, and leave 3 mm of its head exposed.
4.Maneuver the Switch so the
5.Place the
Congratulations! The
Print this page at 100% size, cut along the dotted line and place on the wall to drill precise spacing.
Figure 3-6: Wall-Mount Template
Chapter 3: Connecting the Switch
Figure 3-4: Proper Wall-Mount Orientation (Horizontal)
IMPORTANT: When wall-mounting the switch, be sure to mount it horizontally. Do not mount the switch vertically.
Figure 3-5: Incorrect Wall-Mount Orientation (Vertical)
14
Placement Options