.A complete Parts List is available at www.MillerWelds.com
3-14. Selecting Input Voltage (200/230/460 Volt Models Only)
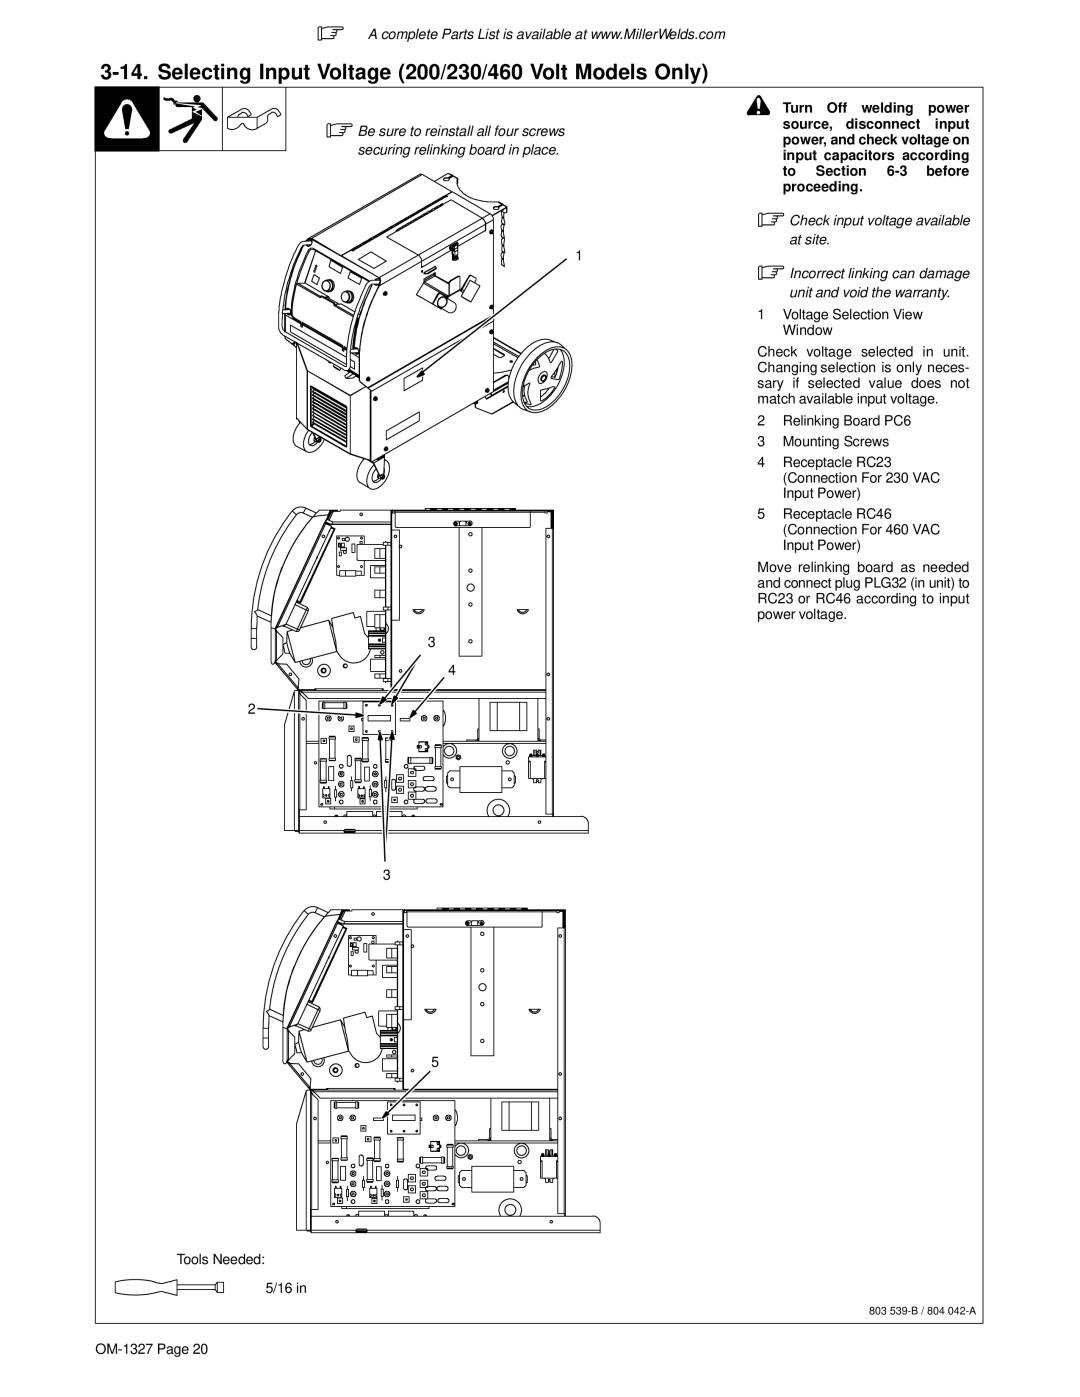
.Be sure to reinstall all four screws securing relinking board in place.
! Turn Off welding power source, disconnect input power, and check voltage on input capacitors according to Section
.Check input voltage available at site.
1
.Incorrect linking can damage
unit and void the warranty.
1 Voltage Selection View
Window
Check voltage selected in unit. Changing selection is only neces- sary if selected value does not match available input voltage.
2 Relinking Board PC6
3 Mounting Screws
4 Receptacle RC23
(Connection For 230 VAC
Input Power)
5 Receptacle RC46
(Connection For 460 VAC
Input Power)
Move relinking board as needed and connect plug PLG32 (in unit) to RC23 or RC46 according to input power voltage.
3
4
2 ![]()
3
5
Tools Needed:
5/16 in
803