Chapter 6: Troubleshooting
6-1 Introduction
The utmost in safety precautions should be observed at all times when working on or around the machine and the electrical components. All normal
The use of good quality test equipment cannot be
Before making haphazard substitutions and repairs when defective electrical components are malfunctioning, we recommend that you check the associated circuitry and assemblies for other defective devices. It is common to replace the obviously damaged component without actually locating the real cause of the trouble. Such hasty substitutions will only destroy the new component. Refer to wiring diagrams and schematics.
Locating mechanical problems, should they occur, is relatively straightforward. When necessary, refer to the parts catalog section.
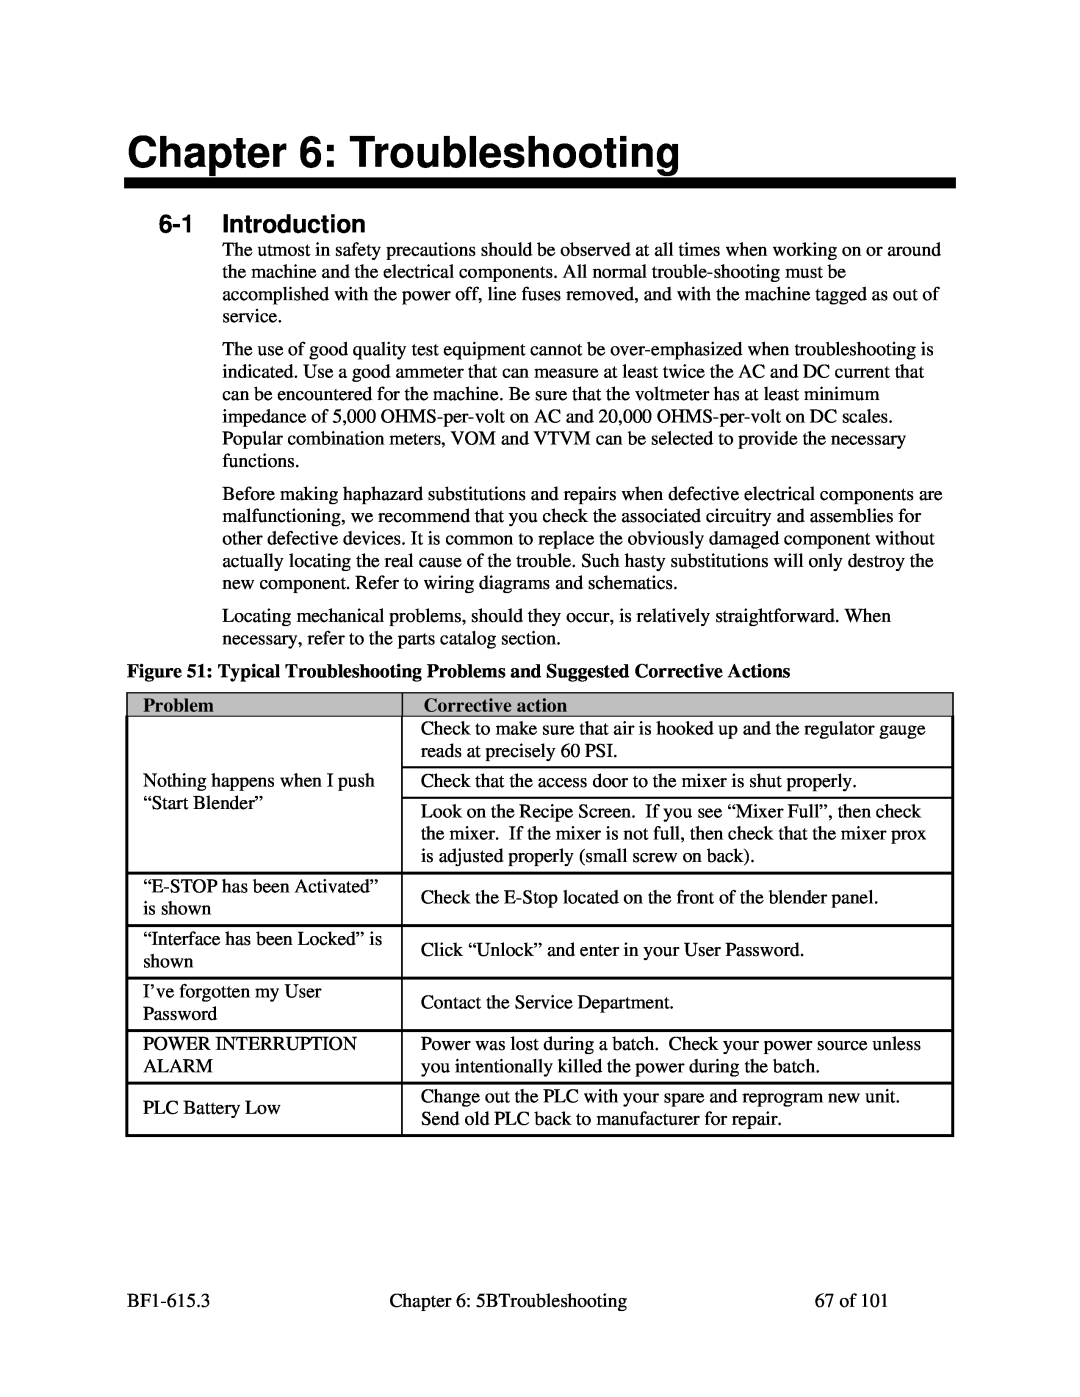
Figure 51: Typical Troubleshooting Problems and Suggested Corrective Actions
| Problem |
| Corrective action |
|
|
| Check to make sure that air is hooked up and the regulator gauge |
|
|
| reads at precisely 60 PSI. |
| Nothing happens when I push |
| Check that the access door to the mixer is shut properly. |
| “Start Blender” |
|
|
|
| Look on the Recipe Screen. If you see “Mixer Full”, then check | |
|
|
| |
|
|
| the mixer. If the mixer is not full, then check that the mixer prox |
|
|
| is adjusted properly (small screw on back). |
|
|
|
|
|
| Check the | |
| is shown |
| |
|
|
| |
|
|
|
|
| “Interface has been Locked” is |
| Click “Unlock” and enter in your User Password. |
| shown |
| |
|
|
| |
| I’ve forgotten my User |
| Contact the Service Department. |
| Password |
| |
|
|
| |
|
|
|
|
| POWER INTERRUPTION |
| Power was lost during a batch. Check your power source unless |
| ALARM |
| you intentionally killed the power during the batch. |
|
|
|
|
| PLC Battery Low |
| Change out the PLC with your spare and reprogram new unit. |
|
| Send old PLC back to manufacturer for repair. | |
|
|
| |
|
|
|
|
Chapter 6: 5BTroubleshooting | 67 of 101 |