User’s Manual
Clicking the ![]() button on the toolbar prints the image currently displayed on the screen on a printer connected to your computer. By placing a checkmark in the box beside Include Image Info, text information about the site will be included when printing the image.
button on the toolbar prints the image currently displayed on the screen on a printer connected to your computer. By placing a checkmark in the box beside Include Image Info, text information about the site will be included when printing the image.
Screen Menu
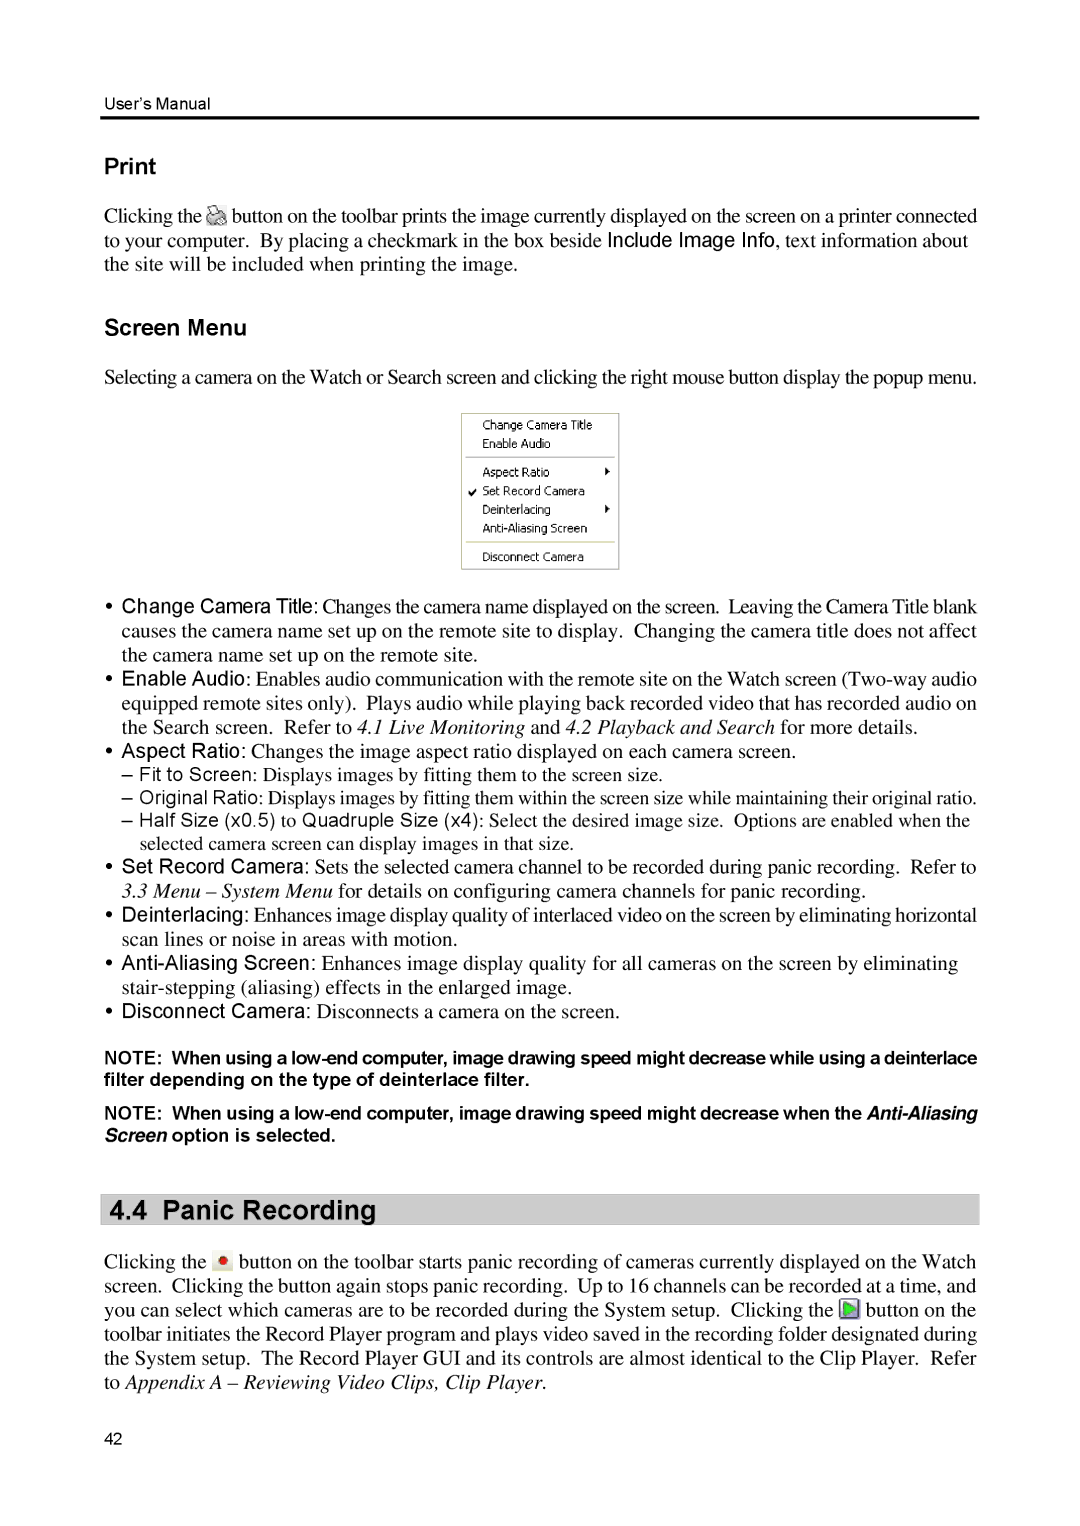
Selecting a camera on the Watch or Search screen and clicking the right mouse button display the popup menu.
Change Camera Title: Changes the camera name displayed on the screen. Leaving the Camera Title blank causes the camera name set up on the remote site to display. Changing the camera title does not affect the camera name set up on the remote site.
Enable Audio: Enables audio communication with the remote site on the Watch screen
Aspect Ratio: Changes the image aspect ratio displayed on each camera screen.
–Fit to Screen: Displays images by fitting them to the screen size.
–Original Ratio: Displays images by fitting them within the screen size while maintaining their original ratio.
–Half Size (x0.5) to Quadruple Size (x4): Select the desired image size. Options are enabled when the selected camera screen can display images in that size.
Set Record Camera: Sets the selected camera channel to be recorded during panic recording. Refer to 3.3 Menu – System Menu for details on configuring camera channels for panic recording.
Deinterlacing: Enhances image display quality of interlaced video on the screen by eliminating horizontal scan lines or noise in areas with motion.
Disconnect Camera: Disconnects a camera on the screen.
NOTE: When using a
NOTE: When using a
4.4 Panic Recording
Clicking the ![]() button on the toolbar starts panic recording of cameras currently displayed on the Watch screen. Clicking the button again stops panic recording. Up to 16 channels can be recorded at a time, and you can select which cameras are to be recorded during the System setup. Clicking the
button on the toolbar starts panic recording of cameras currently displayed on the Watch screen. Clicking the button again stops panic recording. Up to 16 channels can be recorded at a time, and you can select which cameras are to be recorded during the System setup. Clicking the ![]() button on the toolbar initiates the Record Player program and plays video saved in the recording folder designated during the System setup. The Record Player GUI and its controls are almost identical to the Clip Player. Refer to Appendix A – Reviewing Video Clips, Clip Player.
button on the toolbar initiates the Record Player program and plays video saved in the recording folder designated during the System setup. The Record Player GUI and its controls are almost identical to the Clip Player. Refer to Appendix A – Reviewing Video Clips, Clip Player.
42