FINAL INSTALLATION | HBDV7 Series Direct Vent Gas Fireplace |
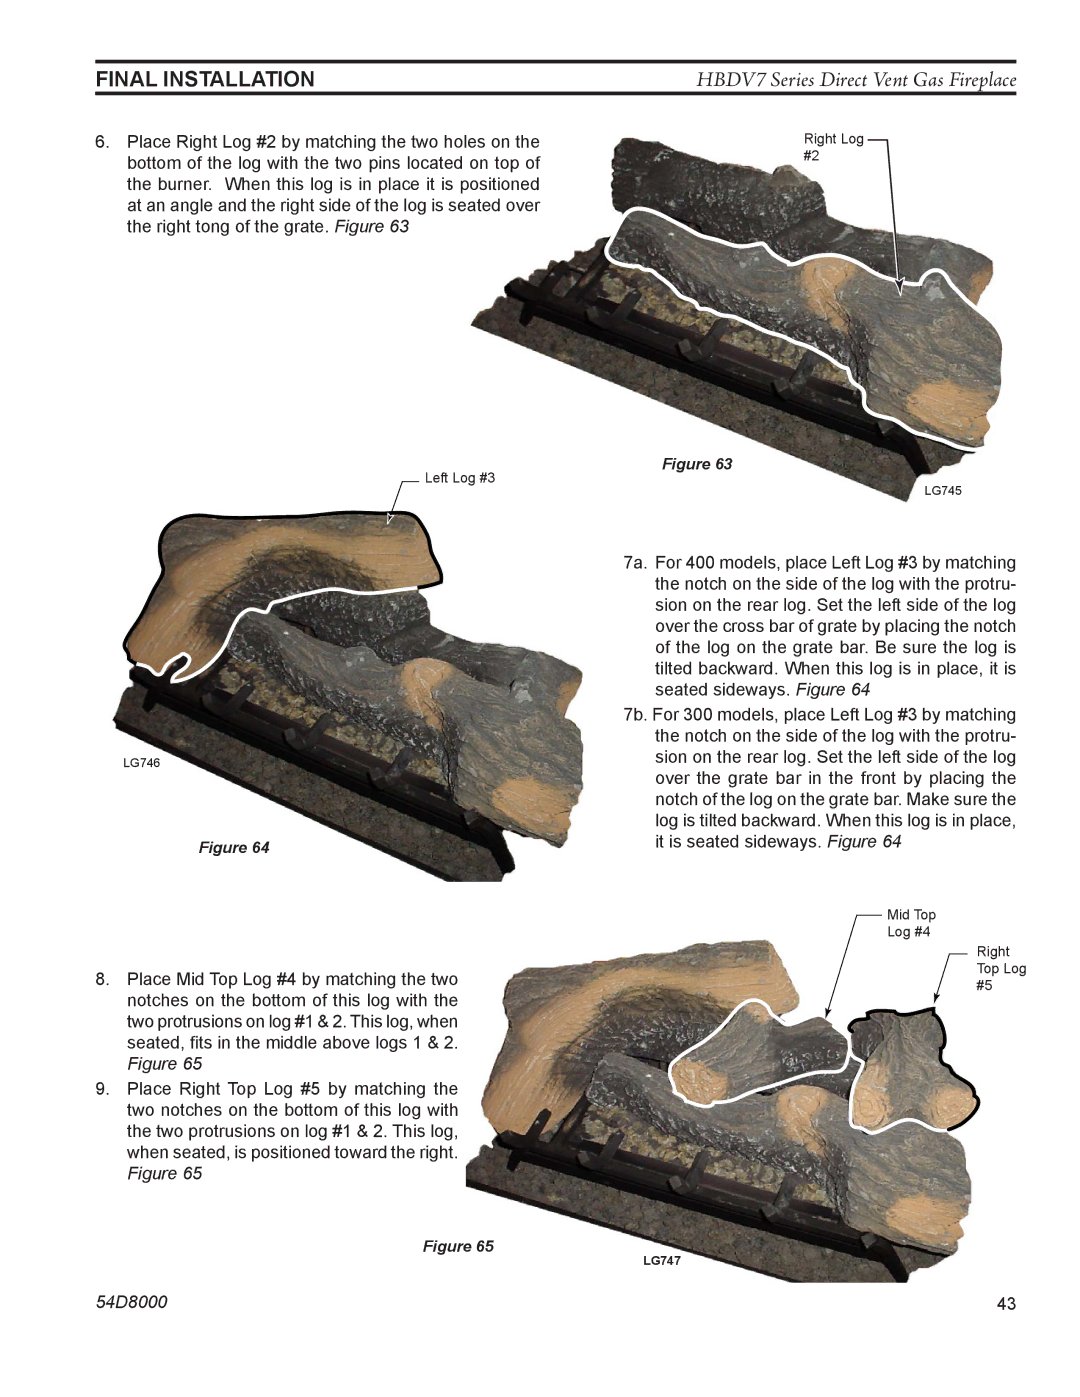
6.Place Right Log #2 by matching the two holes on the bottom of the log with the two pins located on top of the burner. When this log is in place it is positioned at an angle and the right side of the log is seated over the right tong of the grate. Figure 63
Left Log #3
LG746
Figure 64
8.Place Mid Top Log #4 by matching the two notches on the bottom of this log with the two protrusions on log #1 & 2. This log, when seated, fits in the middle above logs 1 & 2. Figure 65
9.Place Right Top Log #5 by matching the two notches on the bottom of this log with the two protrusions on log #1 & 2. This log, when seated, is positioned toward the right. Figure 65
Figure 65
Right Log #2
Figure 63
LG745
7a. For 400 models, place Left Log #3 by matching the notch on the side of the log with the protru- sion on the rear log. Set the left side of the log over the cross bar of grate by placing the notch of the log on the grate bar. Be sure the log is tilted backward. When this log is in place, it is seated sideways. Figure 64
7b. For 300 models, place Left Log #3 by matching the notch on the side of the log with the protru- sion on the rear log. Set the left side of the log over the grate bar in the front by placing the notch of the log on the grate bar. Make sure the log is tilted backward. When this log is in place, it is seated sideways. Figure 64
Mid Top
Log #4
Right Top Log #5
LG747
54D8000 | 43 |
