The following installation steps use
Installing the Driver
1.After installing the UPCI/PCI board and powering on your PC, Windows 2003 will auto detect and find the UPCI/PCI board you just added. The Found New Hardware window will open in the bottom right corner of the Windows desktop.
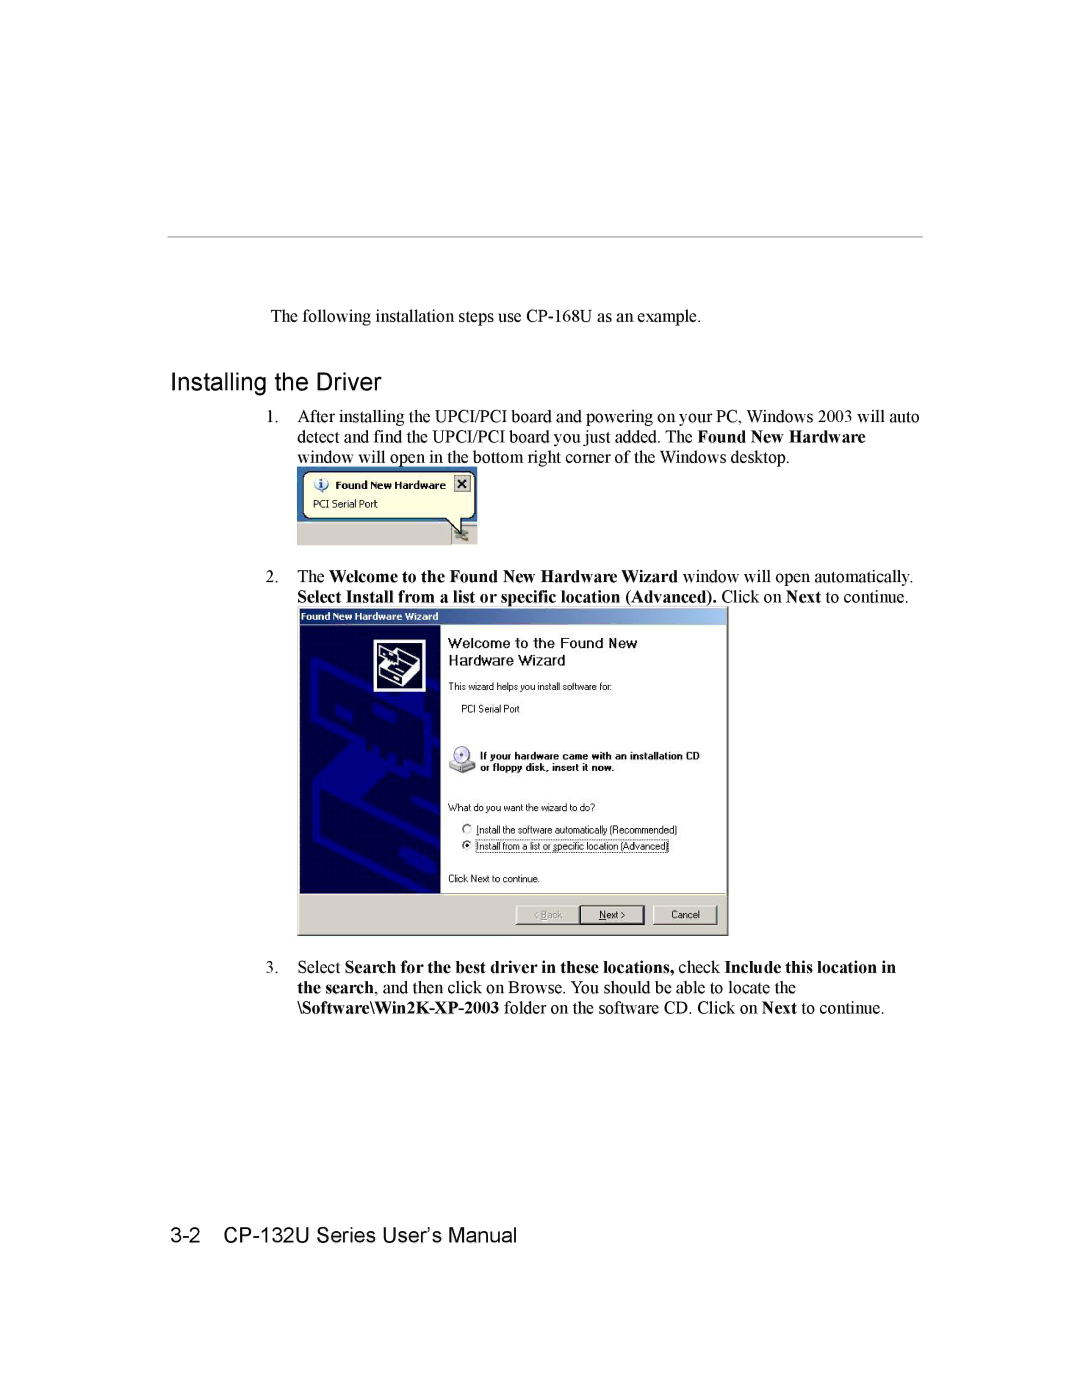
2.The Welcome to the Found New Hardware Wizard window will open automatically. Select Install from a list or specific location (Advanced). Click on Next to continue.
3.Select Search for the best driver in these locations, check Include this location in the search, and then click on Browse. You should be able to locate the
