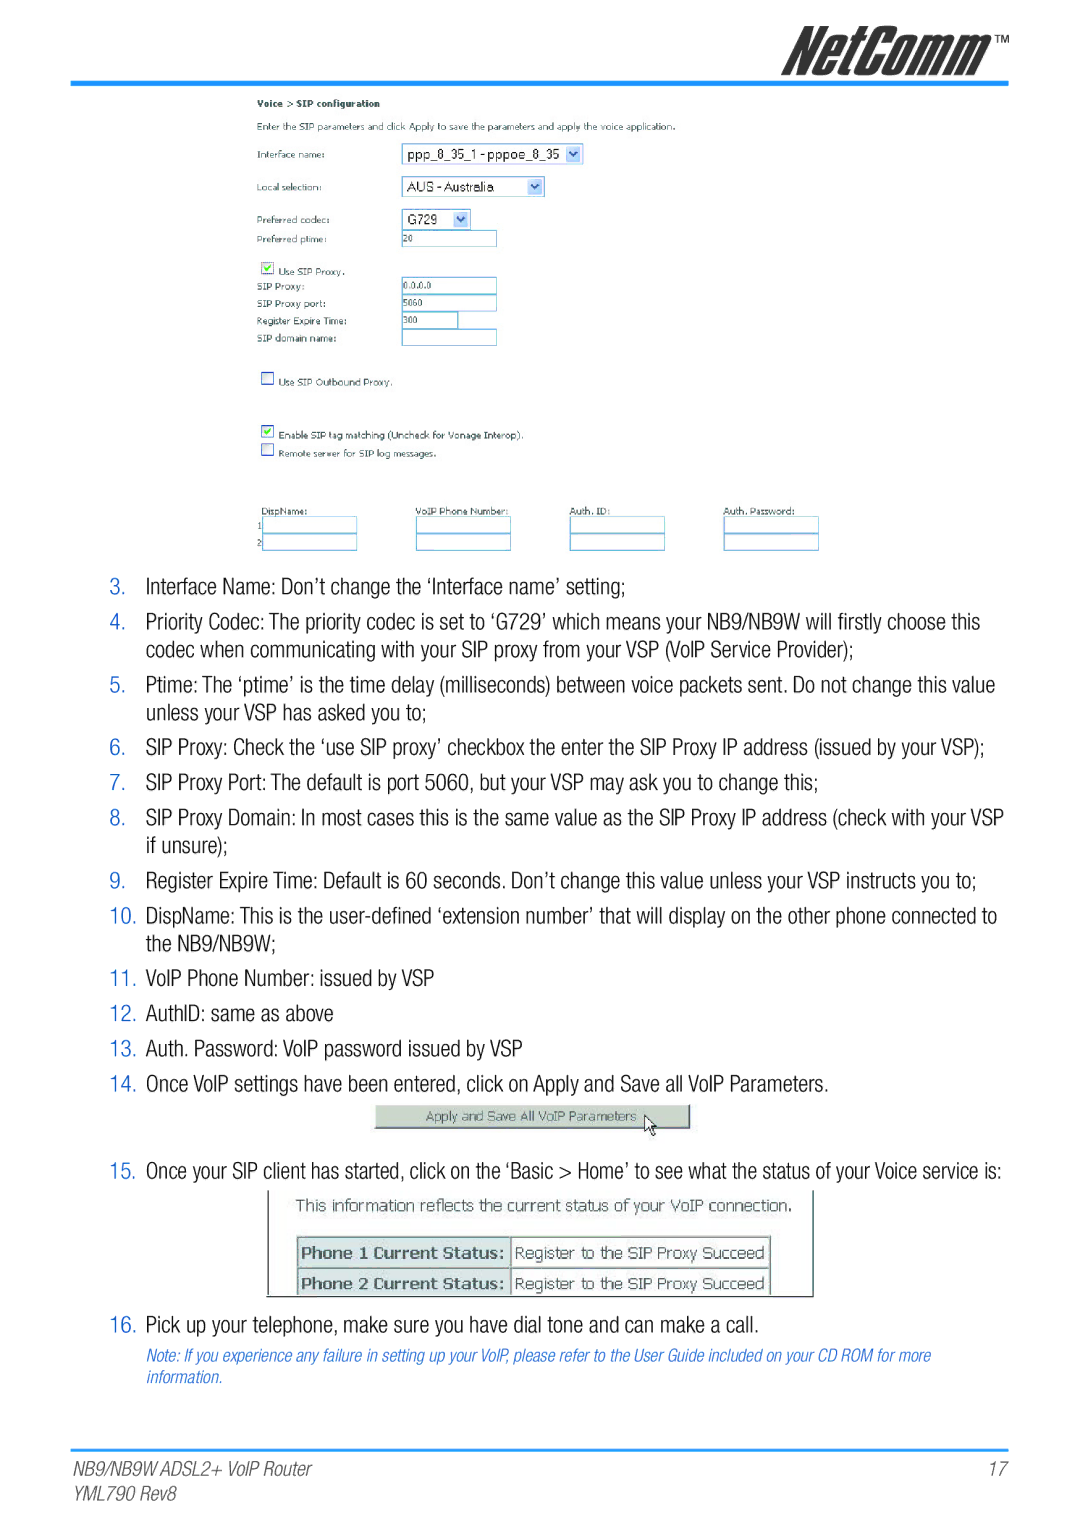
3.Interface Name: Don’t change the ‘Interface name’ setting;
4.Priority Codec: The priority codec is set to ‘G729’ which means your NB9/NB9W will firstly choose this codec when communicating with your SIP proxy from your VSP (VoIP Service Provider);
5.Ptime: The ‘ptime’ is the time delay (milliseconds) between voice packets sent. Do not change this value unless your VSP has asked you to;
6.SIP Proxy: Check the ‘use SIP proxy’ checkbox the enter the SIP Proxy IP address (issued by your VSP);
7.SIP Proxy Port: The default is port 5060, but your VSP may ask you to change this;
8.SIP Proxy Domain: In most cases this is the same value as the SIP Proxy IP address (check with your VSP if unsure);
9.Register Expire Time: Default is 60 seconds. Don’t change this value unless your VSP instructs you to;
10.DispName: This is the
11.VoIP Phone Number: issued by VSP
12.AuthID: same as above
13.Auth. Password: VoIP password issued by VSP
14.Once VoIP settings have been entered, click on Apply and Save all VoIP Parameters.
15.Once your SIP client has started, click on the ‘Basic > Home’ to see what the status of your Voice service is:
16.Pick up your telephone, make sure you have dial tone and can make a call.
Note: If you experience any failure in setting up your VoIP, please refer to the User Guide included on your CD ROM for more information.
NB9/NB9W ADSL2+ VoIP Router | 17 |
YML790 Rev8 |
|