NTI KEEMUX Series PS/2 KVM Switch
INSTALLATION
Prepare To Connect
1.Before connecting the KEEMUX to the CPUs, make sure all CPUs, the monitor, and the KEEMUX are turned OFF.
!![]() WARNING! DAMAGE MAY OCCUR TO THE CPU IF POWER IS NOT DISCONNECTED BEFORE CONNECTING OR DISCONNECTING CABLES.
WARNING! DAMAGE MAY OCCUR TO THE CPU IF POWER IS NOT DISCONNECTED BEFORE CONNECTING OR DISCONNECTING CABLES.
2.The
FYI: Should switch 7 or 8 get changed to the “ON” position, it will be necessary to
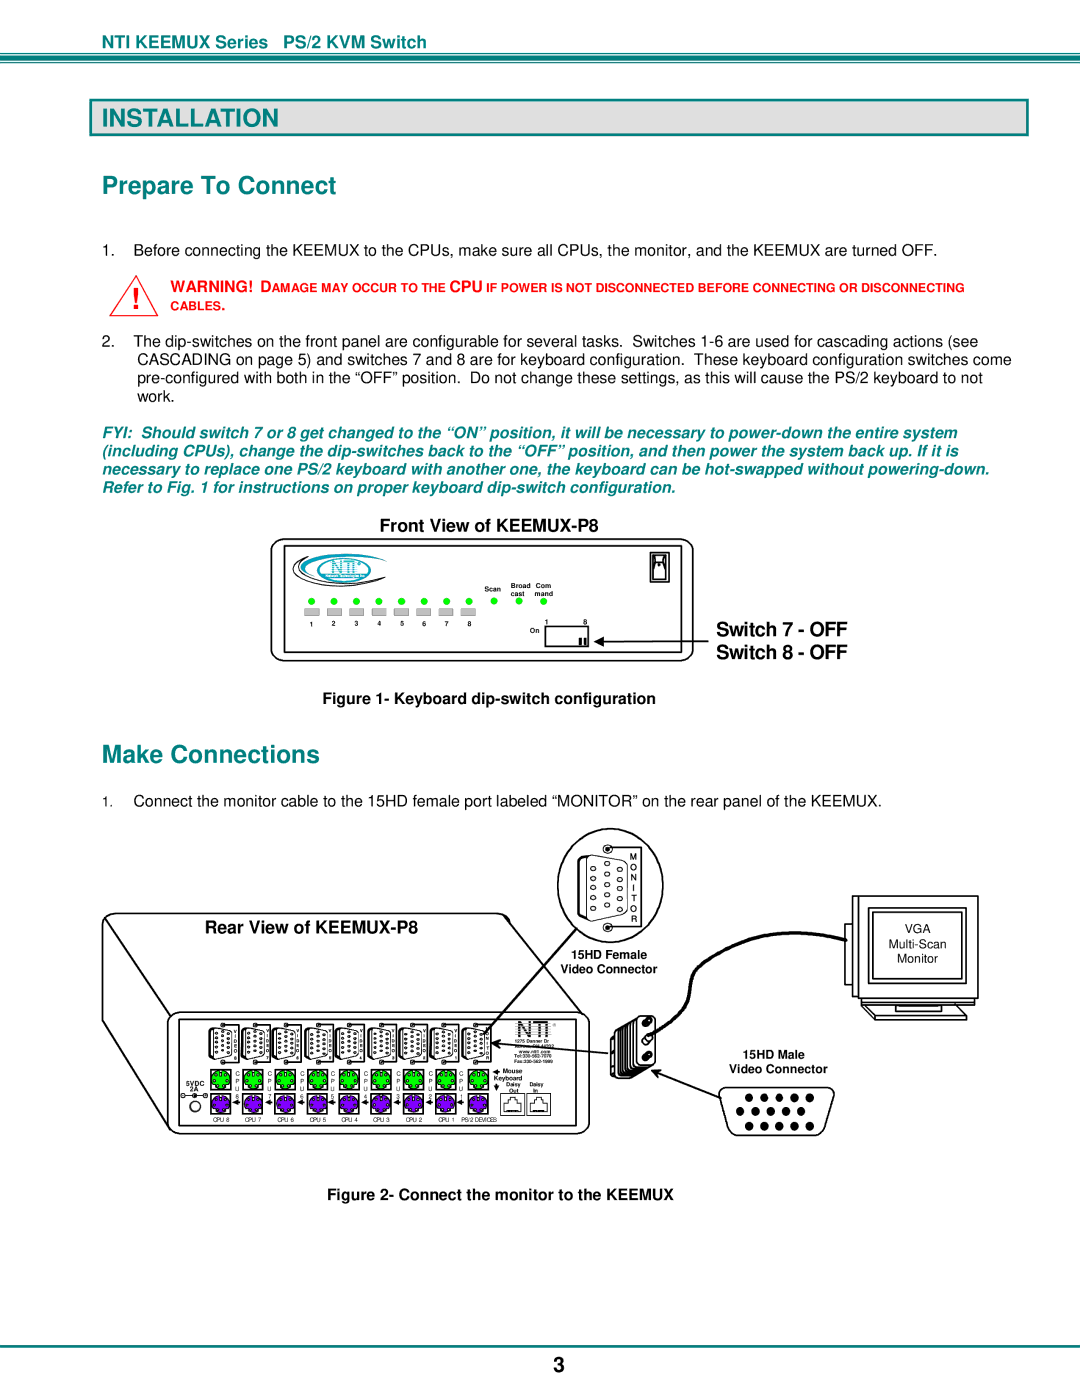
Front View of KEEMUX-P8
NTI R
Network Technologies Inc
Scan Broad Com cast mand
1 | 2 | 3 | 4 | 5 | 6 | 7 | 8 | 1 | 8 | Switch 7 - OFF |
On
![]()
![]()
![]()
![]() Switch 8 - OFF
Switch 8 - OFF
Figure 1- Keyboard dip-switch configuration
Make Connections
1.Connect the monitor cable to the 15HD female port labeled “MONITOR” on the rear panel of the KEEMUX.
|
|
|
|
|
|
|
|
|
|
|
|
| M |
|
|
|
|
|
|
|
|
|
|
|
|
| O |
|
|
|
|
|
|
|
|
|
|
|
|
| N |
|
|
|
|
|
|
|
|
|
|
|
|
| I |
|
|
|
|
|
|
|
|
|
|
|
|
| T |
|
|
|
|
|
|
|
|
|
|
|
|
| O |
Rear View of |
|
|
|
|
| R | |||||||
|
|
|
|
|
| ||||||||
|
|
|
|
|
|
|
|
|
|
|
|
| 15HD Female |
|
|
|
|
|
|
|
|
|
|
|
|
| Video Connector |
| I | I | I |
| I | I | I | I | I | N | NTI | R | |
| V | V | V |
| V | V | V | V | V | O |
|
|
|
|
|
|
|
|
|
|
|
|
|
|
|
| |
| D | D | D |
| D | D | D | D | D | I | 1275 Danner Dr |
| |
| E | E | E |
| E | E | E | E | E | T |
|
| 15HD Male |
| 8 | 7 | 6 |
| 5 | 4 | 3 | 2 | 1 | R | |||
| O | O | O |
| O | O | O | O | O | O | www.nti1.com |
| |
|
|
|
|
|
|
|
|
|
|
|
| ||
| C | C |
| C | C | C | C | C | C |
| Mouse |
| Video Connector |
5VDC | P | P |
| P | P | P | P | P | P |
| Keyboard |
|
|
|
| Daisy | Daisy |
| |||||||||
2A | U | U |
| U | U | U | U | U | U |
| Out | In |
|
- + | 8 | 7 |
| 6 | 5 | 4 | 3 | 2 | 1 |
|
|
|
|
CPU 8 | CPU 7 |
| CPU 6 |
| CPU 5 | CPU 4 CPU 3 | CPU 2 |
| CPU 1 PS/2 DEVICES |
|
| ||
VGA
Monitor
Figure 2- Connect the monitor to the KEEMUX
3