Parts of the MC-36 (2/3)
| Control Panel* |
|
| Selection cursor | |
En |
|
|
| Timer display | |
| Lock indicator | 7 |
| Low battery indicator | 6 |
| “TIMER ACTIVE” indicator | |
| Speaker on/off indicator | 9, 11 |
| “SET” indicator | 8, |
| “RELEASE” indicator | |
| Number of shots |
*The illustration inside the front cover shows the control panel with all elements lit. In the other illustrations throughout this manual, elements relevant to the explanation in the accompanying text are shown in black. Indi- cators not mentioned in the text are shown in gray.
Inserting Batteries
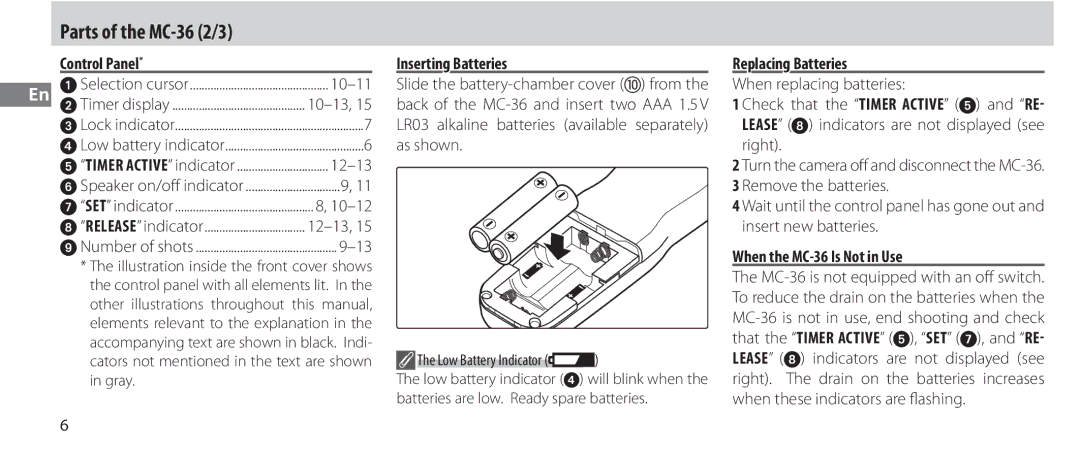
Slide the
![]() The Low Battery Indicator (
The Low Battery Indicator (![]() )
)
The low battery indicator ( ) will blink when the batteries are low. Ready spare batteries.
Replacing Batteries
When replacing batteries:
1 Check that the “TIMER ACTIVE” ( ) and “RE- LEASE” ( ) indicators are not displayed (see right).
2 Turn the camera off and disconnect the
4 Wait until the control panel has gone out and insert new batteries.
When the MC-36 Is Not in Use
The
6
