2Using the Handheld Infrared Thermometer
|
| DISTANCE: SENSOR TO OBJECT (FT) |
| |
(IN) | 0' | 16' | 50' | 82' |
|
|
|
| |
DIA.* |
|
|
|
|
SPOT | 0.5"@ 0 |
| 8.7" | |
|
|
| ||
|
|
| 5.1" | |
| 0.9" | 1.5" |
| |
|
|
| ||
|
|
| D:S = 110:1 |
|
|
| 38 | 130 | 221 |
|
|
| ||
(MM) |
| 13mm @ 0 |
|
|
* |
|
|
|
|
DIA. | *SPOT DIAMETER MEASURED |
|
| |
| AT 90% ENERGY |
|
| |
SPOT |
|
|
| |
0 | 5 | 15 | 25 | |
|
| DISTANCE: SENSOR TO OBJECT (M) |
| |
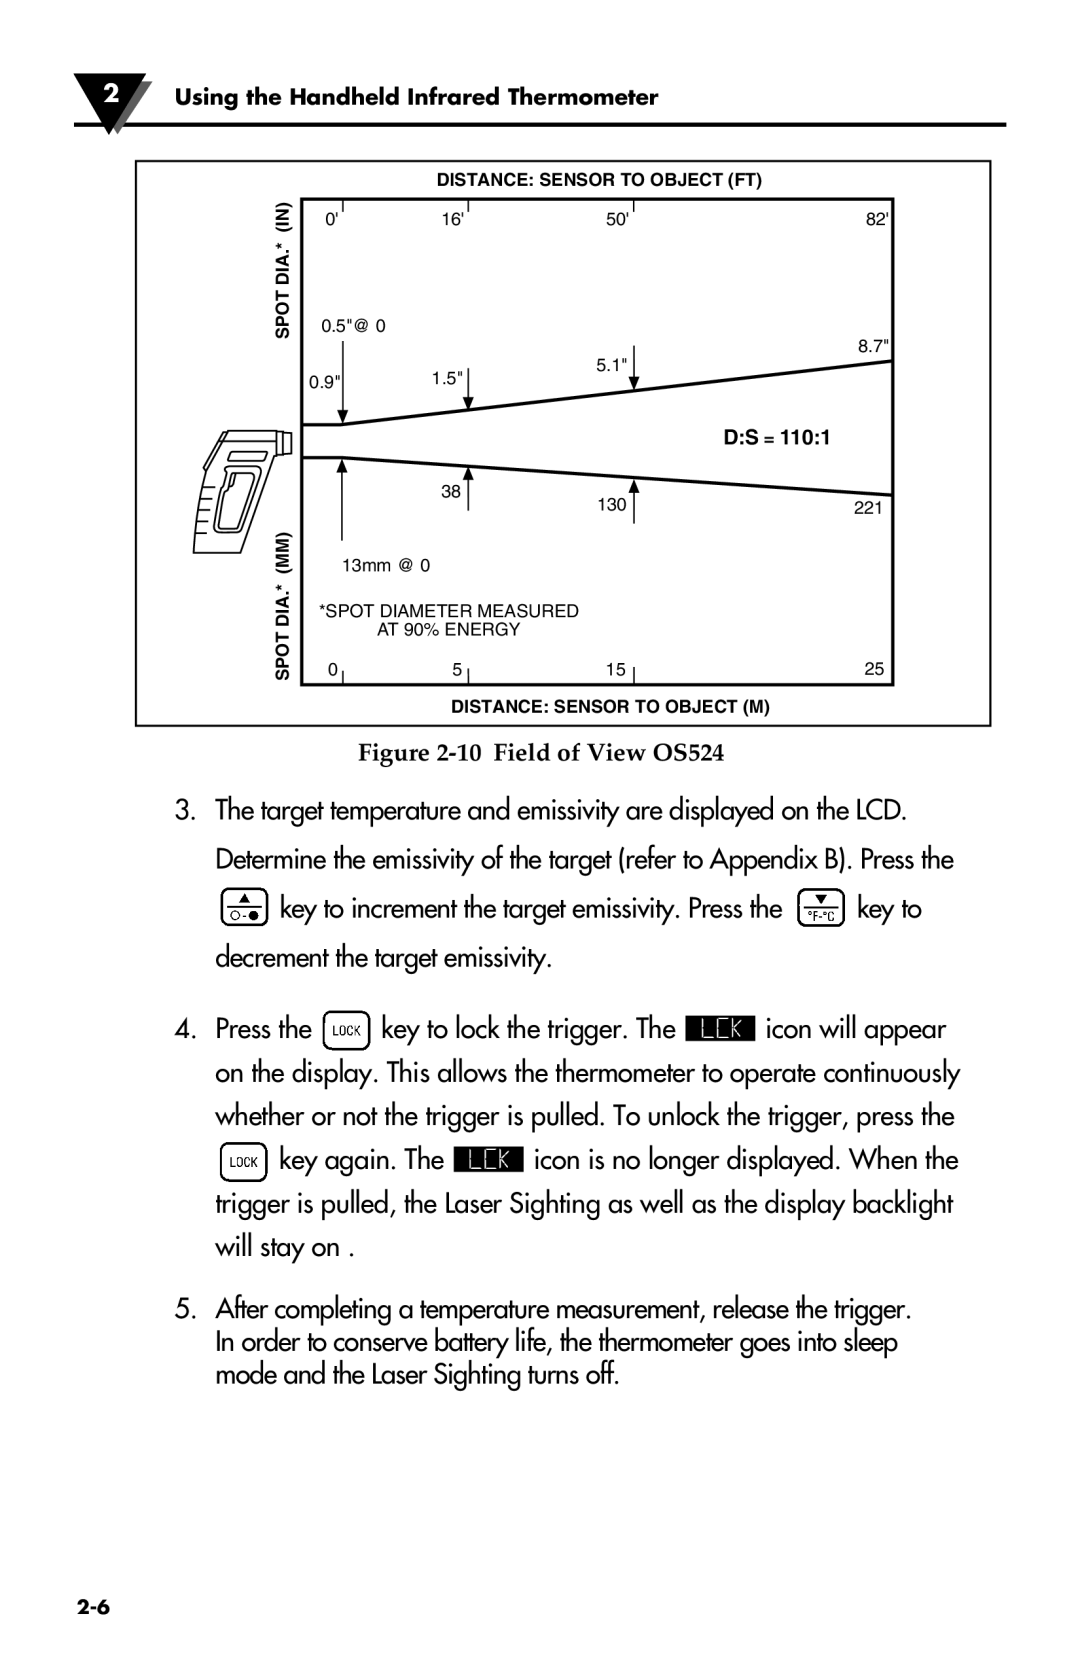
Figure 2-10 Field of View OS524
3.The target temperature and emissivity are displayed on the LCD.
Determine the emissivity of the target (refer to Appendix B). Press the
![]() key to increment the target emissivity. Press the
key to increment the target emissivity. Press the ![]() key to decrement the target emissivity.
key to decrement the target emissivity.
4.Press the ![]() key to lock the trigger. The
key to lock the trigger. The ![]() icon will appear on the display. This allows the thermometer to operate continuously
icon will appear on the display. This allows the thermometer to operate continuously
whether or not the trigger is pulled. To unlock the trigger, press the
![]() key again. The
key again. The ![]() icon is no longer displayed. When the trigger is pulled, the Laser Sighting as well as the display backlight
icon is no longer displayed. When the trigger is pulled, the Laser Sighting as well as the display backlight
will stay on .
5.After completing a temperature measurement, release the trigger. In order to conserve battery life, the thermometer goes into sleep mode and the Laser Sighting turns off.
