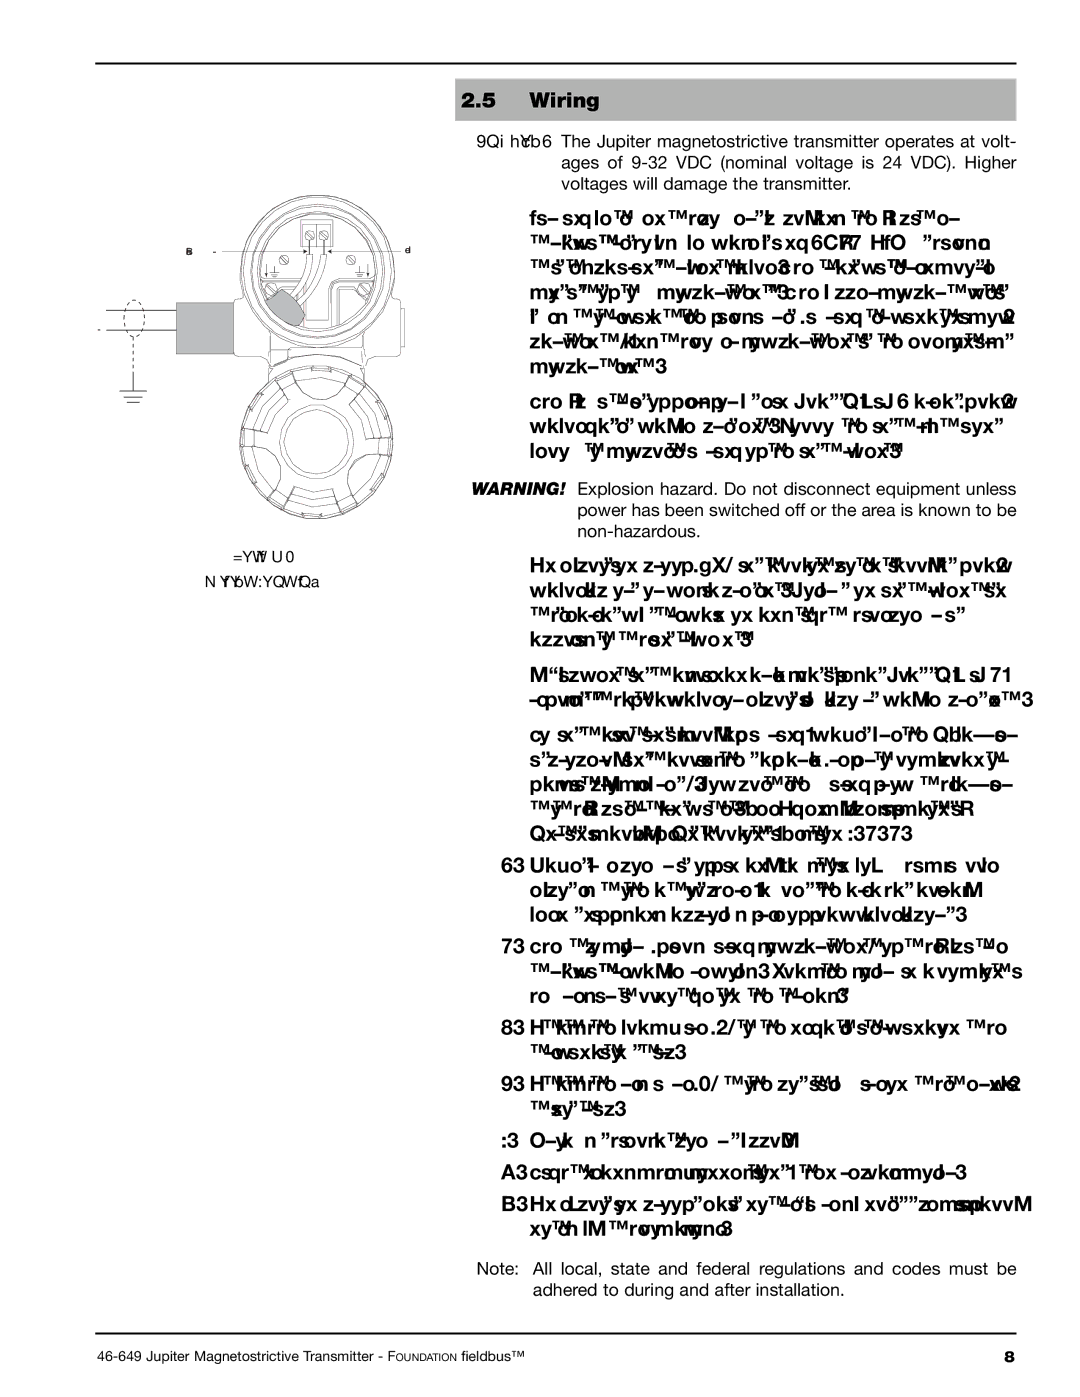
Black
+)(
Figure 4
Wiring Diagram
2.5Wiring
Caution: The Jupiter magnetostrictive transmitter operates at volt- ages of
Wiring between the power supply and the Jupiter
Red (+)transmitter should be made using
The Jupiter is offered for use in Class I, Div 1 areas (flam- mable gasses may be present). Follow the instructions below to complete wiring of the instrument.
WARNING! Explosion hazard. Do not disconnect equipment unless power has been switched off or the area is known to be
An explosion proof (XP) installation potentially has flam- mable vapors or media present. Covers on instruments in these areas must remain on and tight while power is applied to the instrument.
Equipment installed in an area classified as Class I, Div 2, reflects that flammable or explosive vapors may be present.
To install intrinsically safe wiring, make sure the IS barrier is properly installed in the safe area (refer to local plant or facility procedures). Complete the wiring from the barrier to the Jupiter transmitter. See Agency Specifications– Intrinsically Safe Installations, Section 5.2.2.
1.Make sure power is off in any junction box which will be exposed to the atmosphere, unless the area has already been sniffed and approved free of flammable vapors.
2.The top cover (field wiring compartment) of the Jupiter transmitter may be removed. Place the cover in a location where dirt will not get on the threads.
3.Attach the black wire
4.Attach the red wire (+) to the positive wire on the termina- tion strip.
5.Ground shield at power supply.
6.Tighten and check connections, then replace cover.
7.An explosion proof seal is not required unless specifically noted by the local code.
Note: All local, state and federal regulations and codes must be adhered to during and after installation.
8 |
