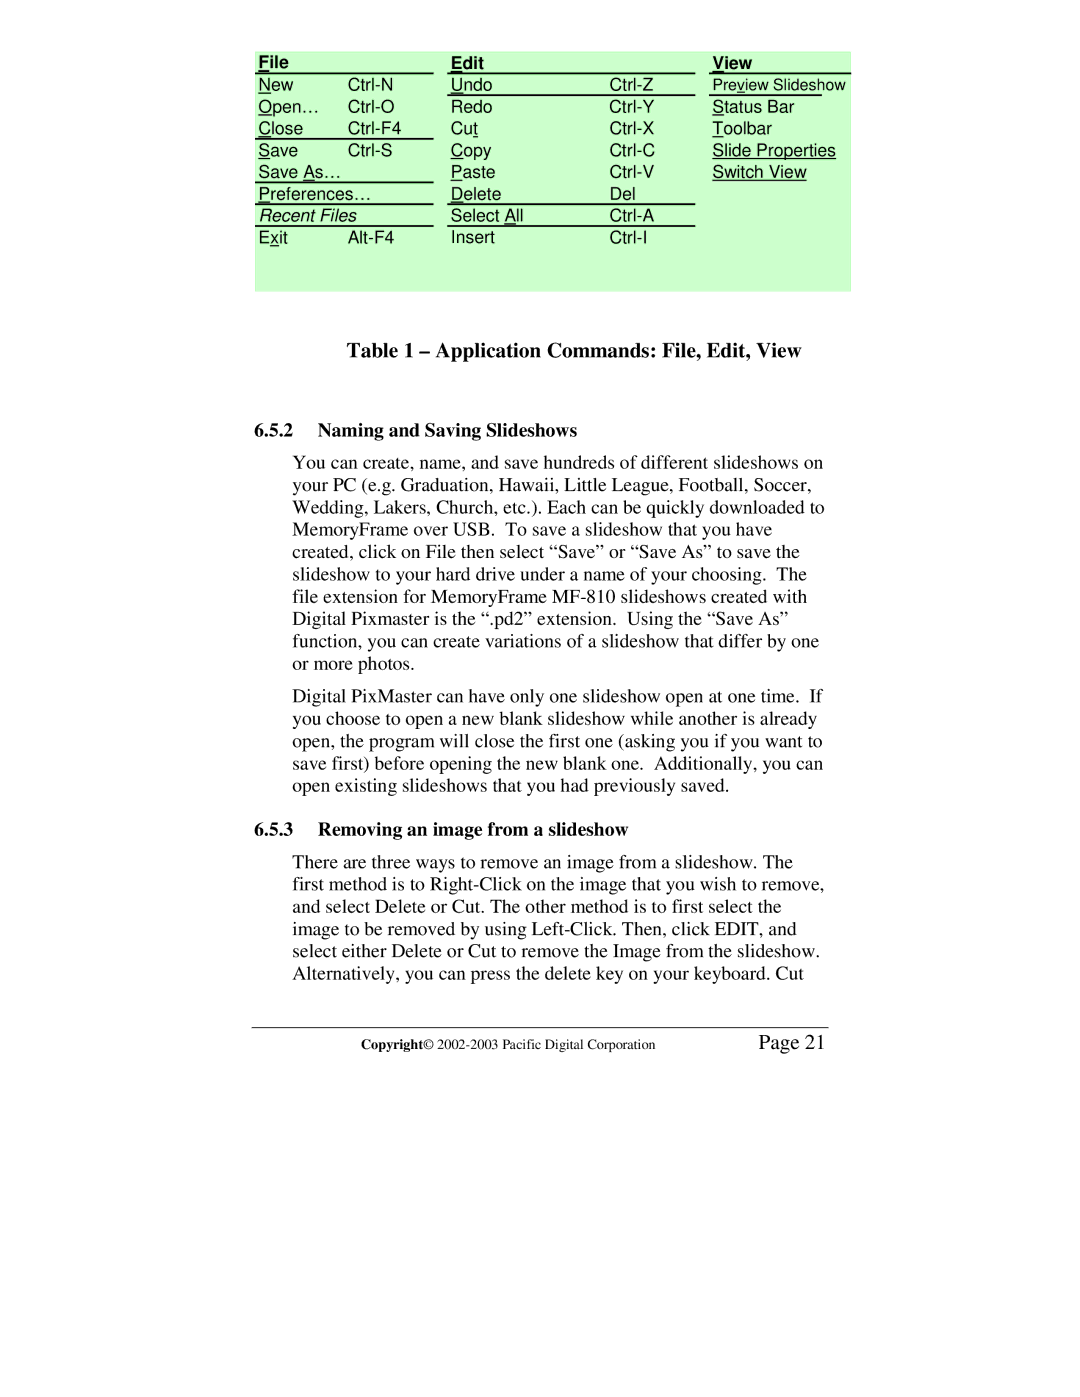
File |
|
| Edit |
|
| View |
New |
| Undo |
| Preview Slideshow | ||
Open… |
| Redo |
| Status Bar | ||
Close |
| Cut |
| Toolbar | ||
Save |
| Copy |
| Slide Properties | ||
Save As… |
|
| Paste |
| Switch View | |
Preferences… |
| Delete | Del |
|
| |
Recent Files |
| Select All |
|
| ||
Exit |
| Insert |
|
| ||
|
|
|
|
|
|
|
Table 1 – Application Commands: File, Edit, View
6.5.2Naming and Saving Slideshows
You can create, name, and save hundreds of different slideshows on your PC (e.g. Graduation, Hawaii, Little League, Football, Soccer, Wedding, Lakers, Church, etc.). Each can be quickly downloaded to MemoryFrame over USB. To save a slideshow that you have created, click on File then select “Save” or “Save As” to save the slideshow to your hard drive under a name of your choosing. The file extension for MemoryFrame
Digital PixMaster can have only one slideshow open at one time. If you choose to open a new blank slideshow while another is already open, the program will close the first one (asking you if you want to save first) before opening the new blank one. Additionally, you can open existing slideshows that you had previously saved.
6.5.3Removing an image from a slideshow
There are three ways to remove an image from a slideshow. The first method is to
Copyright© | Page 21 |