Chapter 5 Preparation
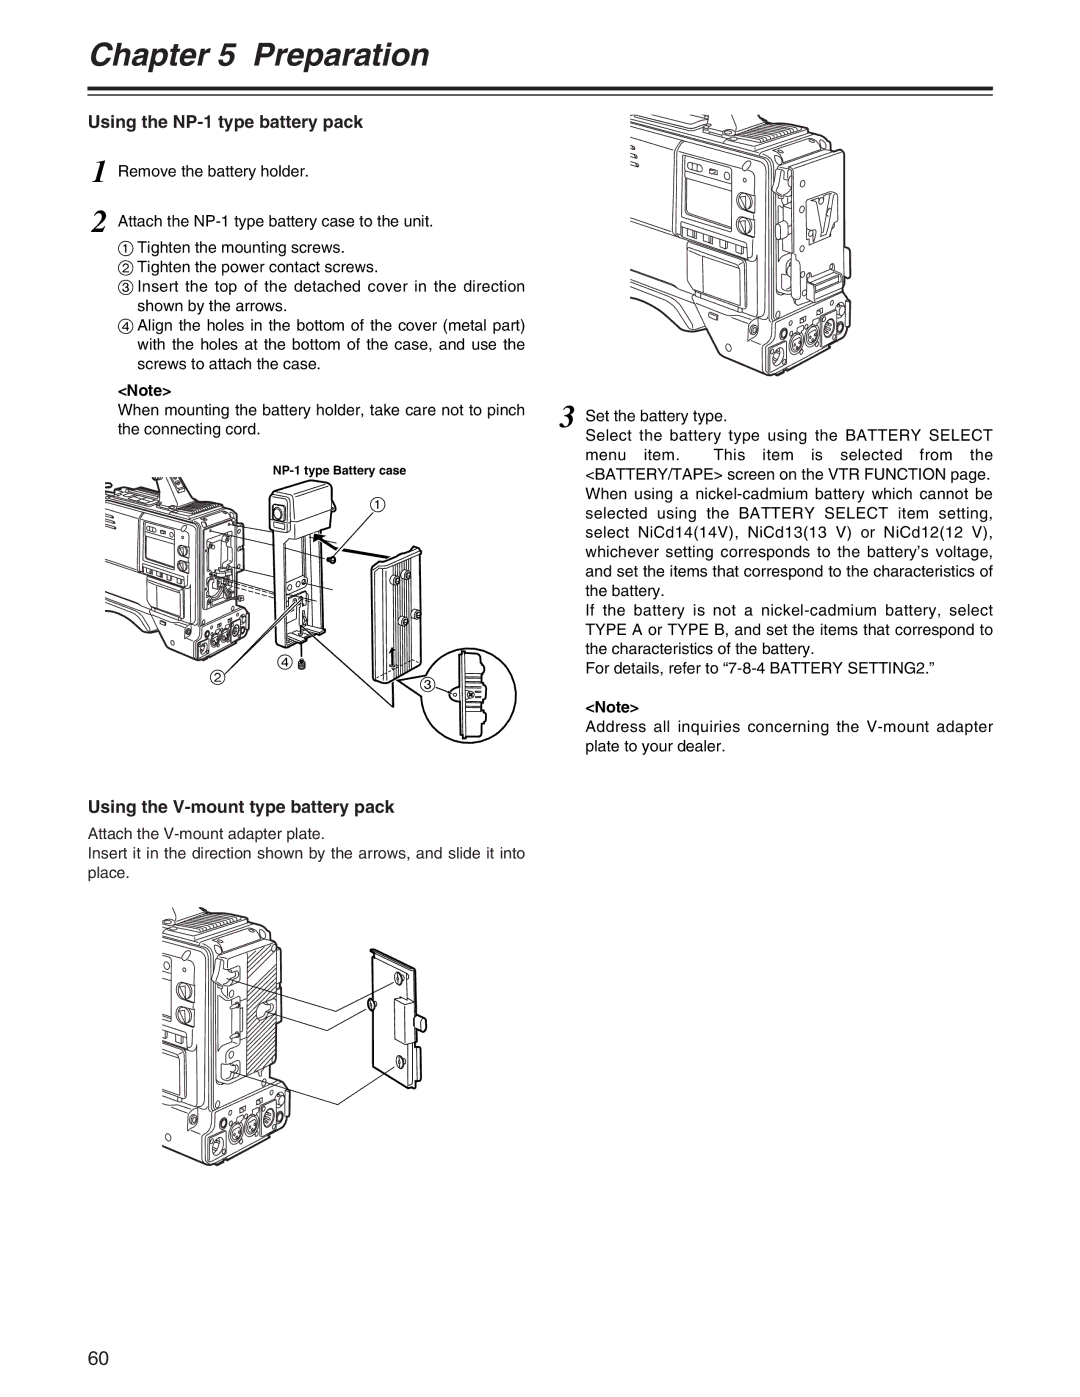
Using the NP-1 type battery pack
1 Remove the battery holder.
2 Attach the
1Tighten the mounting screws.
2 Tighten the power contact screws.
3 Insert the top of the detached cover in the direction shown by the arrows.
4Align the holes in the bottom of the cover (metal part) with the holes at the bottom of the case, and use the screws to attach the case.
<Note> |
| 3 Set the battery type. | ||
When mounting the battery holder, take care not to pinch | ||||
the connecting cord. |
| |||
|
| Select the battery type using the BATTERY SELECT | ||
|
| menu item. | This item is selected from the | |
| <BATTERY/TAPE> screen on the VTR FUNCTION page. | |||
| 1 | When using a | ||
| selected using the BATTERY SELECT item setting, | |||
|
| |||
|
| select NiCd14(14V), NiCd13(13 V) or NiCd12(12 V), | ||
|
| whichever setting corresponds to the battery’s voltage, | ||
|
| and set the items that correspond to the characteristics of | ||
|
| the battery. |
| |
|
| If the battery is not a | ||
|
| TYPE A or TYPE B, and set the items that correspond to | ||
| 4 | the characteristics of the battery. | ||
2 | For details, refer to | |||
3 | ||||
|
| |||
|
|
| ||
|
| <Note> |
| |
|
| Address all inquiries concerning the | ||
|
| plate to your dealer. | ||
Using the V-mount type battery pack
Attach the
Insert it in the direction shown by the arrows, and slide it into place.
60
