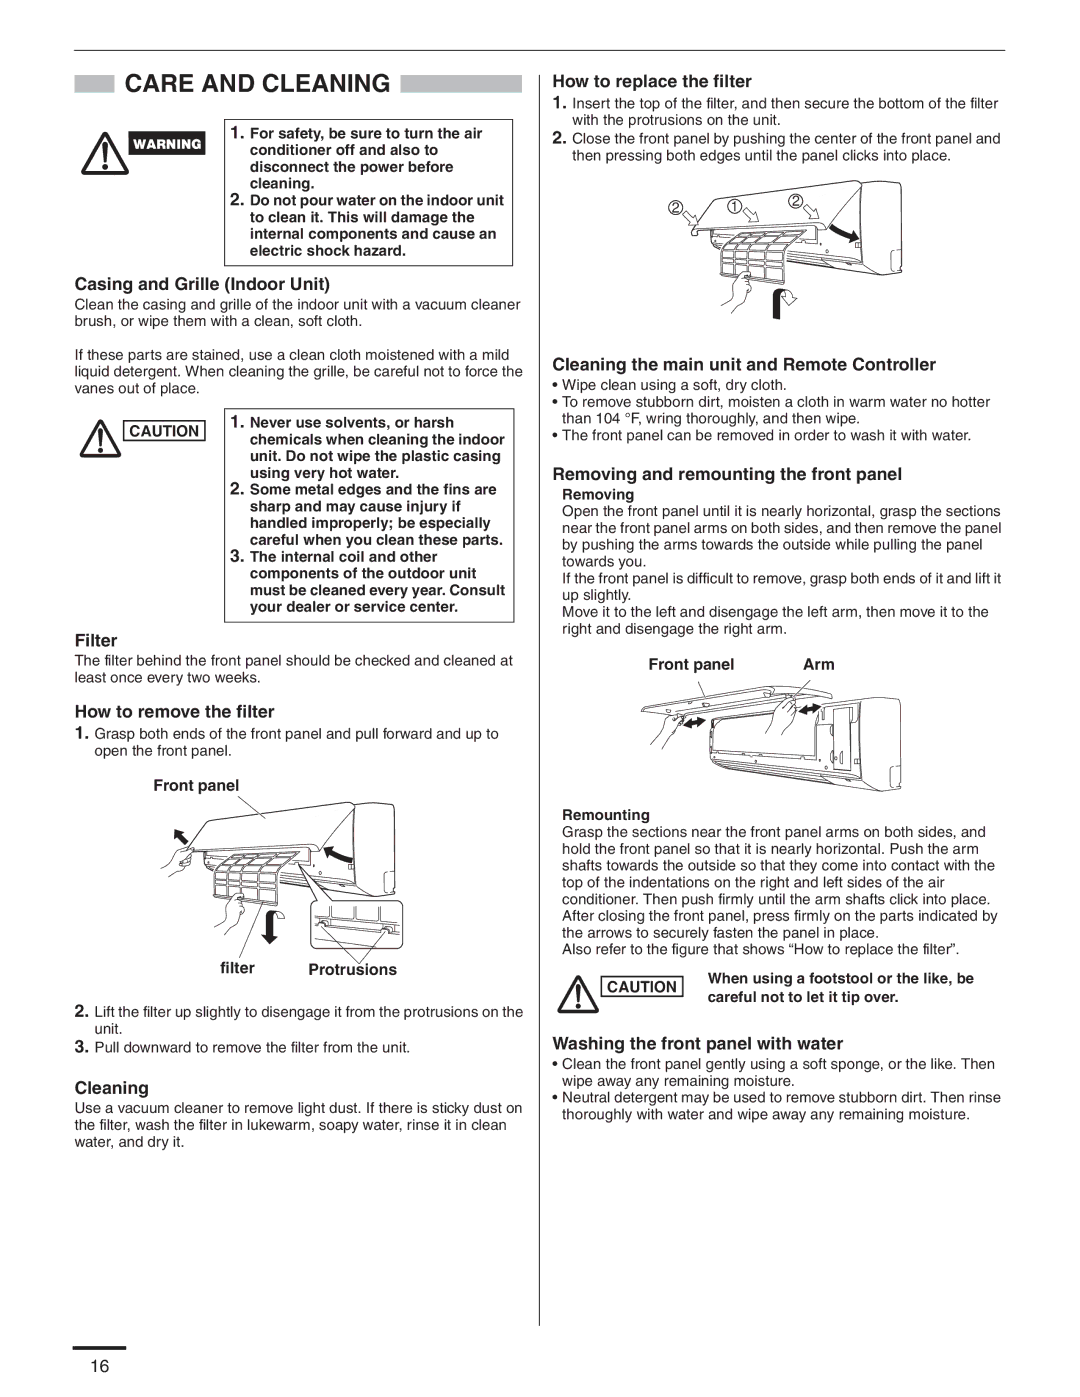
2. Lift the filter up slightly to disengage it from the protrusions on the unit.
3. Pull downward to remove the filter from the unit.
Cleaning
Use a vacuum cleaner to remove light dust. If there is sticky dust on the filter, wash the filter in lukewarm, soapy water, rinse it in clean water, and dry it.
16
Protrusions
Front panel
filter
Filter
The filter behind the front panel should be checked and cleaned at least once every two weeks.
How to remove the filter
1. Grasp both ends of the front panel and pull forward and up to open the front panel.
CAUTION
1. Never use solvents, or harsh chemicals when cleaning the indoor unit. Do not wipe the plastic casing using very hot water.
2. Some metal edges and the fins are sharp and may cause injury if handled improperly; be especially careful when you clean these parts.
3. The internal coil and other components of the outdoor unit must be cleaned every year. Consult your dealer or service center.
CARE AND CLEANING
1. For safety, be sure to turn the air conditioner off and also to
disconnect the power before cleaning.
2. Do not pour water on the indoor unit to clean it. This will damage the internal components and cause an electric shock hazard.
Casing and Grille (Indoor Unit)
Clean the casing and grille of the indoor unit with a vacuum cleaner brush, or wipe them with a clean, soft cloth.
If these parts are stained, use a clean cloth moistened with a mild liquid detergent. When cleaning the grille, be careful not to force the vanes out of place.

How to replace the filter

1.Insert the top of the filter, and then secure the bottom of the filter with the protrusions on the unit.

2.Close the front panel by pushing the center of the front panel and then pressing both edges until the panel clicks into place.

2 1 2

Cleaning the main unit and Remote Controller

Wipe clean using a soft, dry cloth.

To remove stubborn dirt, moisten a cloth in warm water no hotter than 104 °F, wring thoroughly, and then wipe.

The front panel can be removed in order to wash it with water.

Removing and remounting the front panel

Removing

Open the front panel until it is nearly horizontal, grasp the sections near the front panel arms on both sides, and then remove the panel by pushing the arms towards the outside while pulling the panel towards you.

If the front panel is difficult to remove, grasp both ends of it and lift it up slightly.

Move it to the left and disengage the left arm, then move it to the right and disengage the right arm.

Front panel

Arm

Remounting

Grasp the sections near the front panel arms on both sides, and hold the front panel so that it is nearly horizontal. Push the arm shafts towards the outside so that they come into contact with the top of the indentations on the right and left sides of the air conditioner. Then push firmly until the arm shafts click into place. After closing the front panel, press firmly on the parts indicated by the arrows to securely fasten the panel in place.

Also refer to the figure that shows “How to replace the filter”.

CAUTION

When using a footstool or the like, be careful not to let it tip over.

Washing the front panel with water

Clean the front panel gently using a soft sponge, or the like. Then wipe away any remaining moisture.

Neutral detergent may be used to remove stubborn dirt. Then rinse thoroughly with water and wipe away any remaining moisture.

Page 76
Image 76
Panasonic CU-KE36NKU, CU-KE30NKU How to replace the filter, Cleaning the main unit and Remote Controller, Front panel Arm

CS-KE30NKU, CS-KE36NKU, CU-KE30NKU, CU-KE36NKU specifications

The Panasonic CU-KE36NKU, CS-KE36NKU, CU-KE30NKU, and CS-KE30NKU air conditioning units represent the brand's commitment to delivering high-performance cooling solutions backed by innovative technologies. These units cater to both residential and commercial applications, ensuring users experience maximum comfort throughout the year.

One of the standout features of these models is their energy efficiency. Both units are equipped with advanced inverter technology, which allows for variable speed operation. This means they can adjust their power output according to the room's cooling needs, reducing energy consumption and minimizing electric bills while maintaining a consistent temperature. The models boast impressive SEER (Seasonal Energy Efficiency Ratio) ratings, making them environmentally friendly options.

Panasonic's nanoe-G technology is another remarkable feature incorporated into these models. This technology helps to purify the air by generating hydroxyl radicals, which eliminate airborne particles, odors, and harmful bacteria. This results in a healthier indoor environment, conducive to both comfort and well-being. The air purification aspect not only enhances the air quality but also extends the lifespan of the HVAC system by reducing the buildup of dust and contaminants.

In terms of user convenience, both the CU-KE and CS-KE series are equipped with programmable timers, allowing users to set their desired operation schedules. They also come with a remote control for ease of use, enabling adjustments from a distance. The installation process is straightforward, and the sleek design blends seamlessly with various interior aesthetics, making them a suitable choice for any room.

Durability is a key characteristic of Panasonic air conditioning units, and the CU-KE36NKU, CS-KE36NKU, CU-KE30NKU, and CS-KE30NKU are designed to withstand varying environmental conditions. Their robust construction ensures reliability and performance over the years. Additionally, both models come with a quiet operation feature that minimizes noise levels, allowing for comfortable use without disturbing daily activities.

In summary, the Panasonic CU-KE36NKU, CS-KE36NKU, CU-KE30NKU, and CS-KE30NKU are exceptional air conditioning units that combine energy efficiency, innovative purification technology, user-friendly features, and robust durability. These models are an ideal investment for anyone seeking a reliable and high-performance cooling solution.