Preparation
Before using | 2 | Parts identification and | |||
|
|
|
| ||
| handling |
|
| ||
| 1 | 2 3 | 4 5 |
|
|
|
|
|
|
| 6 |
|
|
|
|
| 7 |
|
|
|
|
| 8 |
|
|
|
|
| 9 |
| 1817161514 |
|
|
| |
|
|
|
| 10 |
|
|
|
| 11 | 12 | 13 |
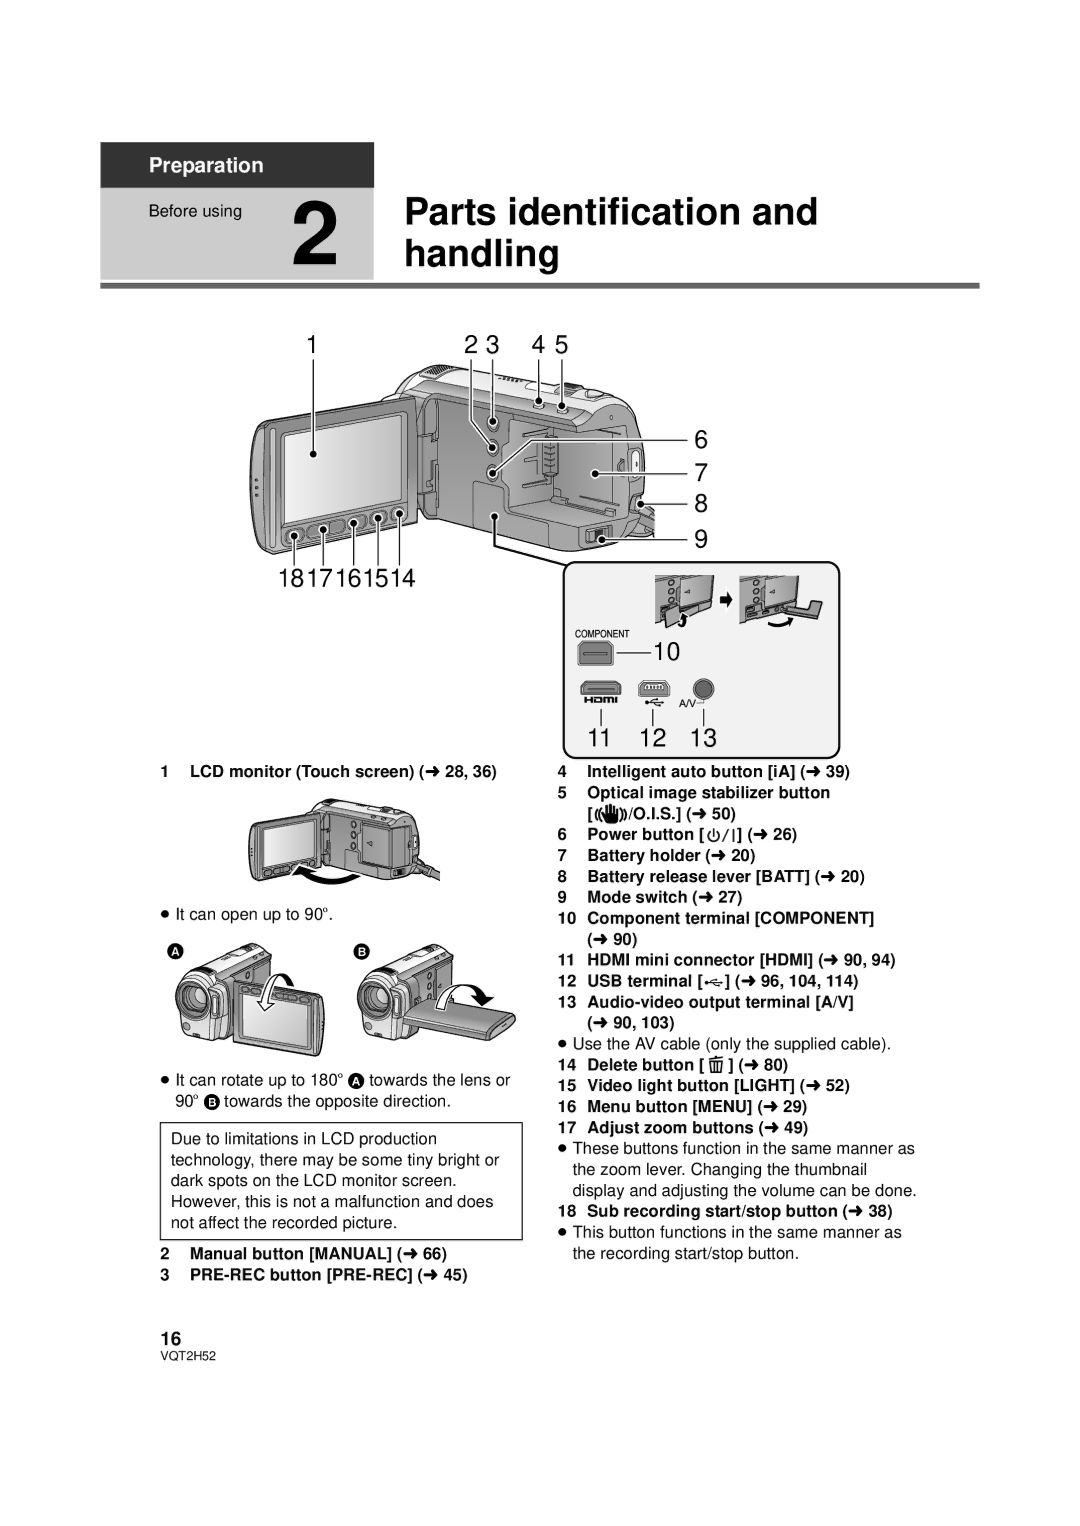
1 LCD monitor (Touch screen) (l 28, 36)
≥It can open up to 90o.
≥It can rotate up to 180o A towards the lens or 90o B towards the opposite direction.
Due to limitations in LCD production technology, there may be some tiny bright or dark spots on the LCD monitor screen. However, this is not a malfunction and does not affect the recorded picture.
2Manual button [MANUAL] (l 66)
3
4Intelligent auto button [iA] (l 39)
5Optical image stabilizer button
[![]()
![]()
![]() /O.I.S.] (l 50)
/O.I.S.] (l 50)
6Power button [ ![]()
![]()
![]() ] (l 26)
] (l 26)
7Battery holder (l 20)
8Battery release lever [BATT] (l 20)
9Mode switch (l 27)
10Component terminal [COMPONENT] (l 90)
11HDMI mini connector [HDMI] (l 90, 94)
12USB terminal [ ![]()
![]()
![]() ] (l 96, 104, 114)
] (l 96, 104, 114)
13
≥Use the AV cable (only the supplied cable).
14Delete button [ ![]() ] (l 80)
] (l 80)
15Video light button [LIGHT] (l 52)
16Menu button [MENU] (l 29)
17Adjust zoom buttons (l 49)
≥These buttons function in the same manner as the zoom lever. Changing the thumbnail display and adjusting the volume can be done.
18Sub recording start/stop button (l 38)
≥This button functions in the same manner as the recording start/stop button.
16
VQT2H52