Getting Started
Setting up
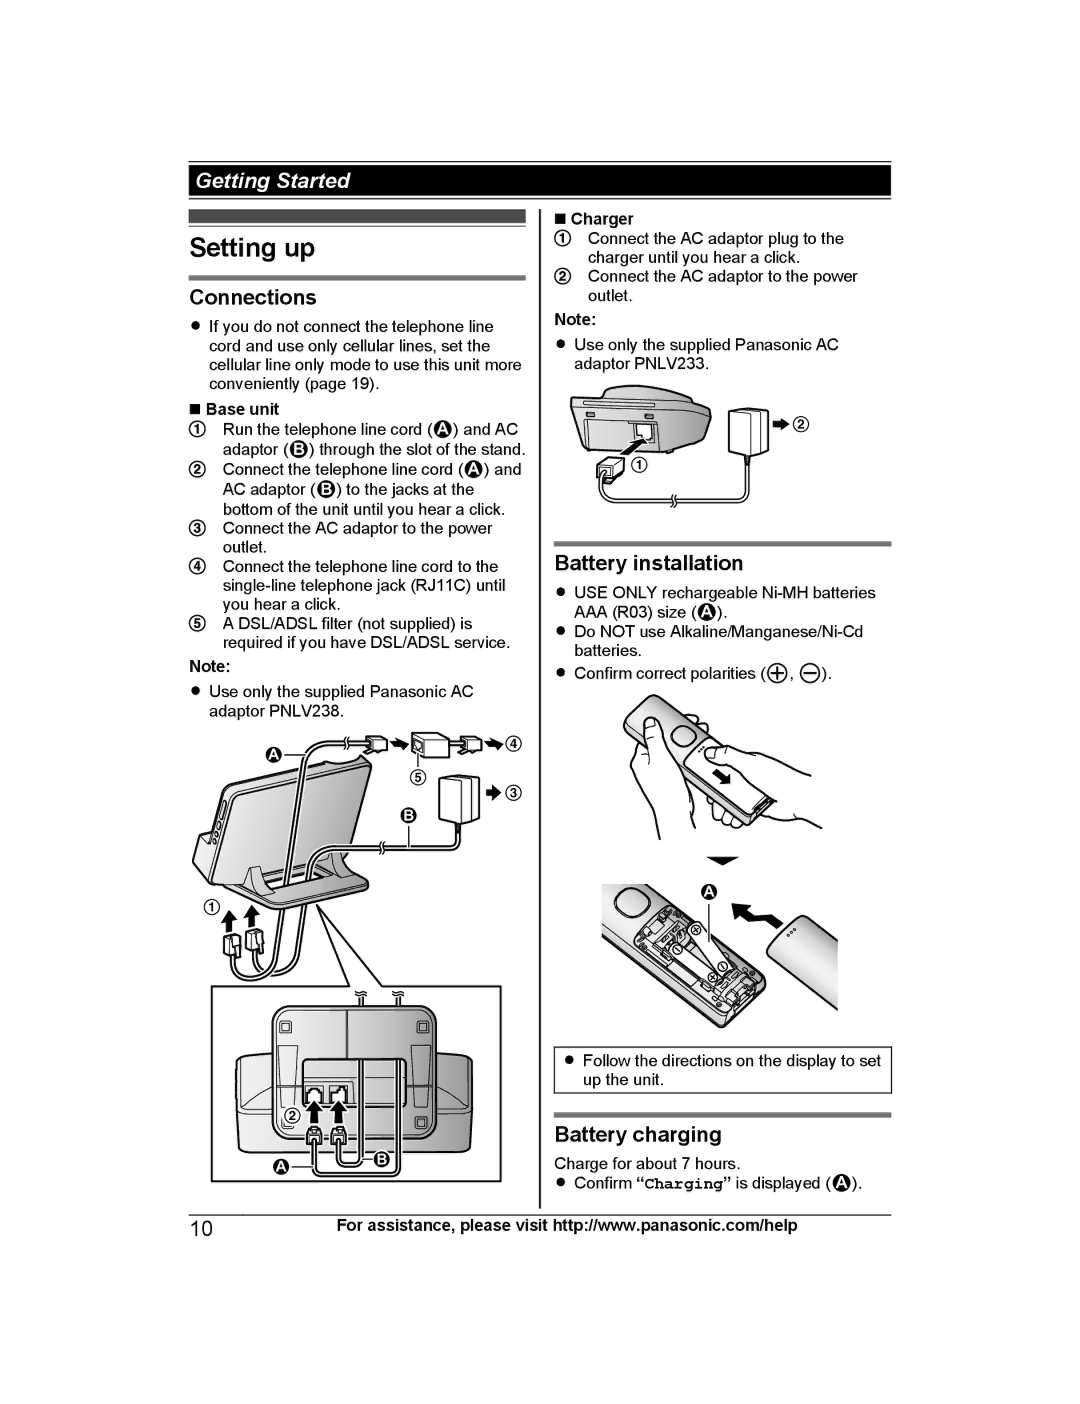
Connections
RIf you do not connect the telephone line cord and use only cellular lines, set the cellular line only mode to use this unit more conveniently (page 19).
n Base unit
Run the telephone line cord (1) and AC adaptor (2) through the slot of the stand. Connect the telephone line cord (1) and AC adaptor (2) to the jacks at the bottom of the unit until you hear a click. Connect the AC adaptor to the power outlet.
Connect the telephone line cord to the
A DSL/ADSL filter (not supplied) is required if you have DSL/ADSL service.
Note:
RUse only the supplied Panasonic AC adaptor PNLV238.
nCharger
Connect the AC adaptor plug to the charger until you hear a click. Connect the AC adaptor to the power outlet.
Note:
RUse only the supplied Panasonic AC adaptor PNLV233.
![]() 2
2
![]() 1
1
Battery installation
RUSE ONLY rechargeable
RDo NOT use
RConfirm correct polarities (![]() ,
, ![]() ).
).
1![]()
4
5
![]() 3
3
2
1![]()
![]()
2![]()
1![]()
![]() 2
2
1
RFollow the directions on the display to set up the unit.
Battery charging
Charge for about 7 hours.
RConfirm “Charging” is displayed (1).
10For assistance, please visit http://www.panasonic.com/help