Network setting of the projector (cont.)
Verifying settings
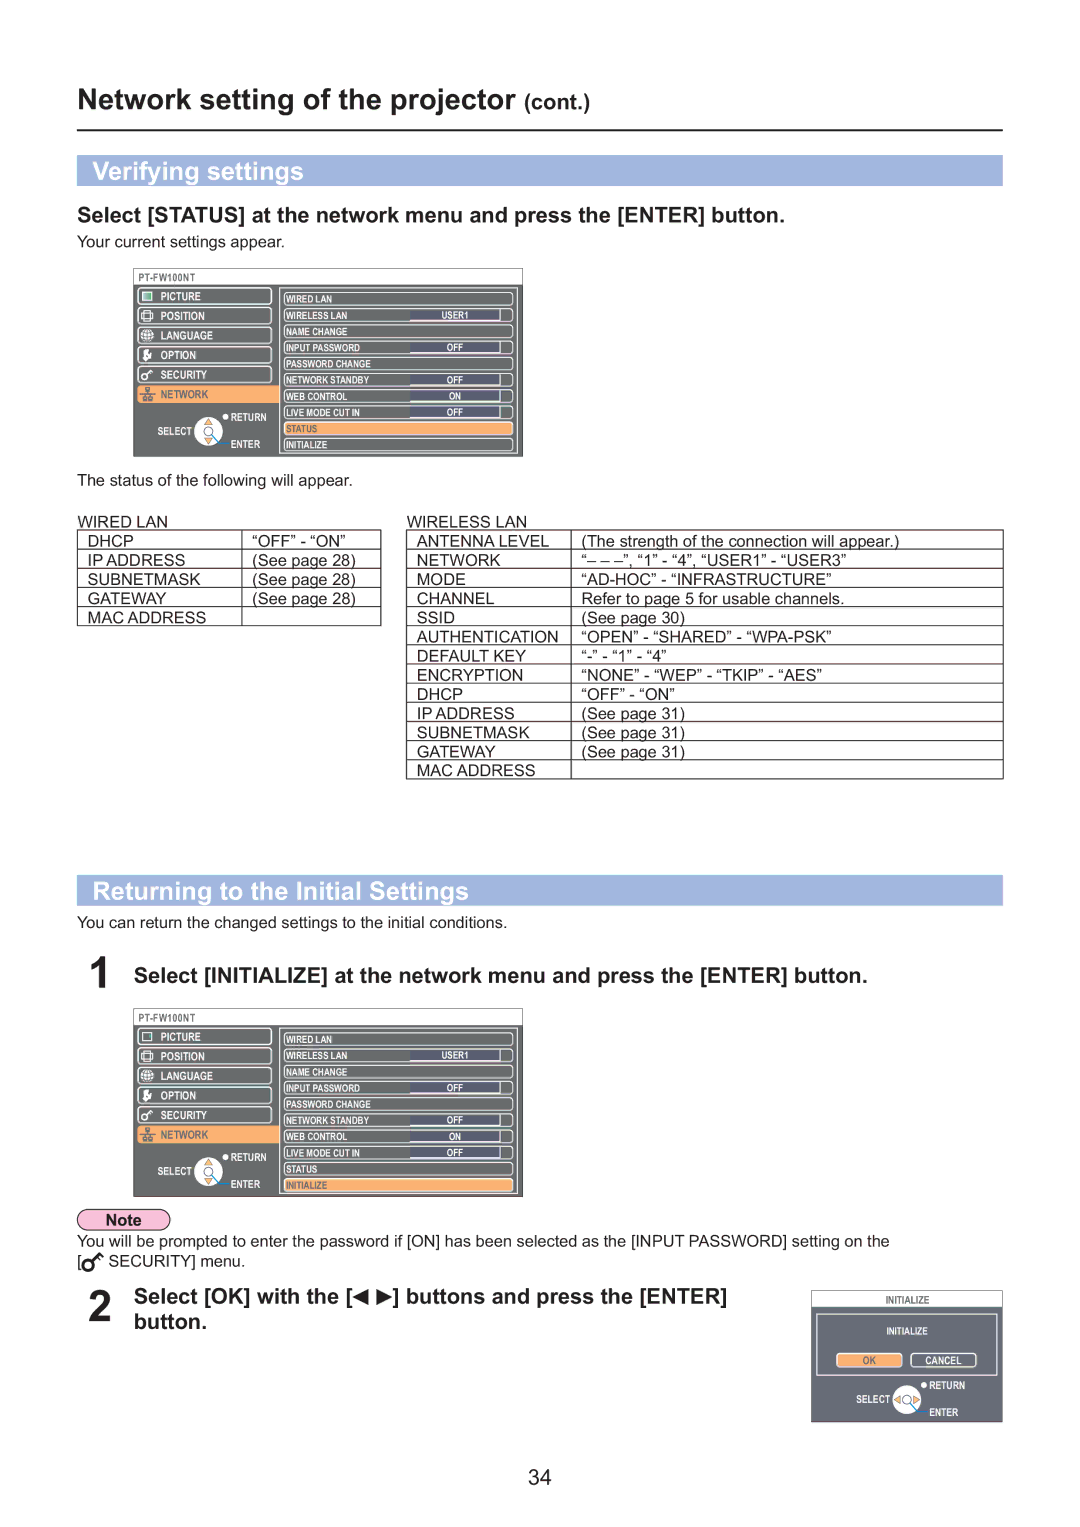
Select [STATUS] at the network menu and press the [ENTER] button.
Your current settings appear.
|
| ||
PICTURE | WIRED LAN |
| |
POSITION | WIRELESS LAN | USER1 | |
LANGUAGE | NAME CHANGE | OFF | |
OPTION | INPUT PASSWORD | ||
PASSWORD CHANGE |
| ||
SECURITY |
| ||
NETWORK STANDBY | OFF | ||
NETWORK | |||
WEB CONTROL | ON | ||
RETURN | LIVE MODE CUT IN | OFF | |
STATUS |
| ||
SELECT |
| ||
ENTER | INITIALIZE |
|
The status of the following will appear.
WIRED LAN
DHCP | “OFF” - “ON” |
IP ADDRESS | (See page 28) |
SUBNETMASK | (See page 28) |
GATEWAY | (See page 28) |
MAC ADDRESS |
|
WIRELESS LAN
ANTENNA LEVEL | (The strength of the connection will appear.) |
NETWORK | “– – |
MODE | |
CHANNEL | Refer to page 5 for usable channels. |
SSID | (See page 30) |
AUTHENTICATION | “OPEN” - “SHARED” - |
DEFAULT KEY | |
ENCRYPTION | “NONE” - “WEP” - “TKIP” - “AES” |
DHCP | “OFF” - “ON” |
IP ADDRESS | (See page 31) |
SUBNETMASK | (See page 31) |
GATEWAY | (See page 31) |
MAC ADDRESS |
|
Returning to the Initial Settings
You can return the changed settings to the initial conditions.
1Select [INITIALIZE] at the network menu and press the [ENTER] button.
|
| ||
PICTURE | WIRED LAN |
| |
POSITION | WIRELESS LAN | USER1 | |
LANGUAGE | NAME CHANGE | OFF | |
OPTION | INPUT PASSWORD | ||
PASSWORD CHANGE |
| ||
SECURITY |
| ||
NETWORK STANDBY | OFF | ||
NETWORK | |||
WEB CONTROL | ON | ||
RETURN | LIVE MODE CUT IN | OFF | |
STATUS |
| ||
SELECT |
| ||
ENTER | INITIALIZE |
|
You will be prompted to enter the password if [ON] has been selected as the [INPUT PASSWORD] setting on the [![]() SECURITY] menu.
SECURITY] menu.
2Select [OK] with the [
 ] buttons and press the [ENTER] button.
INITIALIZE
INITIALIZE
OK CANCEL
![]() RETURN
RETURN
SELECT ![]()
![]()
![]()
ENTER
34