Description of Controls
Front View
• | . ..._ |
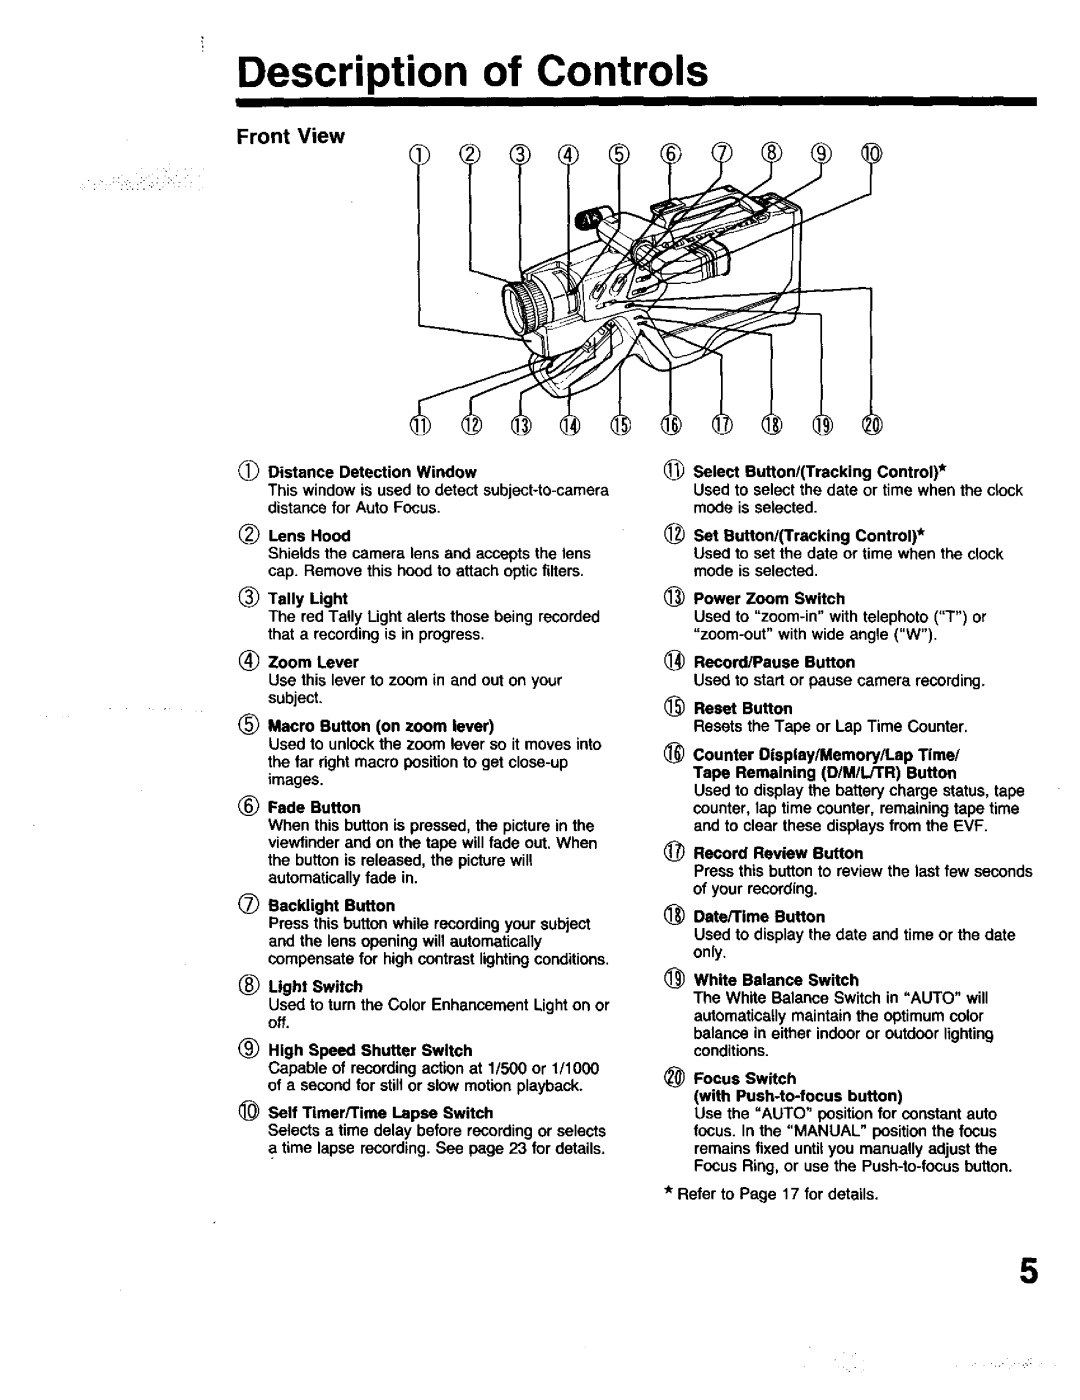
(_) Distance Detection Window
This window is used to detect
(_) Lens Hood
Shields the camera lens and accepts the lens cap. Remove this hood to attach optic filters.
_) Tally Light
The red Tally Light alerts those being recorded that a recording is in progress.
(_ Zoom Lever
Use this lever to zoom in and out on your subject.
(_ Macro Button (on zoom lever)
Used to unlock the zoom lever so it moves into the far right macro position to get
images.
(_) Fade Button
When this button is pressed, the picture in the viewfinder and on the tape will fade out. When the button is released, the picture will automatically fade in.
(_ Racklight Button
Press this button while recording your subject and the lens opening will automatically compensate for high contrast lighting conditions.
(_) Light Switch
Used to turn the Color Enhancement Light on or off.
(_ High Speed Shutter Switch
Capable of recording action at 1/500 or 1/1000 of a second for still or slow motion playback.
_) Self Timer/Time Lapse Switch
Selects a time delay before recording or selects time lapse recording. See page 23 for details.
(_) Select Button/(Tracking Control)*
Used to select the date or time when the clock mode is selected.
_) Set Rutton/(Tracking Control)*
Used to set the date or time when the clock mode is selected.
@Power Zoom Switch
Used to
@Record/Pause Button
Used to startor pause camera recording.
®Reset Button
Resets the Tape or Lap Time Counter.
®Counter Display/Memory/Lap Time/ Tape Remaining (D/M/L/TR) Button
Used to display the battery charge status, tape counter, lap time counter, remaining tape time and to clear these displays from the EVF.
(_ Record Review Button
Press this button to review the last few seconds of your recording.
_) Dete/Time Button
Used to display the date and time or the date only,
(_ White Balance Switch
The White Balance Switch in "AUTO" will automatically maintain the optimum color balance in either indoor or outdoor lighting conditions.
_) Focus Switch
(with
Use the "AUTO" position for constant auto focus. In the "MANUAL" position the focus
remains fixed until you manually adjust the Focus Ring, or use the
*Refer to Page 17 for details.
5
