Others
Playback (Pictures)
Playback (Sound)
Although the Camcorder is correctly connected to a TV, playback images cannot be seen.
•Have you selected “Video Input” on the TV? Please read the operating instructions of your TV and select the channel that matches the input jacks used for the connection.
•Depending on your TV, nothing may be shown even if you correctly connect the Camcorder with your TV. In this case, set [AV JACK] on the [INITIAL]
Playback picture is not clear.
•Are the heads of the Camcorder dirty? If the heads are dirty, playback image cannot be clear. (p. 67)
Playing back or recording do not function, the screen has frozen or the indication has disappeared.
•Turn the Camcorder off. If the Camcorder is not turned off after operating the [OFF/ON] switch, press the [RESET] Button (p. 12) first. And detach the Battery or AC Adaptor and then reattach it.
Sound is not played back from the
•Is the volume too low? During playback, push the [W/T] Lever to display the [VOLUME] Indication and adjust the volume. (p. 35)
Different sounds are reproduced at the same time.
•[12bit AUDIO] on the [PLAYBACK]
The original sound was erased when audio dubbing was performed.
•If you perform audio dubbing on a recording made in [16bit] Mode, the original sound will be erased. If you wish to preserve the original sound, be sure to select [12bit] Mode at the time of recording.
Sounds cannot be played back.
•Although a Cassette with no audio dubbing is being played, is [12bit AUDIO] on the [PLAYBACK]
•Is the Variable Speed Search Function working? Press the [►] Button to cancel the Variable Speed Search Function. (p. 36)
Recorded pictures are not clear.
•Is [PICT QUALITY] on the [CARD]
| Photoshot Playback images do not look | |
| normal. | |
Card | • The picture may be damaged. In order to | |
prevent the loss of image data, backing up | ||
| ||
| on a Cassette or a personal computer is | |
| recommended. (pp. 44, 48) |
During Playback the [UNPLAYABLE CARD] Indication is displayed.
•The image was either recorded in a different format, or data is damaged.
Even if a Card is formatted, it cannot be used.
•Either the Camcorder or the Card may be damaged. Please consult a dealer.
The Camcorder clatters when shaking it.
| • It is a sound of the lens moving, not a | ||
Others | malfunction. | ||
When the USB Cable is disconnected, an | |||
| |||
| error message will appear on PC. | ||
| • To disconnect the USB cable safely, | ||
| the [ | ] icon in the task tray and follow the | |
| instructions on the screen. (p. 49) | ||
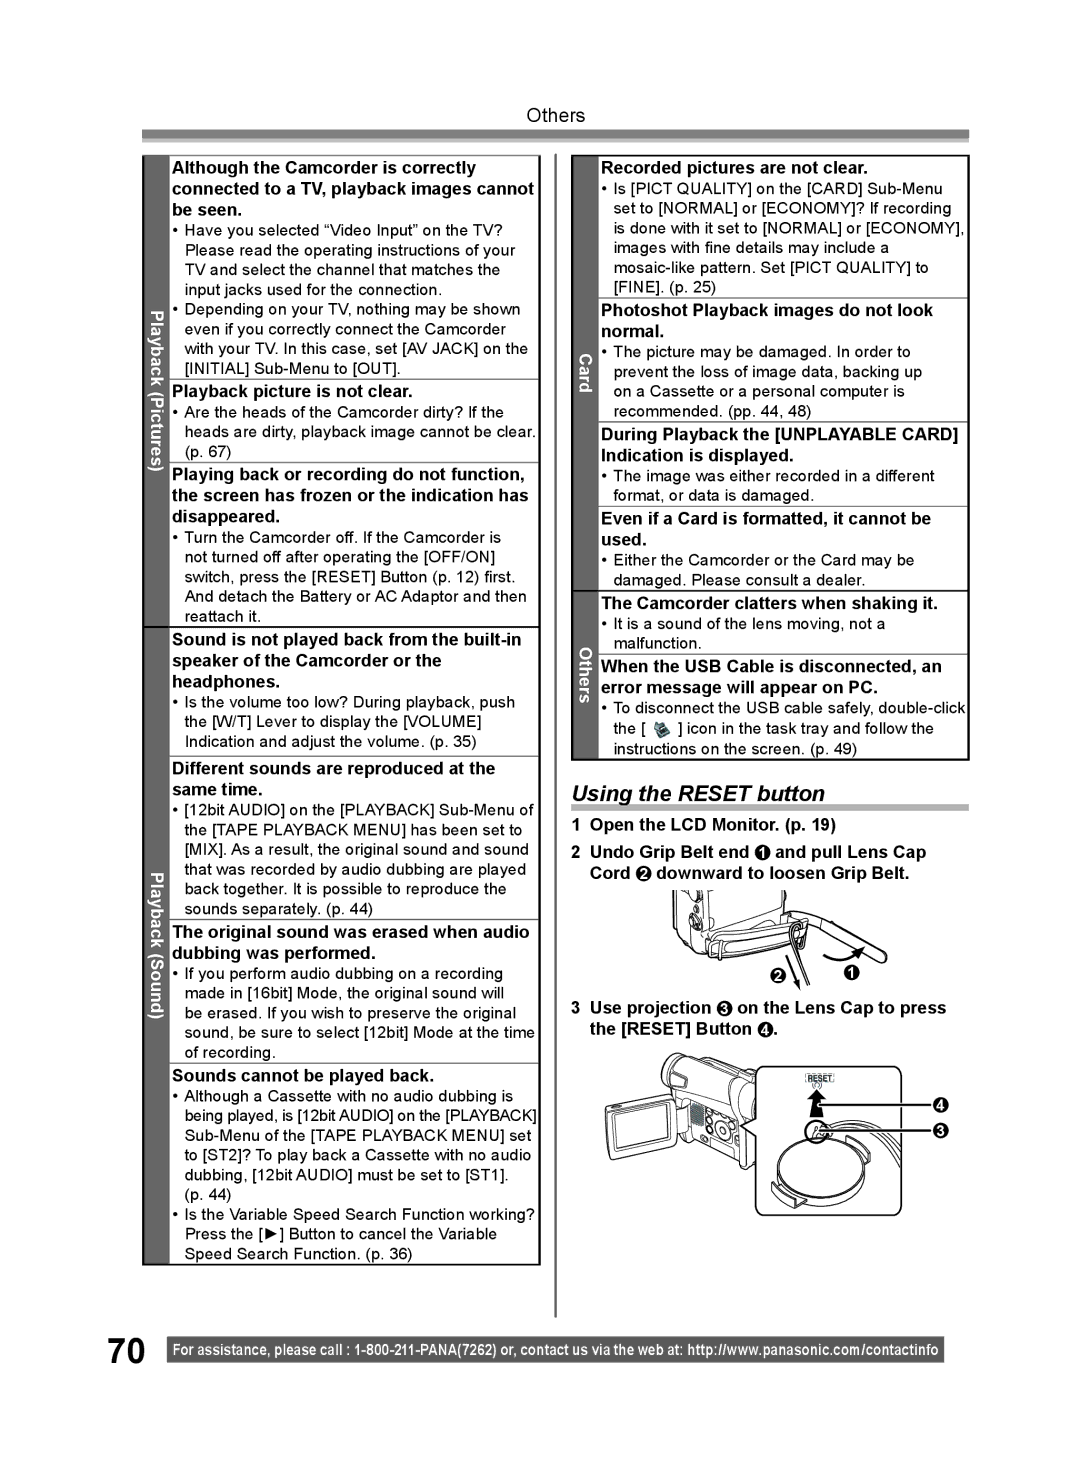
Using the RESET button
1Open the LCD Monitor. (p. 19)
2Undo Grip Belt end 1 and pull Lens Cap Cord 2 downward to loosen Grip Belt.
2 | 1 |
3Use projection 3 on the Lens Cap to press the [RESET] Button 4 .
4
3
70 |
|
For assistance, please call : | |
|