Recording Mode
Recording Mode
About Recording
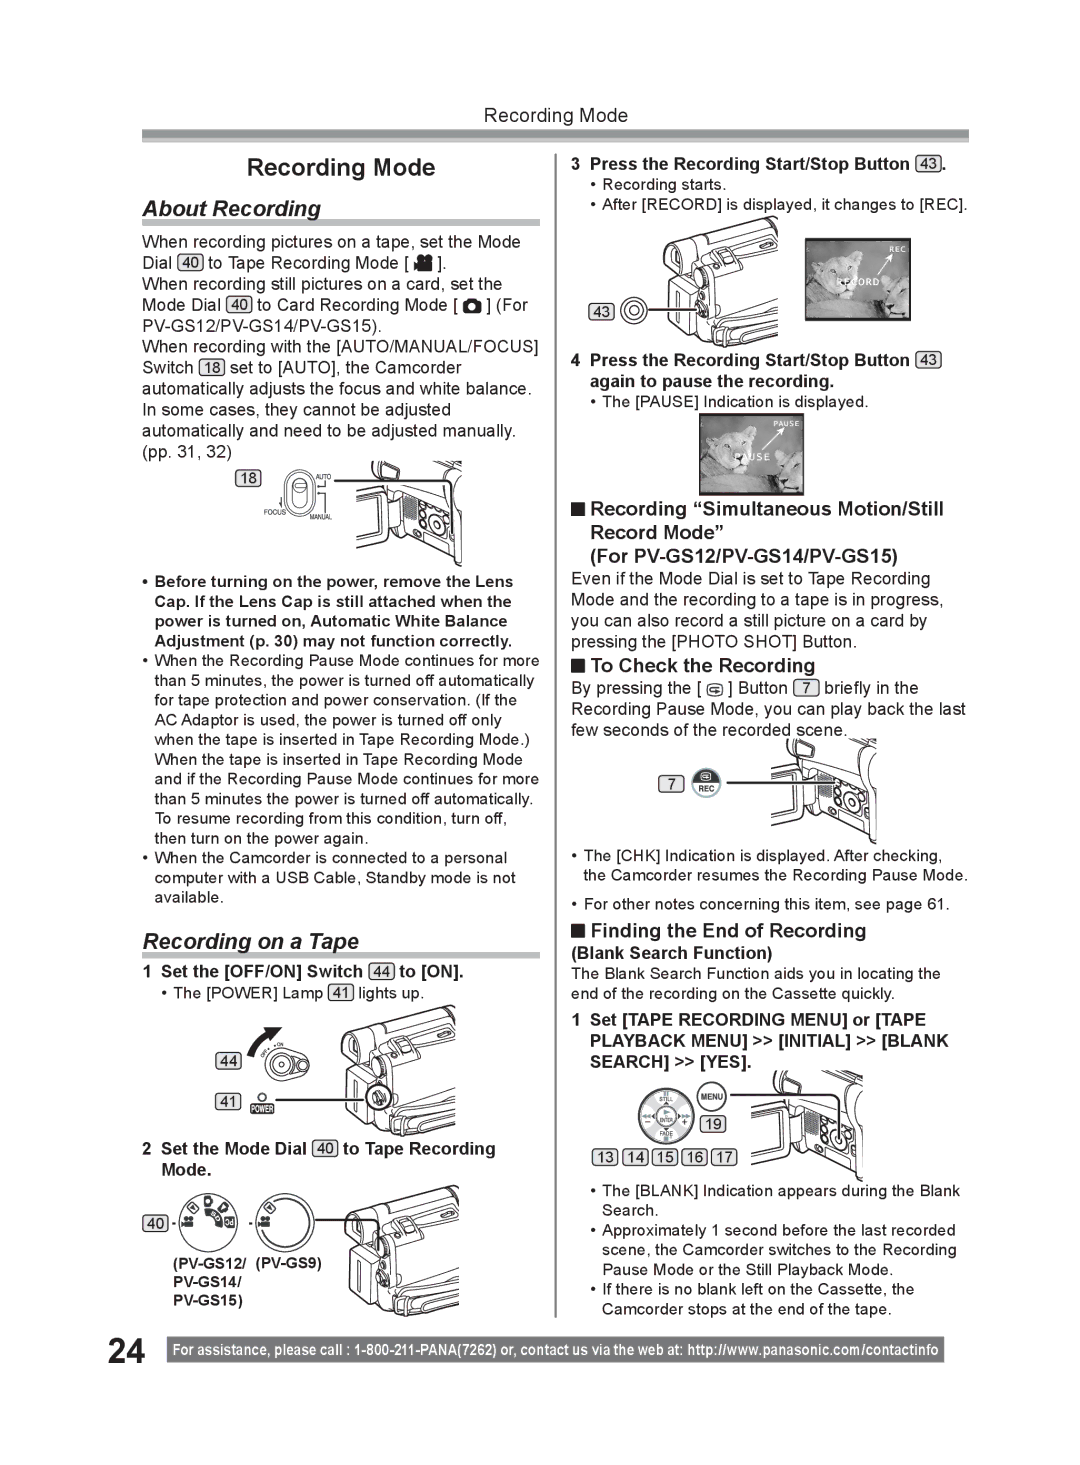
When recording pictures on a tape, set the Mode Dial 40 to Tape Recording Mode [ ![]() ].
].
When recording still pictures on a card, set the Mode Dial 40 to Card Recording Mode [ ![]() ] (For
] (For
When recording with the [AUTO/MANUAL/FOCUS] Switch 18 set to [AUTO], the Camcorder automatically adjusts the focus and white balance. In some cases, they cannot be adjusted automatically and need to be adjusted manually. (pp. 31, 32)
18![]()
![]()
•Before turning on the power, remove the Lens Cap. If the Lens Cap is still attached when the power is turned on, Automatic White Balance Adjustment (p. 30) may not function correctly.
•When the Recording Pause Mode continues for more than 5 minutes, the power is turned off automatically for tape protection and power conservation. (If the AC Adaptor is used, the power is turned off only when the tape is inserted in Tape Recording Mode.) When the tape is inserted in Tape Recording Mode and if the Recording Pause Mode continues for more than 5 minutes the power is turned off automatically. To resume recording from this condition, turn off, then turn on the power again.
•When the Camcorder is connected to a personal computer with a USB Cable, Standby mode is not available.
Recording on a Tape
1Set the [OFF/ON] Switch 44 to [ON].
• The [POWER] Lamp 41 lights up.
44
41
2Set the Mode Dial 40 to Tape Recording
Mode.
40 ![]()
![]()
![]()
3Press the Recording Start/Stop Button 43 .
•Recording starts.
•After [RECORD] is displayed, it changes to [REC].
43
4Press the Recording Start/Stop Button 43 again to pause the recording.
• The [PAUSE] Indication is displayed.
![]() Recording “Simultaneous Motion/Still
Recording “Simultaneous Motion/Still
Record Mode”
(For
Even if the Mode Dial is set to Tape Recording Mode and the recording to a tape is in progress, you can also record a still picture on a card by pressing the [PHOTO SHOT] Button.
 To Check the Recording
By pressing the [ ![]() ] Button 7 briefly in the Recording Pause Mode, you can play back the last few seconds of the recorded scene.
] Button 7 briefly in the Recording Pause Mode, you can play back the last few seconds of the recorded scene.
7
•The [CHK] Indication is displayed. After checking, the Camcorder resumes the Recording Pause Mode.
•For other notes concerning this item, see page 61.
 Finding the End of Recording
(Blank Search Function)
The Blank Search Function aids you in locating the end of the recording on the Cassette quickly.
1Set [TAPE RECORDING MENU] or [TAPE PLAYBACK MENU] >> [INITIAL] >> [BLANK SEARCH] >> [YES].
19
13 14 15 16 17
•The [BLANK] Indication appears during the Blank Search.
•Approximately 1 second before the last recorded scene, the Camcorder switches to the Recording Pause Mode or the Still Playback Mode.
•If there is no blank left on the Cassette, the Camcorder stops at the end of the tape.
24 |
|
For assistance, please call : | |
|
