Recording Mode
2Push the [W/T] Lever 26 towards [W] or towards [T] to zoom in or out.
26
To Cancel the Digital Zoom Function
Set [TAPE RECORDING MENU] >> [CAMERA] >> [D.ZOOM] >> [OFF].
• For other notes concerning this item, see page 62.
Image Stabilizer Function
If the Camcorder is shaken while recording, the camera shake in the image can be corrected.
•If the Camcorder shakes too much, the images may not be stabilized.
1Set [TAPE RECORDING MENU] >> [CAMERA] >> [EIS] >> [ON].
19
13 14 15 16 17
• The [EIS] Indication appears.
2Press the Recording Start/Stop Button 43 or [PHOTO SHOT] Button 36 to start recording.
36
43
To Cancel Image Stabilizer Function
Set [TAPE RECORDING MENU] >> [CAMERA] >> [EIS] >> [OFF].
• For other notes concerning this item, see page 62.
Fade In/Out Functions
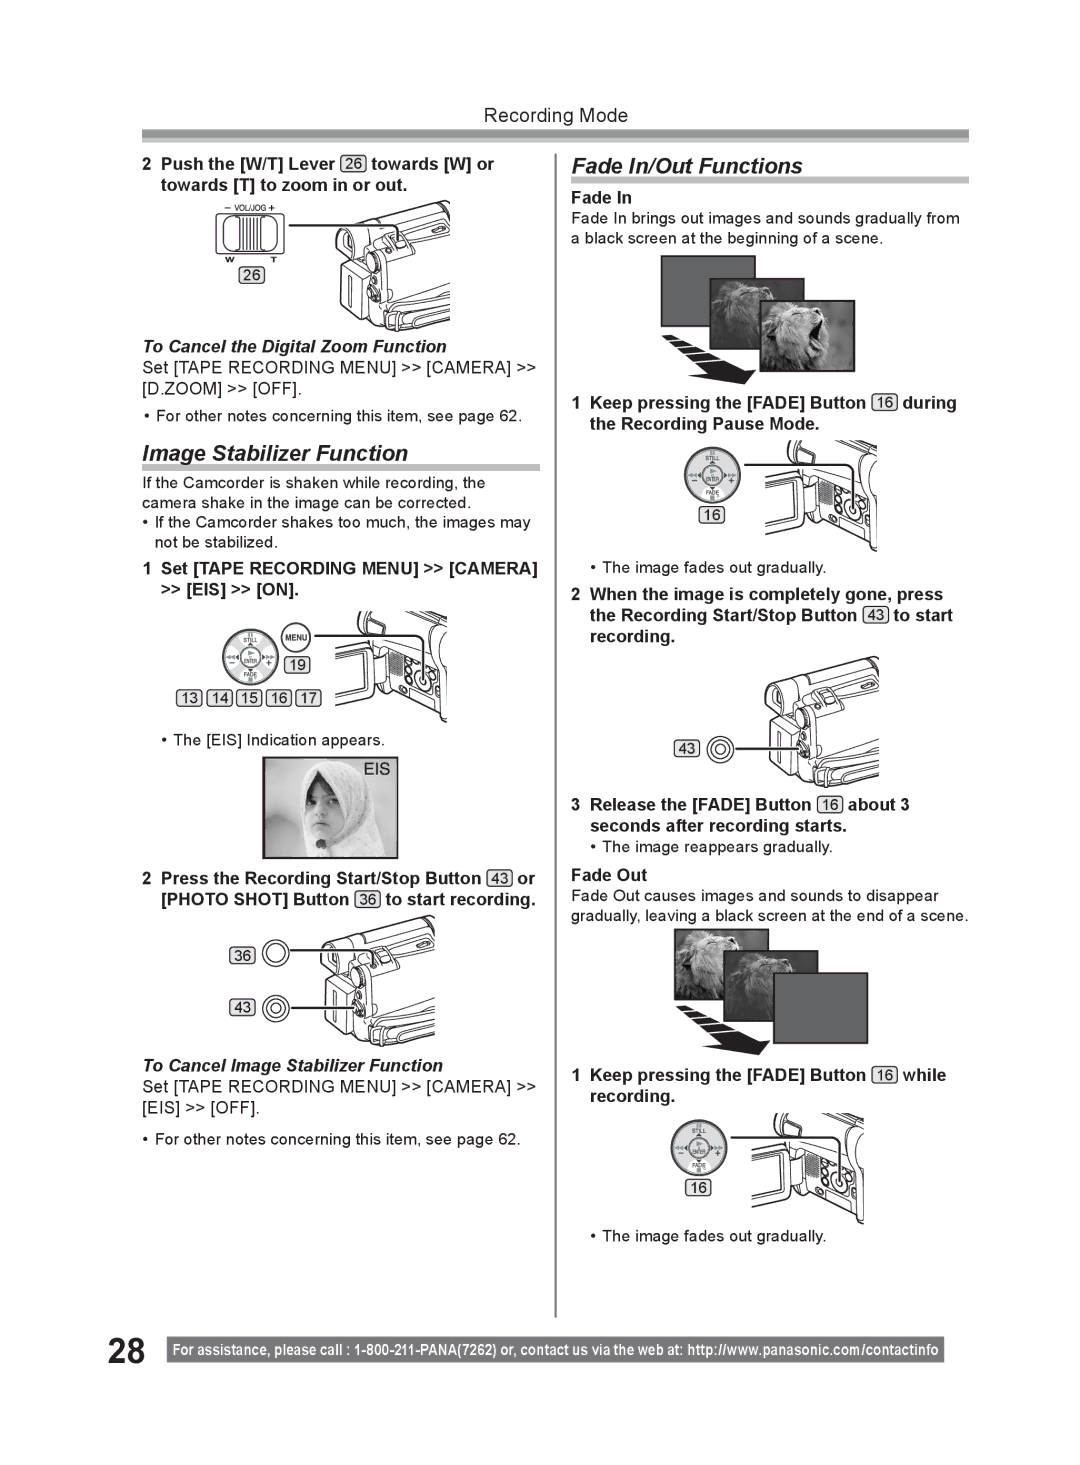
Fade In
Fade In brings out images and sounds gradually from a black screen at the beginning of a scene.
1Keep pressing the [FADE] Button 16 during the Recording Pause Mode.
16
• The image fades out gradually.
2When the image is completely gone, press the Recording Start/Stop Button 43 to start recording.
43
3Release the [FADE] Button 16 about 3 seconds after recording starts.
• The image reappears gradually.
Fade Out
Fade Out causes images and sounds to disappear gradually, leaving a black screen at the end of a scene.
1Keep pressing the [FADE] Button 16 while recording.
16
• The image fades out gradually.
28 |
|
For assistance, please call : | |
|