3.Use the Endura WS5000 application to transfer the XML file to the CM9700MDD-EVS through the Endura network, as described in the following steps:
a.Click the Devices tab in the WS5000 Setup window.
b.Navigate to the CM9700MDD-EVS unit.
A NOTE ABOUT CM9700MDD-EVS DEVICE NAMES IN THE WS5000 APPLICATION:
The WS5000 application assigns a generic default name to each CM9700MDD-EVS unit (it does not use the name assigned through the CM9700-MGR software). Therefore it can be impossible to recognize individual CM9700MDD-EVS units in this application.
It is recommended (although not essential in a single-node system) that you connect each CM9700MDD-EVS unit to the Endura network one at a time, and then edit the device name in the WS5000 Setup window and save the changes. This will allow you to identify individual CM9700MDD-EVS units from within the WS5000 application.
In a multi-node matrix system, it is strongly recommended to:
•follow this additional step of connecting each CM9700MDD-EVS unit to the network one at a time and changing the device name in the WS5000 Setup window, and
•include the node name in each CM9700MDD-EVS device name. This will allow you to transfer the correct XML file to each CM9700MDD-EVS unit, as described in step f.
c.Click the “…” button beside the MDD file field. The Open File dialog box opens.
d.Navigate to the folder containing the CM9700MDD-EVS XML file. This is the same folder used when exporting configuration files from the CM9700-MGR, as described in step 1. The XML file can be located on a hard drive or a floppy disk.
e.Click the XML file, and then click Open (in a multi-node matrix system, be sure to click the correct XML file; look for the node name in the XML file name).
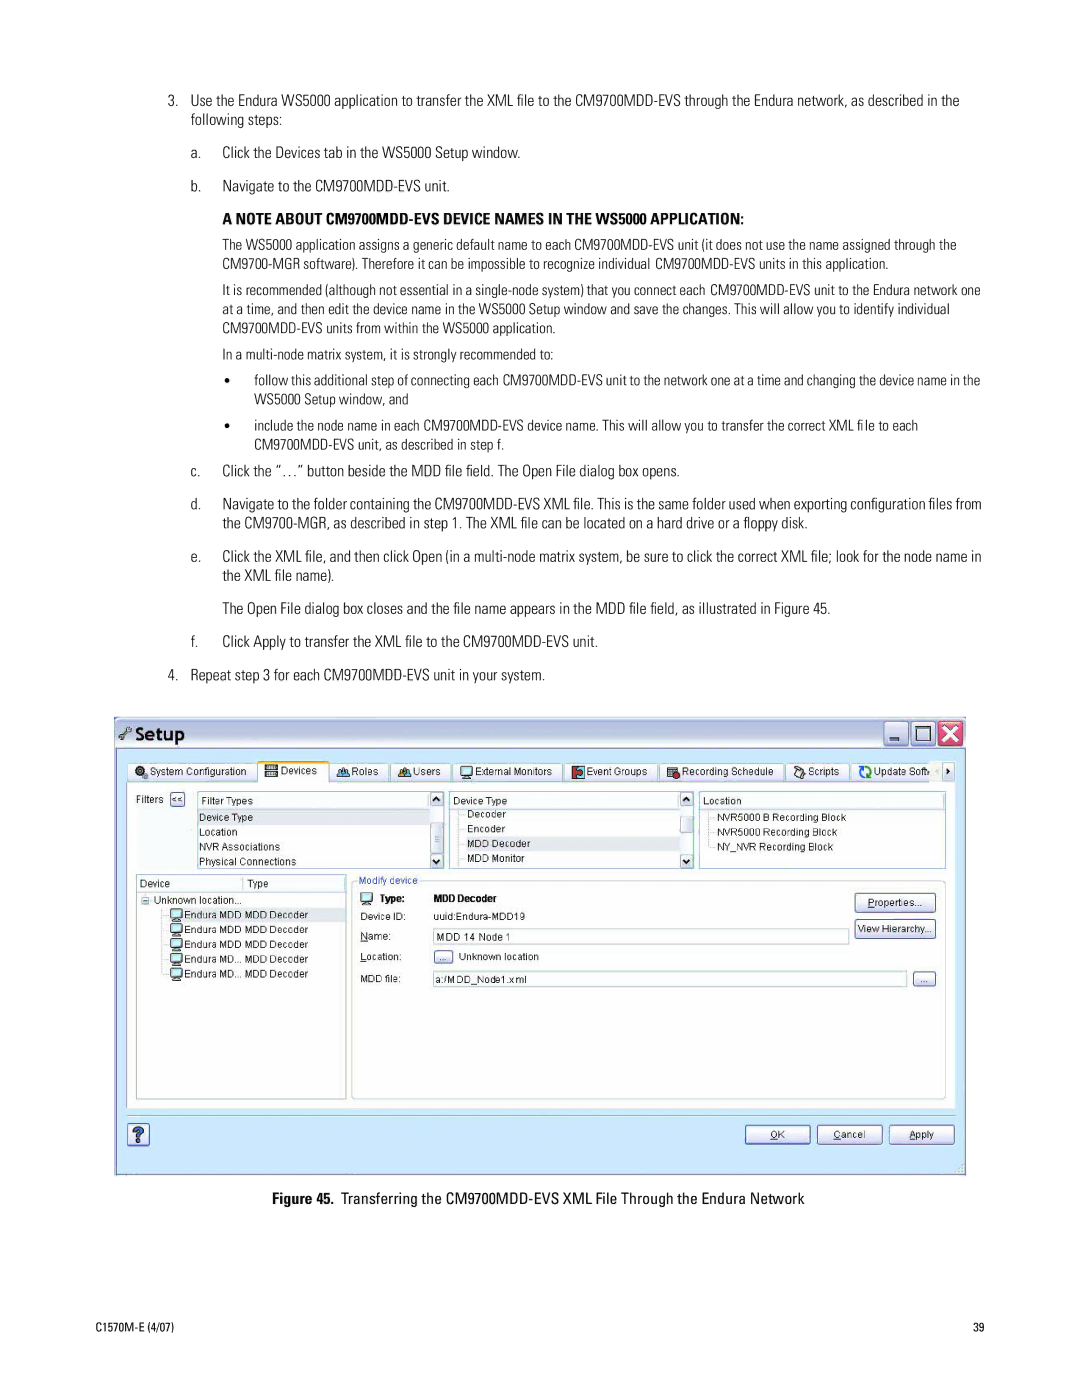
The Open File dialog box closes and the file name appears in the MDD file field, as illustrated in Figure 45.
f.Click Apply to transfer the XML file to the CM9700MDD-EVS unit.
4.Repeat step 3 for each CM9700MDD-EVS unit in your system.
Figure 45. Transferring the CM9700MDD-EVS XML File Through the Endura Network

