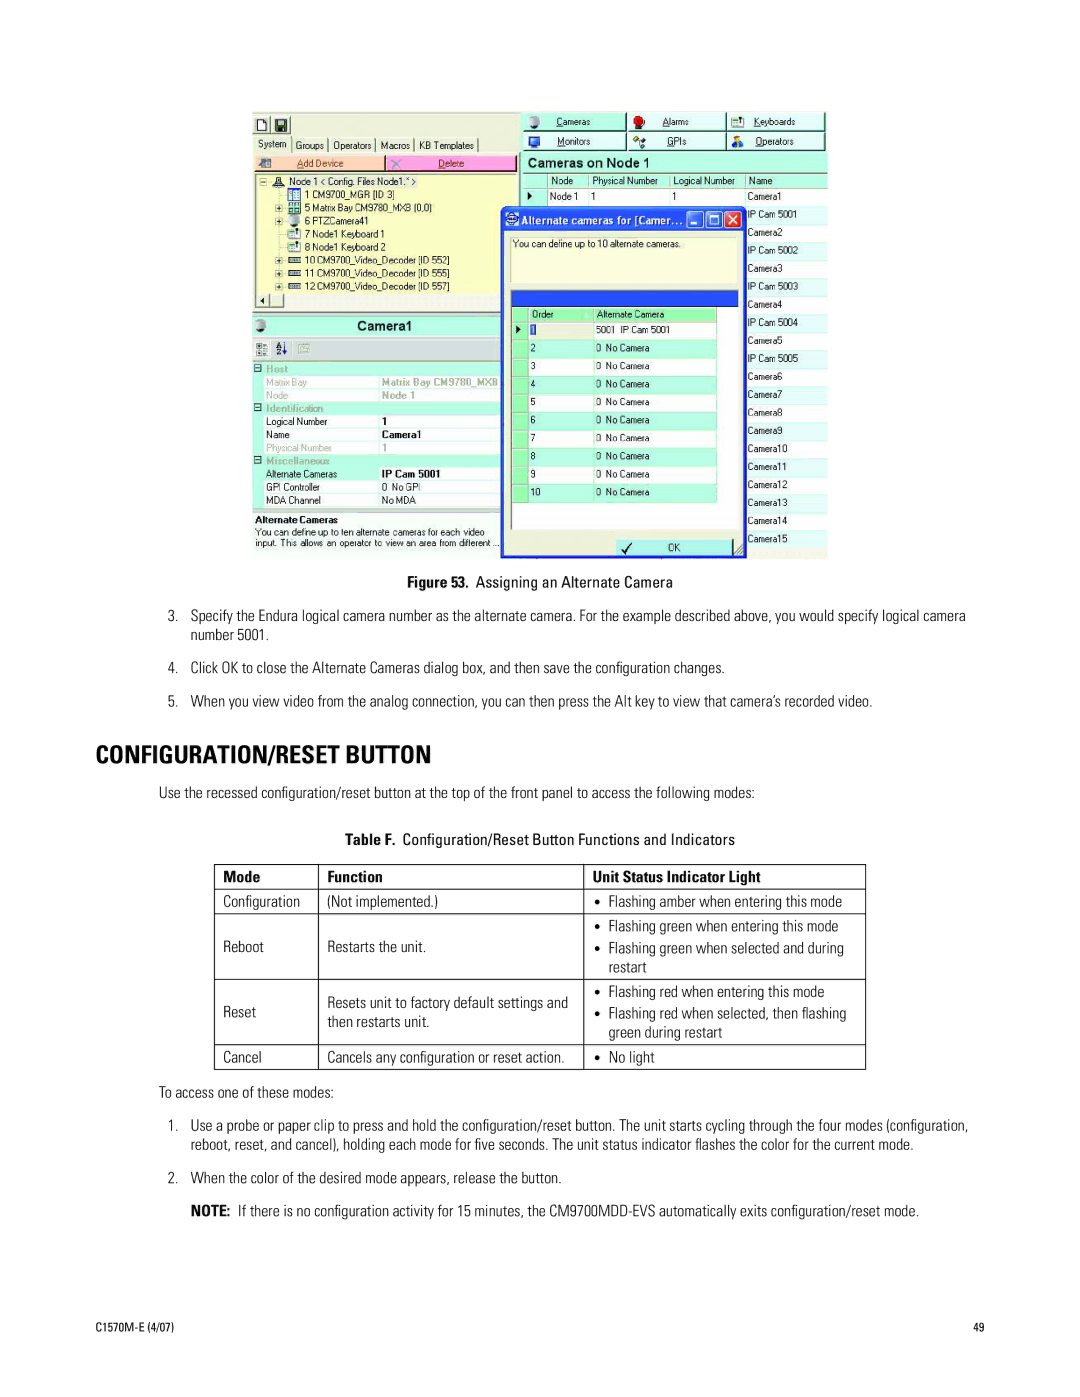
Figure 53. Assigning an Alternate Camera
3.Specify the Endura logical camera number as the alternate camera. For the example described above, you would specify logical camera number 5001.
4.Click OK to close the Alternate Cameras dialog box, and then save the configuration changes.
5.When you view video from the analog connection, you can then press the Alt key to view that camera’s recorded video.
CONFIGURATION/RESET BUTTON
Use the recessed configuration/reset button at the top of the front panel to access the following modes:
Table F. Configuration/Reset Button Functions and Indicators
Mode | Function | Unit Status Indicator Light | |
|
|
| |
Configuration | (Not implemented.) | • Flashing amber when entering this mode | |
|
| • Flashing green when entering this mode | |
Reboot | Restarts the unit. | • Flashing green when selected and during | |
|
| restart | |
|
|
| |
| Resets unit to factory default settings and | • Flashing red when entering this mode | |
Reset | • Flashing red when selected, then flashing | ||
then restarts unit. | |||
| green during restart | ||
|
| ||
|
|
| |
Cancel | Cancels any configuration or reset action. | • No light |
To access one of these modes:
1.Use a probe or paper clip to press and hold the configuration/reset button. The unit starts cycling through the four modes (configuration, reboot, reset, and cancel), holding each mode for five seconds. The unit status indicator flashes the color for the current mode.
2.When the color of the desired mode appears, release the button.
NOTE: If there is no configuration activity for 15 minutes, the
| 49 |
