Connecting a VCR
1
2
3
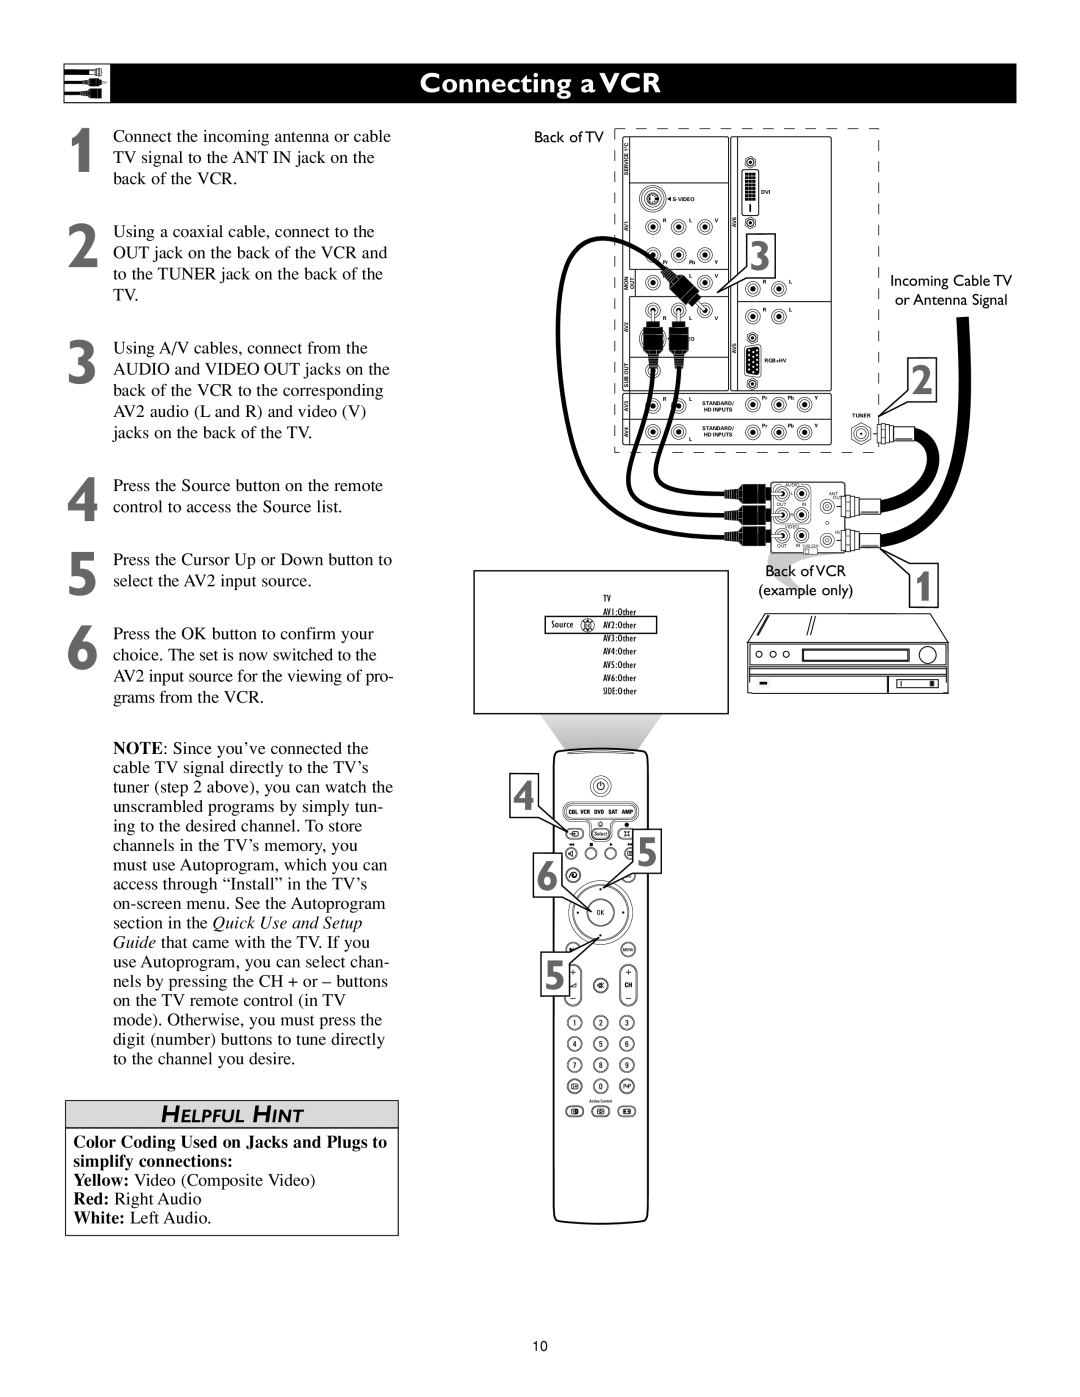
Connect the incoming antenna or cable TV signal to the ANT IN jack on the back of the VCR.
Using a coaxial cable, connect to the OUT jack on the back of the VCR and to the TUNER jack on the back of the TV.
Using A/V cables, connect from the AUDIO and VIDEO OUT jacks on the back of the VCR to the corresponding AV2 audio (L and R) and video (V) jacks on the back of the TV.
Back of TV
C |
|
|
|
|
|
|
|
2 |
|
|
|
|
|
|
|
SERVICE 1 |
|
|
|
|
|
|
|
|
|
|
|
| DVI |
|
|
| G |
|
|
|
|
| |
AV1 | R | L | V | AV6 |
|
|
|
|
|
| 3 |
|
| ||
| Pr | Pb | Y |
|
|
| |
MON | OUT | L | V |
|
|
| |
|
|
| R | L |
| ||
|
|
|
|
|
| ||
|
|
|
|
| R | L |
|
AV2 | R | L | V |
|
|
|
|
|
|
|
|
|
|
| |
|
|
|
| AV5 |
|
|
|
SUB OUT |
|
|
|
| RGB+HV |
|
|
|
|
|
|
|
|
| |
AV3 | R | L | STANDARD/ | Pr | Pb | Y | |
|
|
|
|
| |||
|
| HD INPUTS |
|
| TUNER | ||
|
|
|
|
|
|
| |
AV4 |
|
| STANDARD/ | Pr | Pb | Y | |
|
|
|
|
| |||
R | L | HD INPUTS |
|
|
| ||
|
|
|
|
|
| ||
Incoming Cable TV or Antenna Signal
2
4
5
6
Press the Source button on the remote control to access the Source list.
Press the Cursor Up or Down button to select the AV2 input source.
Press the OK button to confirm your choice. The set is now switched to the AV2 input source for the viewing of pro- grams from the VCR.
TV
AV1:Other
Source ![]() OK
OK![]() AV2:Other
AV2:Other
AV3:Other
AV4:Other
AV5:Other
AV6:Other
SIDE:Other
AUDIO
L | ANT |
| OUT |
OUT | IN |
R |
|
VIDEO | |
| IN |
OUT | IN CH3 CH4 |
Back of VCR | 1 | |
(example only) | ||
|
NOTE: Since you’ve connected the cable TV signal directly to the TV’s tuner (step 2 above), you can watch the unscrambled programs by simply tun- ing to the desired channel. To store channels in the TV’s memory, you must use Autoprogram, which you can access through “Install” in the TV’s
4
6
![]()
![]()
![]()
![]() 5
5
use Autoprogram, you can select chan- nels by pressing the CH + or – buttons on the TV remote control (in TV mode). Otherwise, you must press the digit (number) buttons to tune directly to the channel you desire.
5![]()
![]()
![]()
HELPFUL HINT
Color Coding Used on Jacks and Plugs to simplify connections:
Yellow: Video (Composite Video)
Red: Right Audio
White: Left Audio.
10