Labeling the Audio/Video Input Sources
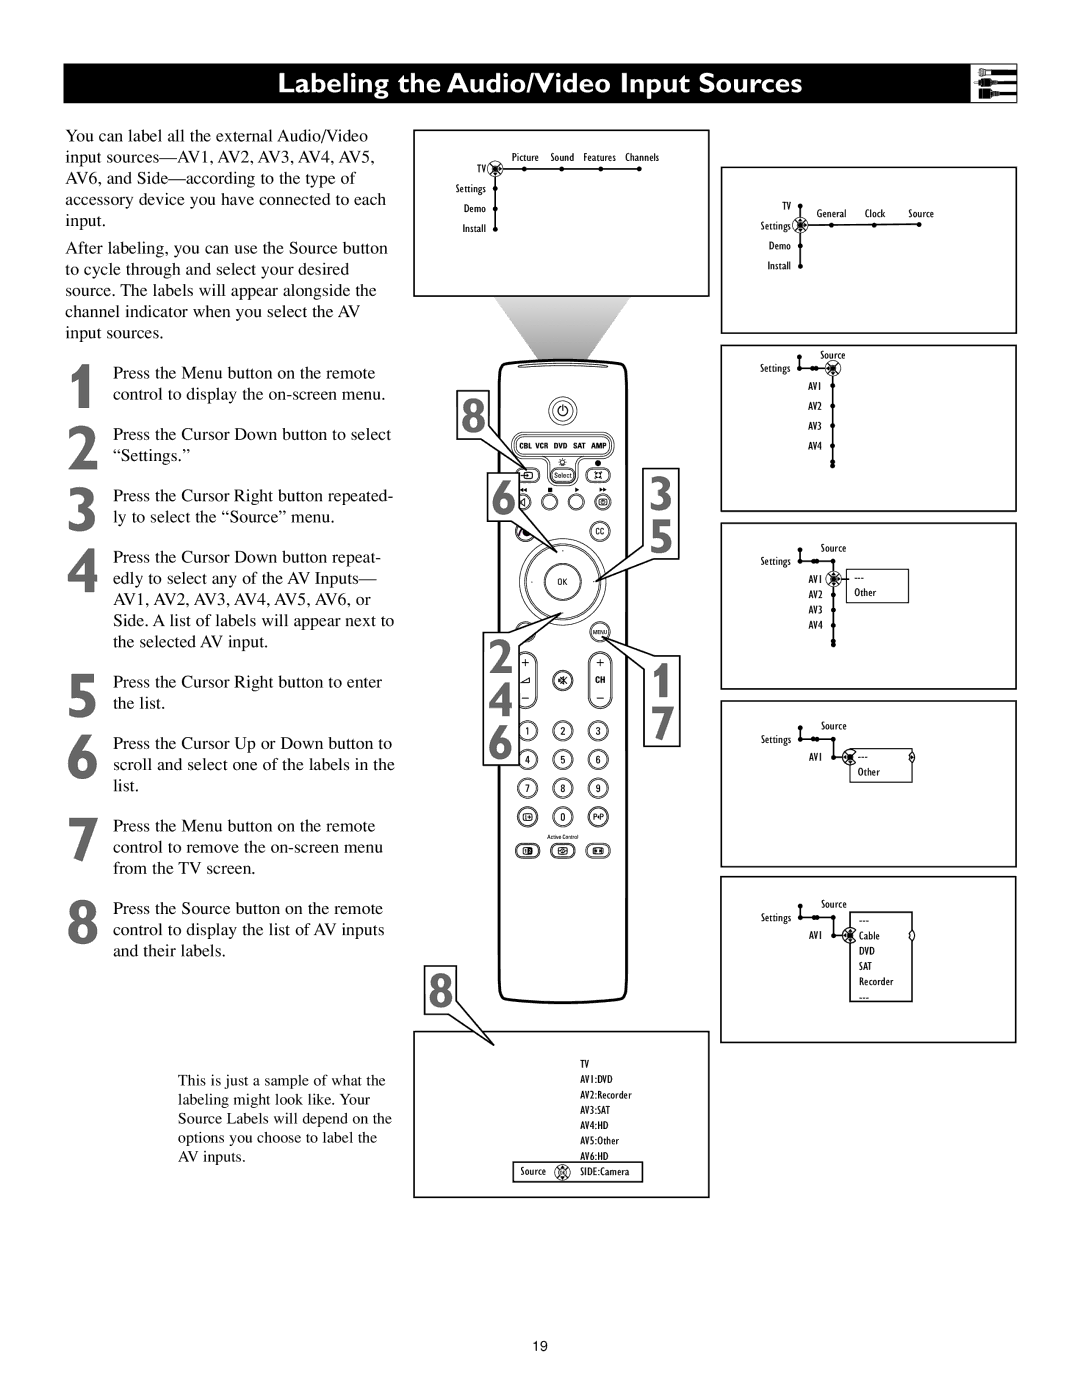
You can label all the external Audio/Video input
After labeling, you can use the Source button to cycle through and select your desired source. The labels will appear alongside the channel indicator when you select the AV input sources.
1 Press the Menu button on the remote control to display the
2 Press the Cursor Down button to select “Settings.”
TV ![]()
Settings
Demo
Install
8
Picture Sound Features Channels
TV
General Clock Source
Settings ![]()
Demo
Install
Source
Settings
AV1
AV2
AV3
AV4
3 Press the Cursor Right button repeated- ly to select the “Source” menu.
4 Press the Cursor Down button repeat- edly to select any of the AV Inputs— AV1, AV2, AV3, AV4, AV5, AV6, or Side. A list of labels will appear next to the selected AV input.
5 Press the Cursor Right button to enter the list.
6 Press the Cursor Up or Down button to scroll and select one of the labels in the list.
7 Press the Menu button on the remote control to remove the
8 Press the Source button on the remote control to display the list of AV inputs and their labels.
6![]()
![]()
![]()
![]() 3
3
5
2
4 ![]()
![]()
![]() 1
1
6![]()
![]()
![]() 7
7
8
Source |
|
Settings |
|
AV1 | |
AV2 | Other |
AV3 |
|
AV4 |
|
Source |
|
Settings |
|
AV1 | |
| Other |
Source |
|
Settings | |
AV1 | Cable |
| DVD |
| SAT |
| Recorder |
|
|
|
| TV | |
This is just a sample of what the |
|
| AV1:DVD | |
labeling might look like. Your |
|
| AV2:Recorder | |
|
| AV3:SAT | ||
Source Labels will depend on the |
|
| ||
|
| AV4:HD | ||
options you choose to label the |
|
| ||
|
| AV5:Other | ||
AV inputs. |
|
| AV6:HD |
|
|
| Source OK | SIDE:Camera |
|
|
|
|
|
|
|
|
|
|
|
19
