OSD – On Screen Display, the user's guide on the picture screen
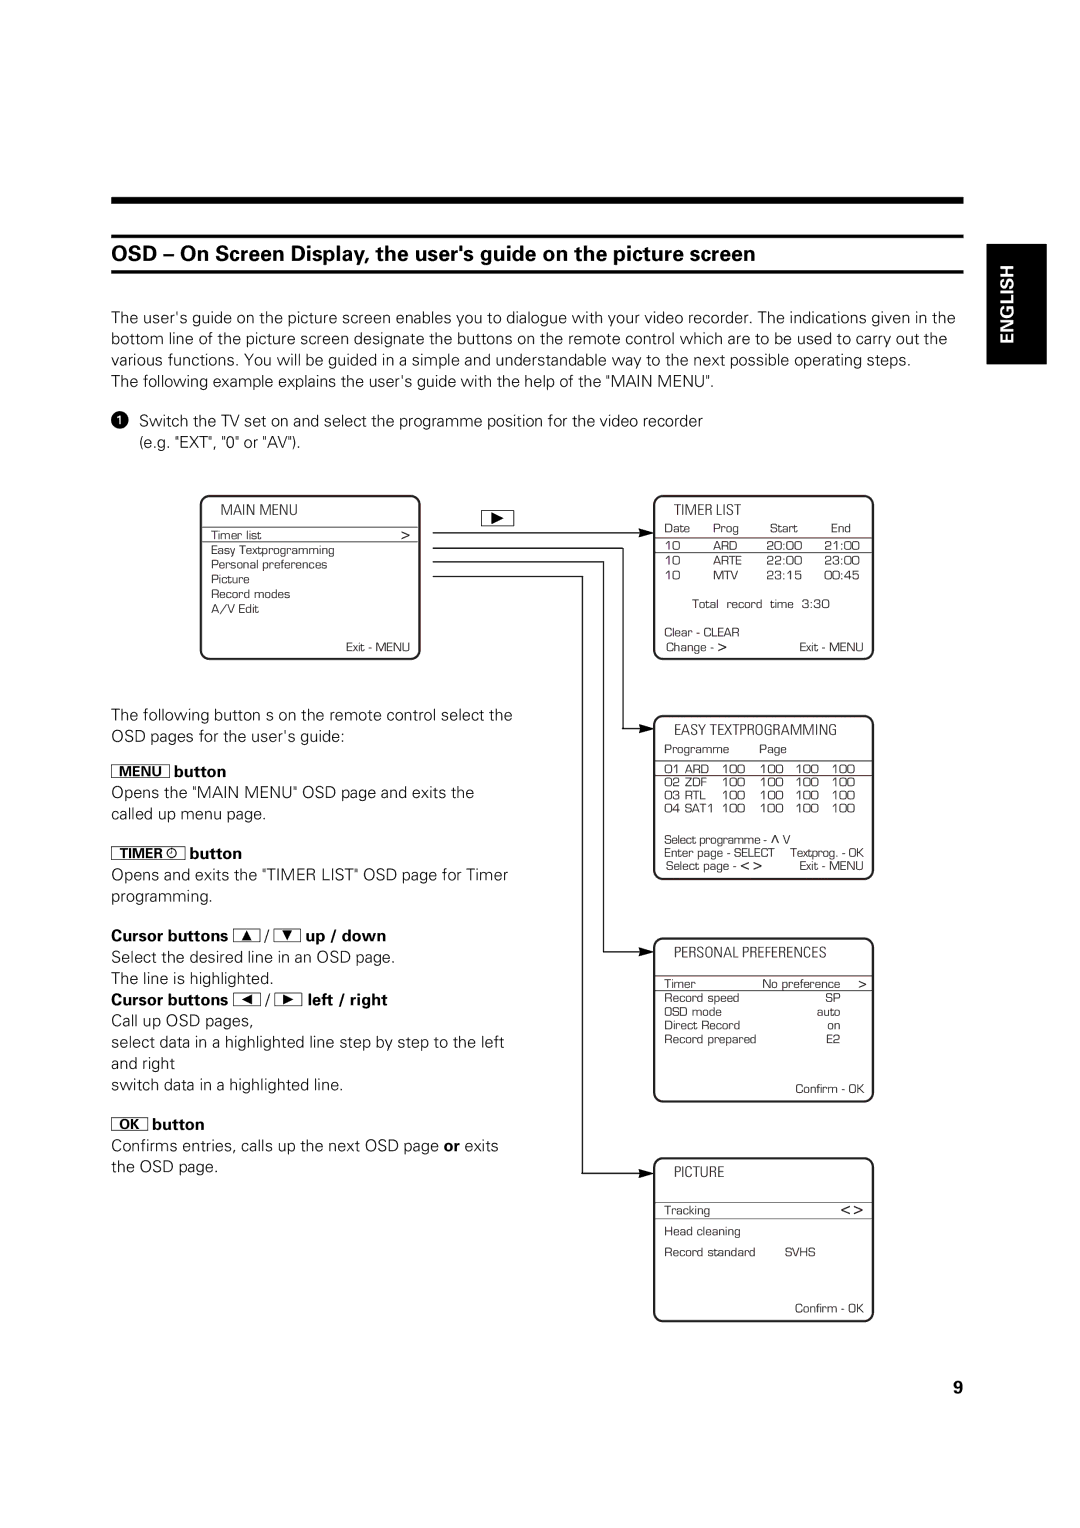
The user's guide on the picture screen enables you to dialogue with your video recorder. The indications given in the bottom line of the picture screen designate the buttons on the remote control which are to be used to carry out the various functions. You will be guided in a simple and understandable way to the next possible operating steps.
The following example explains the user's guide with the help of the "MAIN MENU".
!Switch the TV set on and select the programme position for the video recorder (e.g. "EXT", "0" or "AV").
ENGLISH
MAIN MENU |
|
| G | |||
|
|
| ||||
Timer list | > |
|
|
|
|
|
|
|
|
| |||
Easy Textprogramming |
|
|
|
|
|
|
|
|
|
|
|
| |
Personal preferences |
|
|
|
|
|
|
|
|
|
|
|
| |
Picture |
|
|
|
|
|
|
|
|
|
|
|
| |
Record modes |
|
|
|
|
|
|
A/V Edit |
|
|
|
|
|
|
Exit - MENU
The following button s on the remote control select the
OSD pages for the user's guide:
lbutton
Opens the "MAIN MENU" OSD page and exits the called up menu page.
obutton
Opens and exits the "TIMER LIST" OSD page for Timer programming.
Cursor buttons H/ Iup / down
Select the desired line in an OSD page.
The line is highlighted.
Cursor buttons F/ Gleft / right
Call up OSD pages,
select data in a highlighted line step by step to the left and right
switch data in a highlighted line.
Bbutton
Confirms entries, calls up the next OSD page or exits the OSD page.
TIMER LIST
Date | Prog | Start | End |
10 | ARD | 20:00 | 21:00 |
10 | ARTE | 22:00 | 23:00 |
10 | MTV | 23:15 | 00:45 |
Total record time 3:30
Clear - CLEAR
Change - > Exit - MENU
EASY TEXTPROGRAMMING
Programme Page
01 | ARD | 100 | 100 | 100 | 100 |
02 | ZDF | 100 | 100 | 100 | 100 |
03 | RTL | 100 | 100 | 100 | 100 |
04 | SAT1 100 | 100 | 100 | 100 | |
Select programme - ^ V |
| ||||
Enter page - SELECT | Textprog. - OK | ||||
Select page - < > | Exit - MENU | ||||
PERSONAL PREFERENCES | |||||
|
|
| |||
Timer |
| No preference > | |||
Record speed |
|
| SP | ||
OSD mode |
| auto | |||
Direct Record |
|
| on | ||
Record prepared |
|
| E2 | ||
|
|
|
| Confirm - OK | |
PICTURE |
|
|
| ||
Tracking |
|
|
| < > | |
Head cleaning |
|
|
| ||
Record standard |
| SVHS |
| ||
Confirm - OK
9
