4. Installing and Using Software
4.5 Using Driver and Service Mode
4.5.1 Service Mode display
Press the Service Mode button in the “Test Mode” screen to open the “Service Information” screen.
a) Screen items
This screen shows service information and DIP switch information for handwriting device.
[Displayed service information]
LED/Sens | Area: | Test board number (See figure below.) |
| Point: | Test address number |
| Status: | Assessment Normal = OK |
|
| Malfunction = E01, ALL, Check |
[Displayed DIP SW information]
Handwriting device DIP switch information (Binary expression)
[SelfTest button]
Perform self test. The button cannot be pressed using the touch screen. Click the button using the mouse without touching the screen. Do not touch the screen until screen changes on the next item b) appears.
Notes:
Perform self test under the following conditions.
¶Make sure that the numbers in the second and fourth boxes from the left in the DIP SW Information are both “0”. Locked low scan mode and ultra low scan mode do not provide a correct assessment.
¶Perform the test with the scan device firmly installed in the plasma display as a correct assessment will not be obtained unless the scan device is correctly installed.
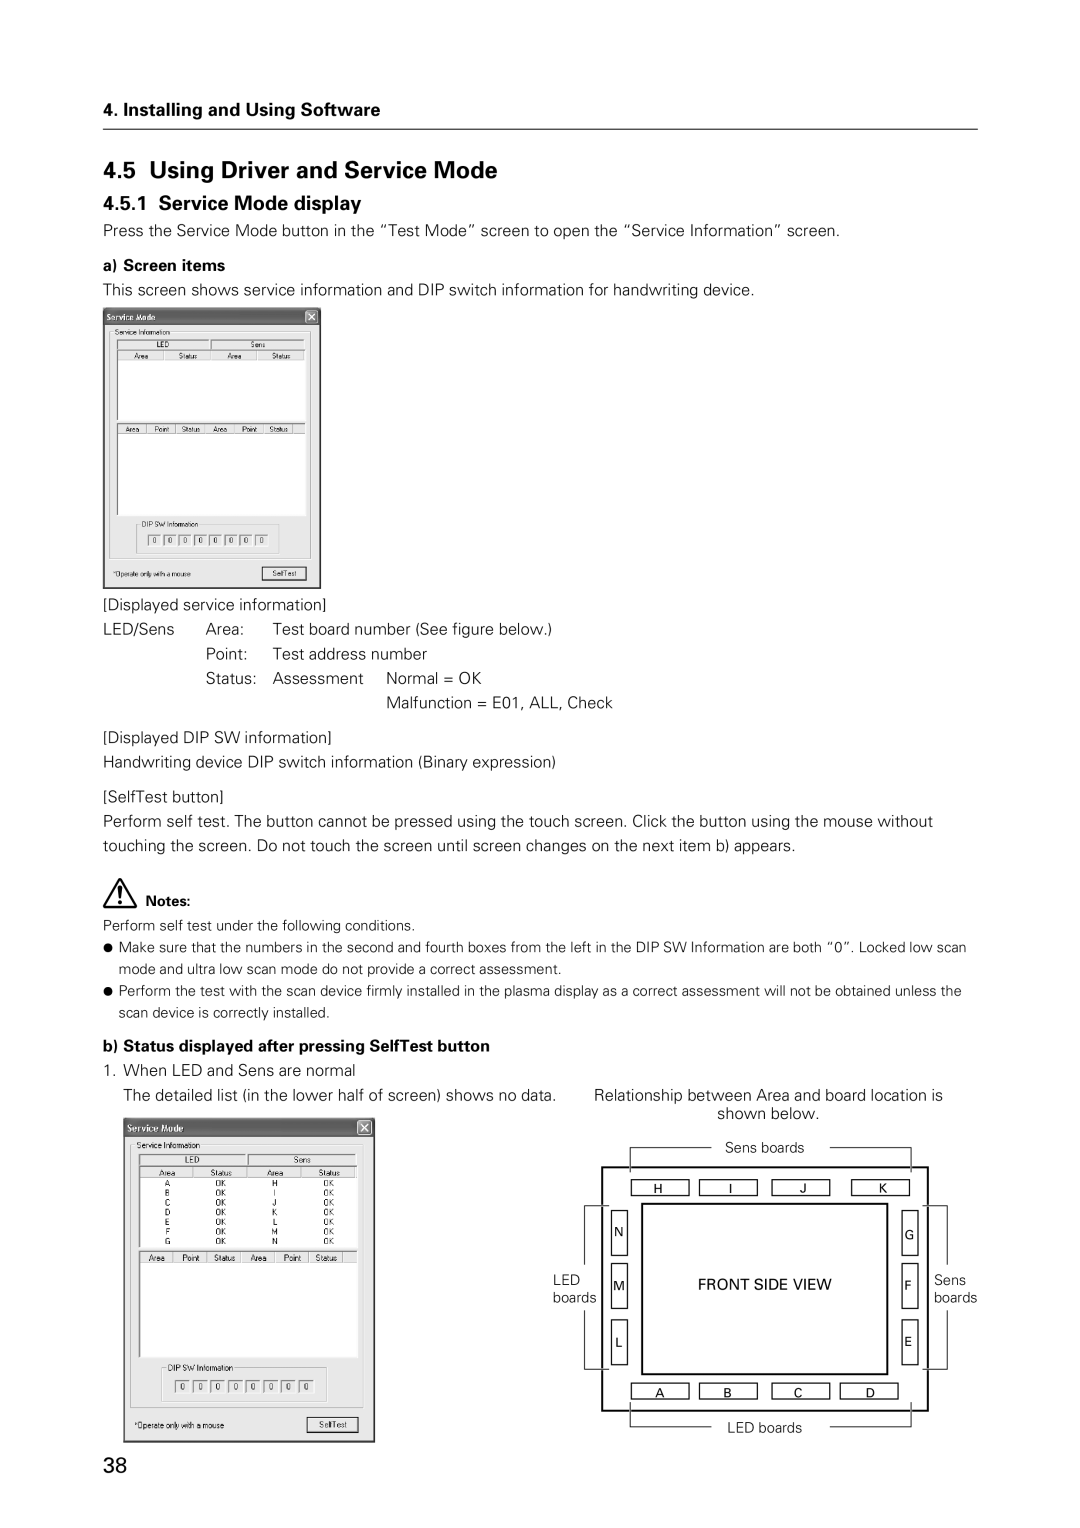
b) Status displayed after pressing SelfTest button |
|
|
|
|
|
|
|
1. When LED and Sens are normal |
|
|
|
|
|
|
|
The detailed list (in the lower half of screen) shows no data. | Relationship between Area and board location is | ||||||
|
|
|
| shown below. | |||
|
|
|
| Sens boards |
|
|
|
|
|
|
|
| |||
|
|
|
|
|
|
|
|
|
|
|
|
|
|
|
|
LED boards
N
M
H |
| I |
| J |
FRONT SIDE VIEW
K
G
F
Sens boards
L
E
A
B
C
D
LED boards
38