12
74
Using External Equipment
Making network connections
To connect to a network, set up the Home Media Gallery through the panel’s menu. Connect to a home network (LAN) via an Ethernet hub or cable directly to a media server.
NOTE
•Although the Home Media Gallery supports
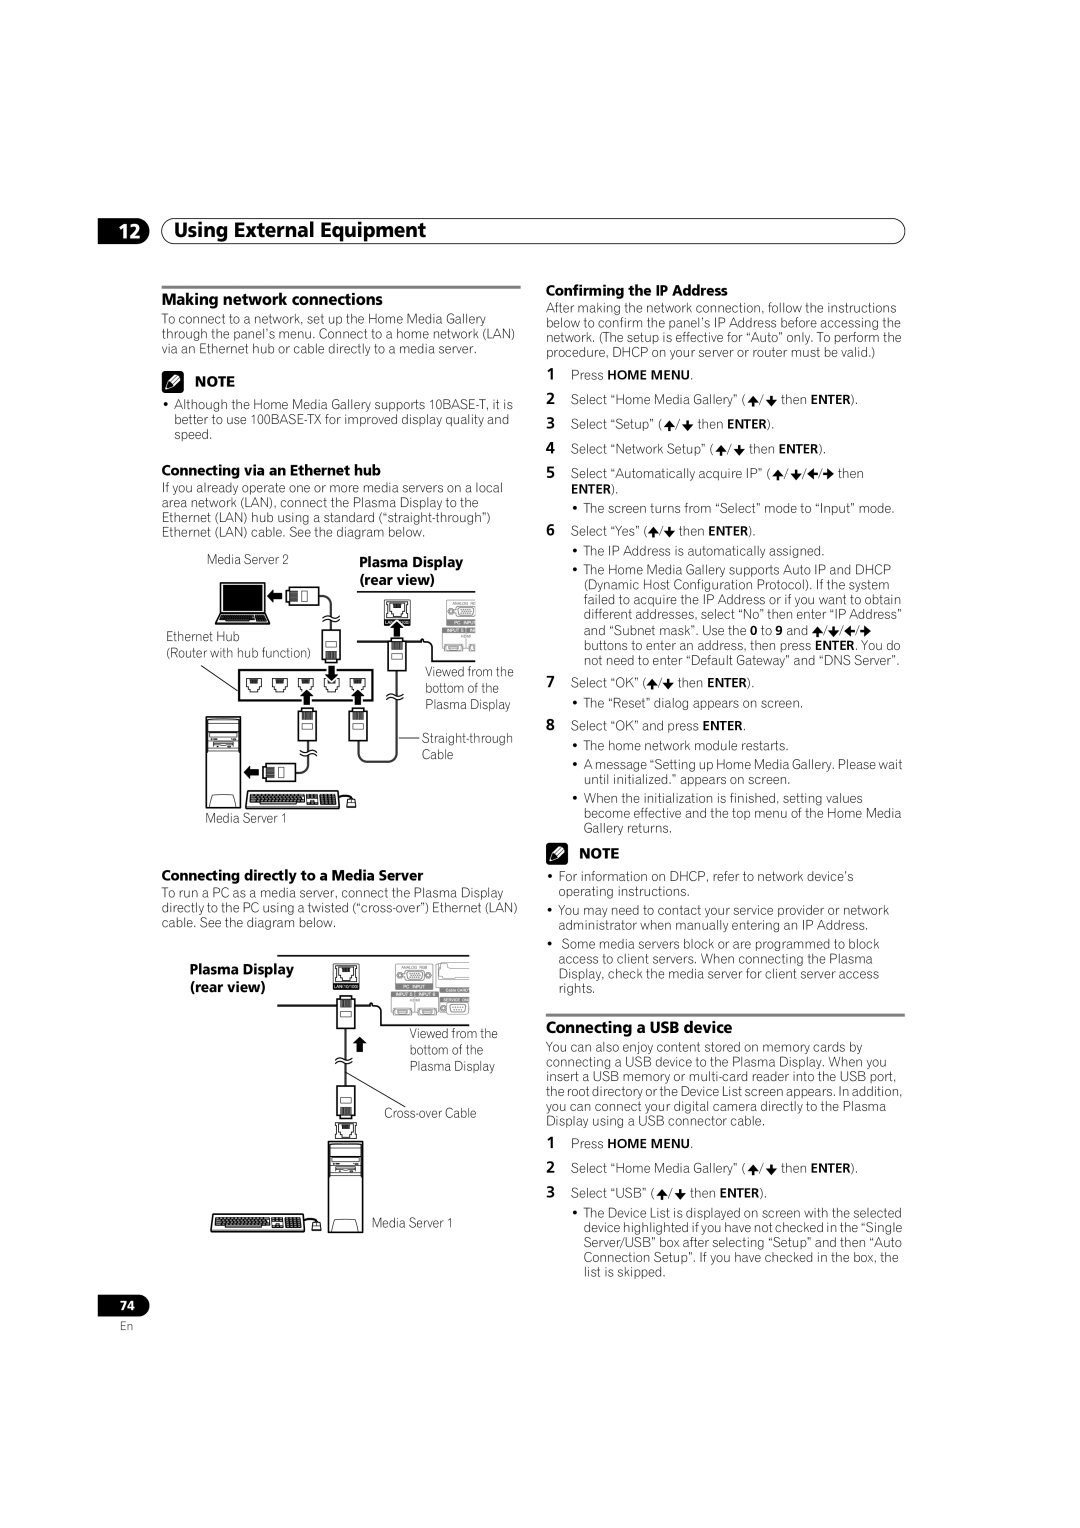
Connecting via an Ethernet hub
If you already operate one or more media servers on a local area network (LAN), connect the Plasma Display to the Ethernet (LAN) hub using a standard
Media Server 2 |
|
| Plasma Display | ||||||
|
|
|
|
|
|
| (rear view) | ||
|
|
|
|
|
|
|
|
|
|
|
|
|
|
|
|
|
|
|
|
|
|
|
|
|
|
|
|
|
|
Ethernet Hub (Router with hub function)
Viewed from the bottom of the Plasma Display
Cable
Media Server 1
Connecting directly to a Media Server
To run a PC as a media server, connect the Plasma Display directly to the PC using a twisted
Plasma Display (rear view)
Viewed from the bottom of the Plasma Display
Media Server 1
Confirming the IP Address
After making the network connection, follow the instructions below to confirm the panel’s IP Address before accessing the network. (The setup is effective for “Auto” only. To perform the procedure, DHCP on your server or router must be valid.)
1Press HOME MENU.
2Select “Home Media Gallery” (![]() /
/![]() then ENTER).
then ENTER).
3Select “Setup” (![]() /
/![]() then ENTER).
then ENTER).
4Select “Network Setup” (![]() /
/![]() then ENTER).
then ENTER).
5Select “Automatically acquire IP” (![]() /
/![]() /
/![]() /
/![]() then
then
ENTER).
•The screen turns from “Select” mode to “Input” mode.
6Select “Yes” (![]() /
/![]() then ENTER).
then ENTER).
•The IP Address is automatically assigned.
•The Home Media Gallery supports Auto IP and DHCP (Dynamic Host Configuration Protocol). If the system failed to acquire the IP Address or if you want to obtain different addresses, select “No” then enter “IP Address”
and “Subnet mask”. Use the 0 to 9 and ![]() /
/![]() /
/![]() /
/![]() buttons to enter an address, then press ENTER. You do not need to enter “Default Gateway” and “DNS Server”.
buttons to enter an address, then press ENTER. You do not need to enter “Default Gateway” and “DNS Server”.
7Select “OK” (![]() /
/![]() then ENTER).
then ENTER).
•The “Reset” dialog appears on screen.
8Select “OK” and press ENTER.
•The home network module restarts.
•A message “Setting up Home Media Gallery. Please wait until initialized.” appears on screen.
•When the initialization is finished, setting values become effective and the top menu of the Home Media Gallery returns.
NOTE
•For information on DHCP, refer to network device’s operating instructions.
•You may need to contact your service provider or network administrator when manually entering an IP Address.
•Some media servers block or are programmed to block access to client servers. When connecting the Plasma Display, check the media server for client server access rights.
Connecting a USB device
You can also enjoy content stored on memory cards by connecting a USB device to the Plasma Display. When you insert a USB memory or
1Press HOME MENU.
2Select “Home Media Gallery” (![]() /
/![]() then ENTER).
then ENTER).
3Select “USB” (![]() /
/![]() then ENTER).
then ENTER).
•The Device List is displayed on screen with the selected device highlighted if you have not checked in the “Single Server/USB” box after selecting “Setup” and then “Auto Connection Setup”. If you have checked in the box, the list is skipped.
En