
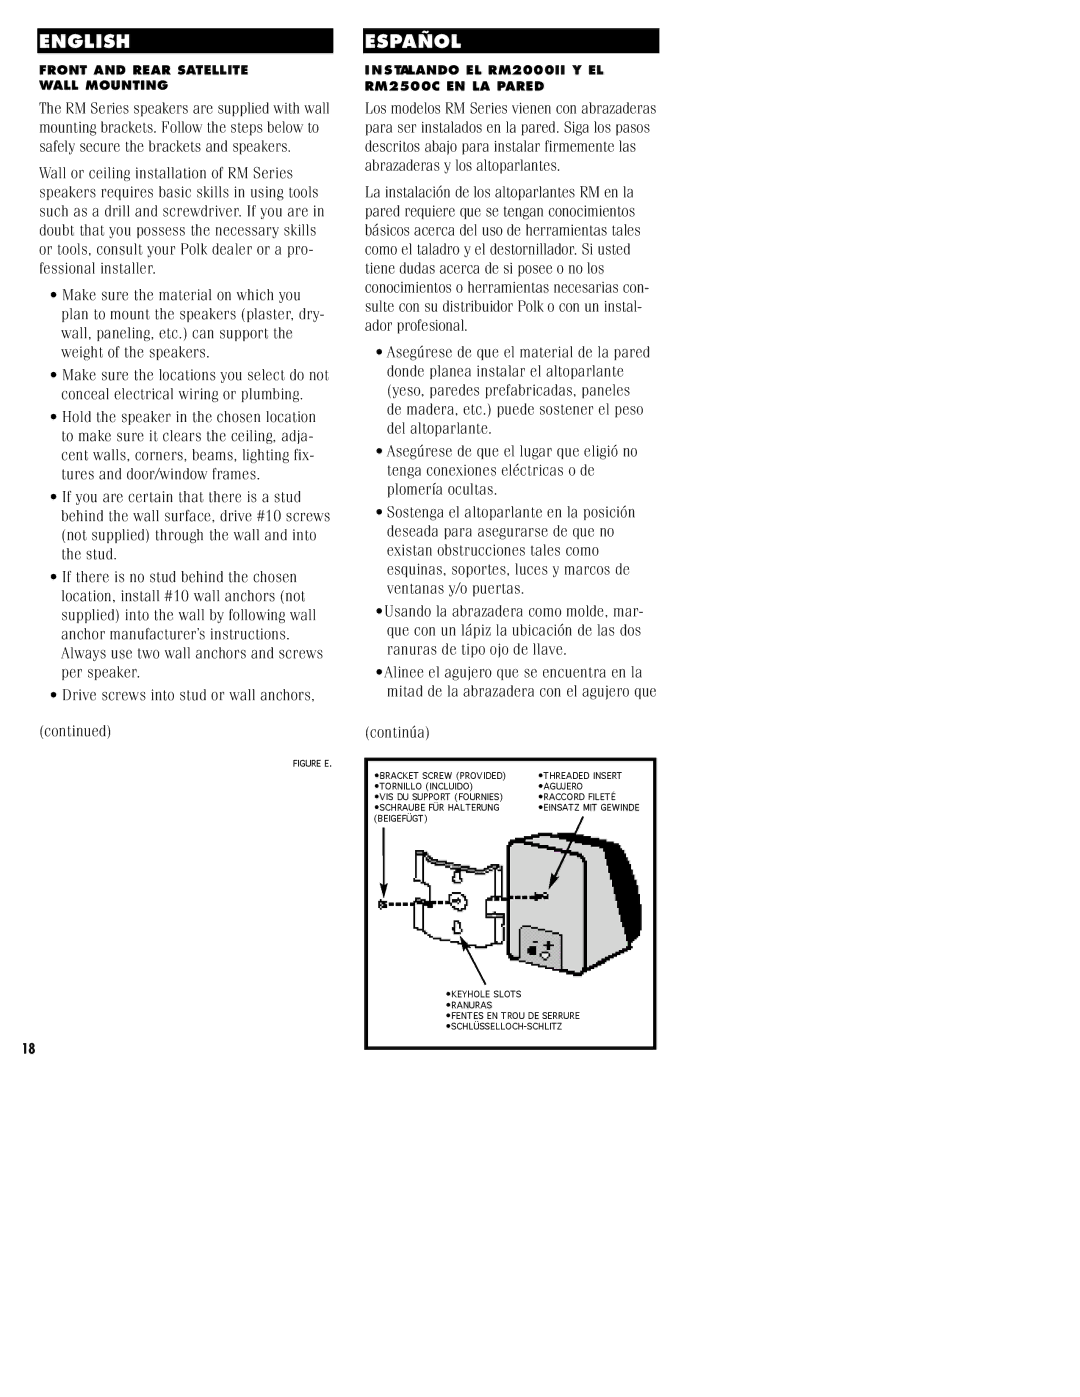
RM3300, RM5300, RM7300 specifications
Polk Audio has long been a key player in the audio industry, renowned for producing high-quality speakers and home theater systems. Among its notable product lineup are the RM series speakers, specifically the RM4300, RM3600, RM4600, RM7200, and RM3300 models. Each of these speakers boasts unique features and technologies that cater to audiophiles and casual listeners alike.The RM4300 is a compact bookshelf speaker that delivers impressive sound quality in a small package. Its advanced driver technology includes a 5.25-inch Dynamic Balance driver, which provides a well-balanced response across frequencies. The speaker also features a 1-inch silk dome tweeter, ensuring clear and detailed highs. The RM4300 is designed for versatility, making it an excellent choice for both stereo and multi-channel setups.
The RM3600 is another high-performing bookshelf speaker, recognized for its exceptional detail and clarity. Its design includes a 6.5-inch Dynamic Balance driver paired with a 1-inch tweeter, resulting in enhanced bass performance and a smooth high-frequency response. The RM3600 is perfect for music lovers who appreciate rich sound with a clean presentation, making it suitable for various audio setups, from small rooms to larger spaces.
The RM4600 takes performance up a notch with its superior acoustic design. It features a more expansive 6.5-inch driver for deep, resonant bass, complemented by a 1-inch tweeter for precise treble. This model also includes Polk's patented PowerPort technology, which significantly reduces distortion while increasing bass response. The RM4600 is ideal for home theater enthusiasts seeking immersive audio experiences.
For those who desire a more robust surround sound configuration, the RM7200 serves as an outstanding floor-standing speaker. It incorporates dual 6.5-inch woofers alongside a 1-inch tweeter, delivering a strong, full-range sound that can fill larger rooms. The RM7200’s design emphasizes a wide soundstage, making it an excellent option for those looking to create an impactful home theater experience.
Finally, the RM3300 is engineered as a dedicated center channel speaker, ensuring dialog clarity and seamless integration with other RM series speakers. This model utilizes dual 5.25-inch drivers and a 1-inch tweeter, resulting in precise sound reproduction. The RM3300 is built with a focus on minimizing sound distortion, facilitating smoother transitions between channels during movie playback.
In summary, the Polk Audio RM series, including the RM4300, RM3600, RM4600, RM7200, and RM3300, offers a diverse selection of speakers designed for exceptional audio performance. Each model incorporates innovative technologies and driver configurations that appeal to both music enthusiasts and home theater aficionados, ensuring that Polk Audio remains a trusted name in home entertainment solutions.