Recording
Making a Recording
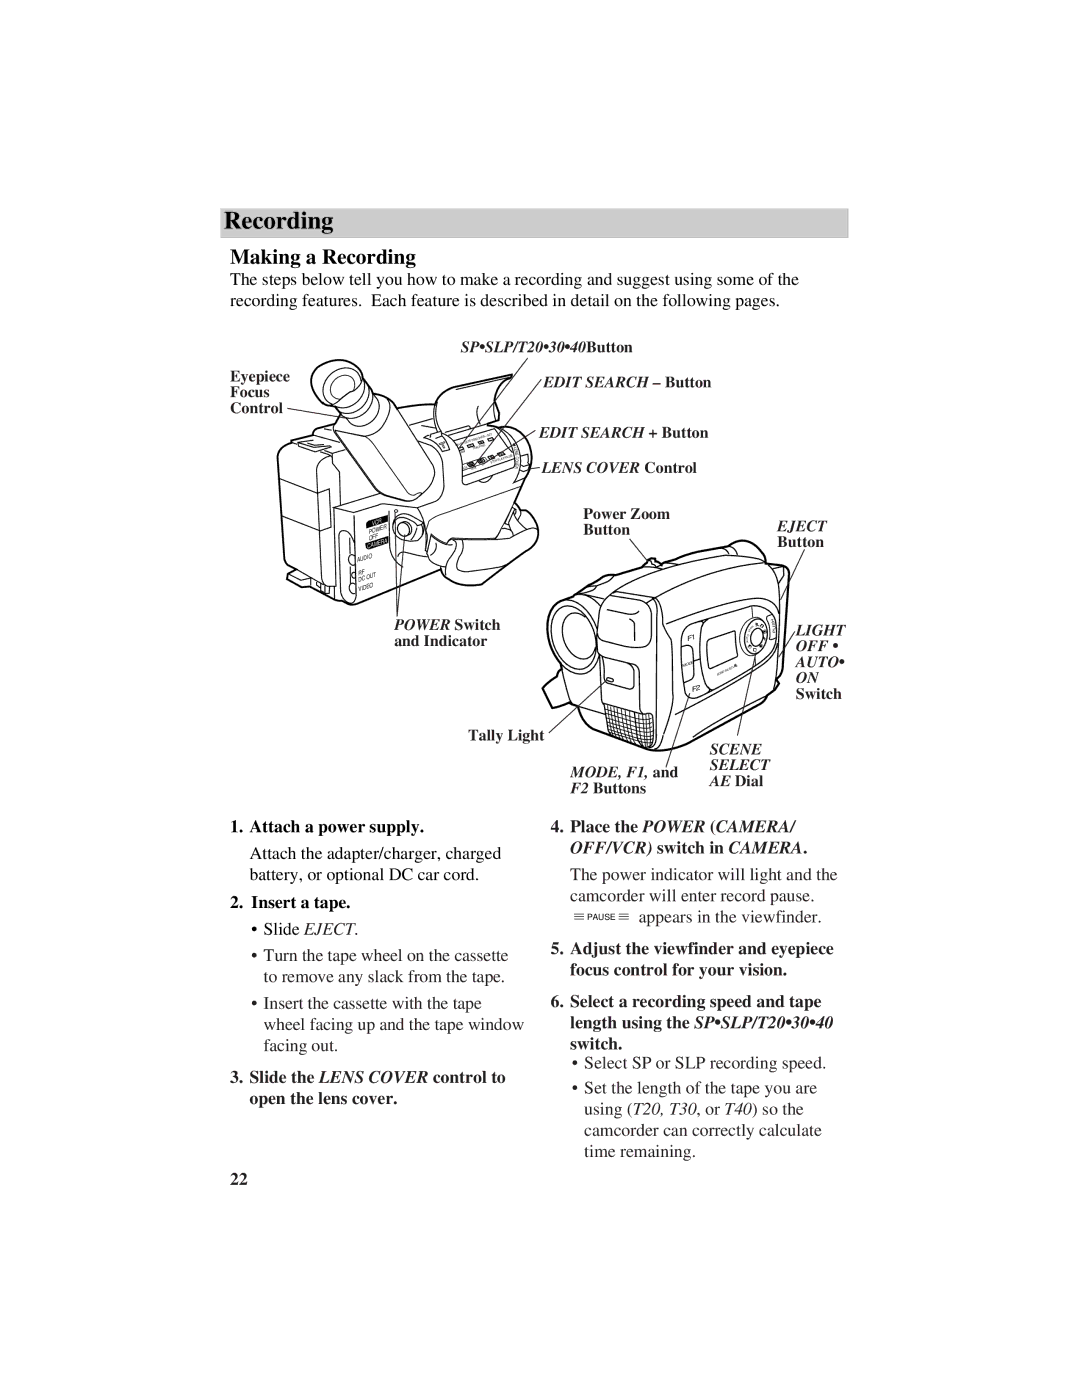
The steps below tell you how to make a recording and suggest using some of the recording features. Each feature is described in detail on the following pages.
SP•SLP/T20•30•40Button
Eyepiece
Focus
Control
| ||
•30•40 | DATE/TIME/CHAR | |
TRACKING | ||
| ||
R/M | ||
| PLAY/PAUSE | |
| STOP | |
| FF | |
RCH REW | ||
L E N S
C
O
V
E
R
EDIT SEARCH – Button
EDIT SEARCH + Button
LENS COVER Control
| VCR | |
| POWER | |
| OFF | |
| CAMERA | |
AUDIO | ||
RF | OUT | |
DC | ||
| ||
VIDEO | ||
Power Zoom
ButtonEJECT
Button
POWER Switch and Indicator
F1
MODE
SELECT
SCENE
F2
M
TO
U
A
A
N
H S U P
LIGHT OFF • AUTO•
ON
Switch
Tally Light
|
| SCENE |
|
| MODE, F1, and | SELECT |
|
| AE Dial |
| |
| F2 Buttons |
| |
|
|
| |
|
|
|
|
1. Attach a power supply. | 4. Place the POWER (CAMERA/ | ||
Attach the adapter/charger, charged | OFF/VCR) switch in CAMERA. | ||
|
|
| |
battery, or optional DC car cord. | The power indicator will light and the | ||
2. Insert a tape. | camcorder will enter record pause. | ||
|
|
| |
![]() PAUSE
PAUSE ![]() appears in the viewfinder.
appears in the viewfinder.
• Slide EJECT.
•Turn the tape wheel on the cassette to remove any slack from the tape.
•Insert the cassette with the tape wheel facing up and the tape window facing out.
3.Slide the LENS COVER control to open the lens cover.
5.Adjust the viewfinder and eyepiece focus control for your vision.
6.Select a recording speed and tape length using the SP•SLP/T20•30•40 switch.
•Select SP or SLP recording speed.
•Set the length of the tape you are using (T20, T30, or T40) so the camcorder can correctly calculate time remaining.
22