Connections & Setup
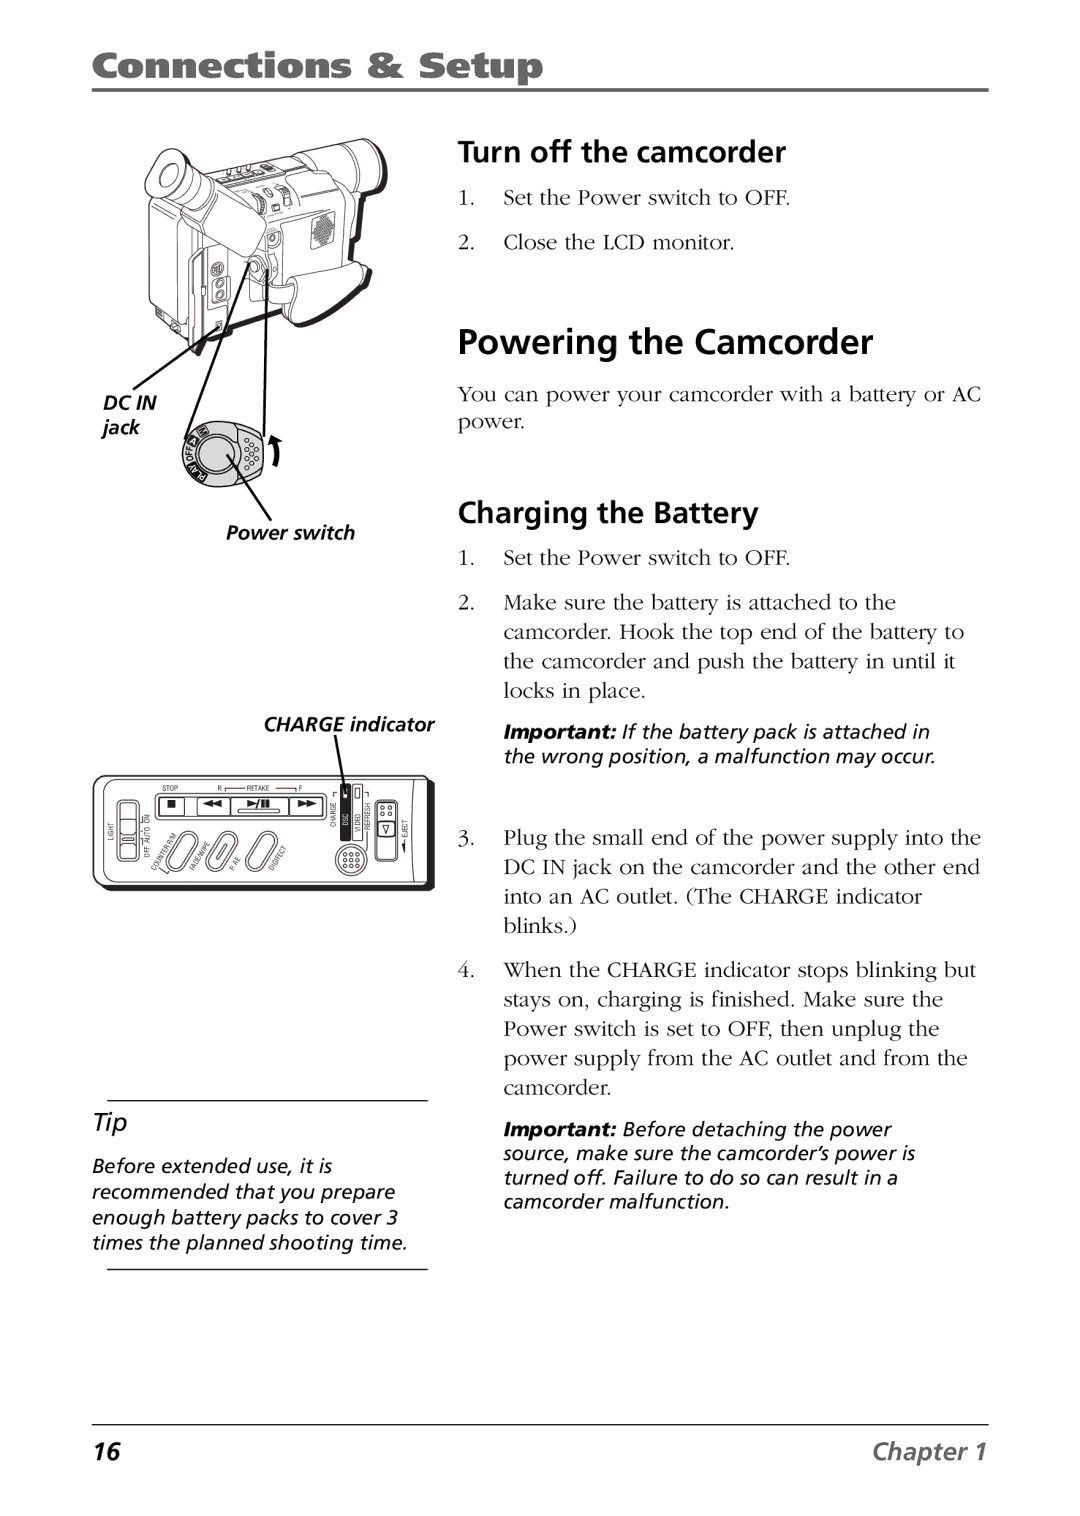
Turn off the camcorder
1. Set the Power switch to OFF.
+
+
2.Close the LCD monitor.
O
Y
A
L
P
Powering the Camcorder
DC IN |
|
jack | M |
| A |
| F |
| F |
| O |
| Y |
| A |
| L |
| P |
Power switch
CHARGE indicator
|
| STOP |
|
|
| R |
| RETAKE |
|
|
| F |
|
|
| |||
LIGHT | AUTO ON |
|
| R | / M |
|
| I P | E |
|
|
|
|
| CHARGE | DSC | VIDEO REFRESH | EJECT |
|
|
|
|
|
|
|
|
|
|
|
| T |
|
|
| |||
| OFF |
| E | R |
|
|
|
|
|
|
|
|
|
|
|
| ||
| T |
|
| E | / W |
|
| E |
|
| I F | E | C |
|
|
| ||
|
| N |
|
|
|
|
|
|
|
|
|
|
|
|
| |||
|
| U |
|
| F A | D |
|
| P . | A |
| D I | G |
|
|
|
|
|
|
| C O |
|
|
|
|
|
|
|
|
|
|
|
|
| |||
Tip
Before extended use, it is recommended that you prepare enough battery packs to cover 3 times the planned shooting time.
You can power your camcorder with a battery or AC power.
Charging the Battery
1.Set the Power switch to OFF.
2.Make sure the battery is attached to the camcorder. Hook the top end of the battery to the camcorder and push the battery in until it locks in place.
Important: If the battery pack is attached in the wrong position, a malfunction may occur.
3.Plug the small end of the power supply into the DC IN jack on the camcorder and the other end into an AC outlet. (The CHARGE indicator blinks.)
4.When the CHARGE indicator stops blinking but stays on, charging is finished. Make sure the Power switch is set to OFF, then unplug the power supply from the AC outlet and from the camcorder.
Important: Before detaching the power source, make sure the camcorder’s power is turned off. Failure to do so can result in a camcorder malfunction.
16 | Chapter 1 |
