
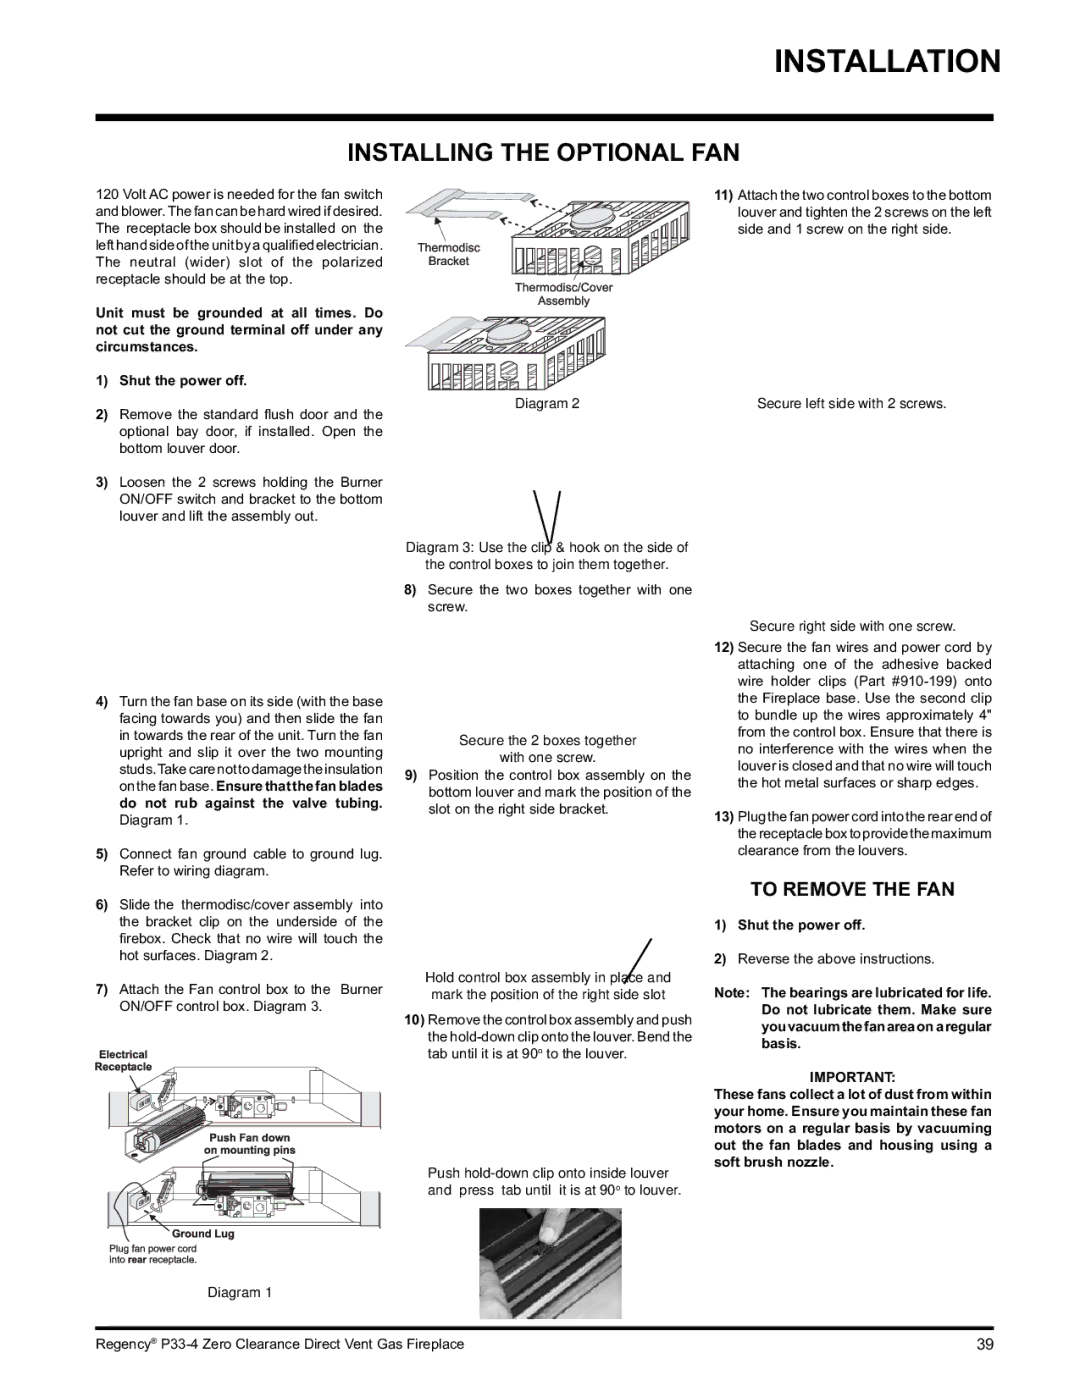
P33-NG4 specifications
The Regency P33-NG4 is a notable offering in the realm of modern communication technology, making waves with its innovative design and robust set of features. This advanced radio has been engineered to meet the demands of both professional users and casual enthusiasts. Its emphasis on reliability, durability, and user-friendly operations positions the P33-NG4 as a leading choice for users in various settings, from emergency services to outdoor adventures.One of the standout features of the Regency P33-NG4 is its superior audio clarity. It is equipped with advanced noise-canceling technologies that ensure clear communication even in loud environments. Whether you are navigating through bustling city streets or communicating in a remote area, users can expect crisp and intelligible sound. Additionally, the P33-NG4 boasts an impressive range, allowing for seamless communication over long distances, which is essential for coordination during events or emergency situations.
The device supports both analog and digital modes, making it versatile for a range of applications. This feature enables the P33-NG4 to connect easily with other devices, enhancing interoperability in diverse communication scenarios. Its digital capabilities include advanced encryption for secure transmissions, making it a reliable tool for sensitive communications in professional environments.
Another highlight of the P33-NG4 is its rugged construction. Designed to withstand harsh conditions, it is dustproof, waterproof, and impact-resistant. This resilience is crucial for users in demanding fields, ensuring that the device will perform reliably in adverse weather conditions or challenging terrains.
Battery life is another critical characteristic of the P33-NG4. It comes equipped with a high-capacity battery that provides extended usage between charges. This ensures that users remain connected for longer periods, particularly in fieldwork situations where charging options may be limited.
Ease of use is a principle that underlies the design of the Regency P33-NG4. The interface is intuitive, featuring clear displays and tactile buttons for intuitive navigation. Users can quickly access critical functions without extensive training, making it suitable for both seasoned professionals and newcomers to radio communications.
In summary, the Regency P33-NG4 blends innovative technology with practical features, making it a standout choice for a wide array of users. With its clear audio, robust build, versatile communication modes, and user-friendly design, it demonstrates a commitment to quality and performance that is crucial in today’s fast-paced communication environment. Whether for safety, connectivity, or team coordination, the P33-NG4 rises to the occasion.