INSTALLATION
NOTE: Should the finished wall protrude beyond the face of the unit, you can accommodate up to 1/2" depth.
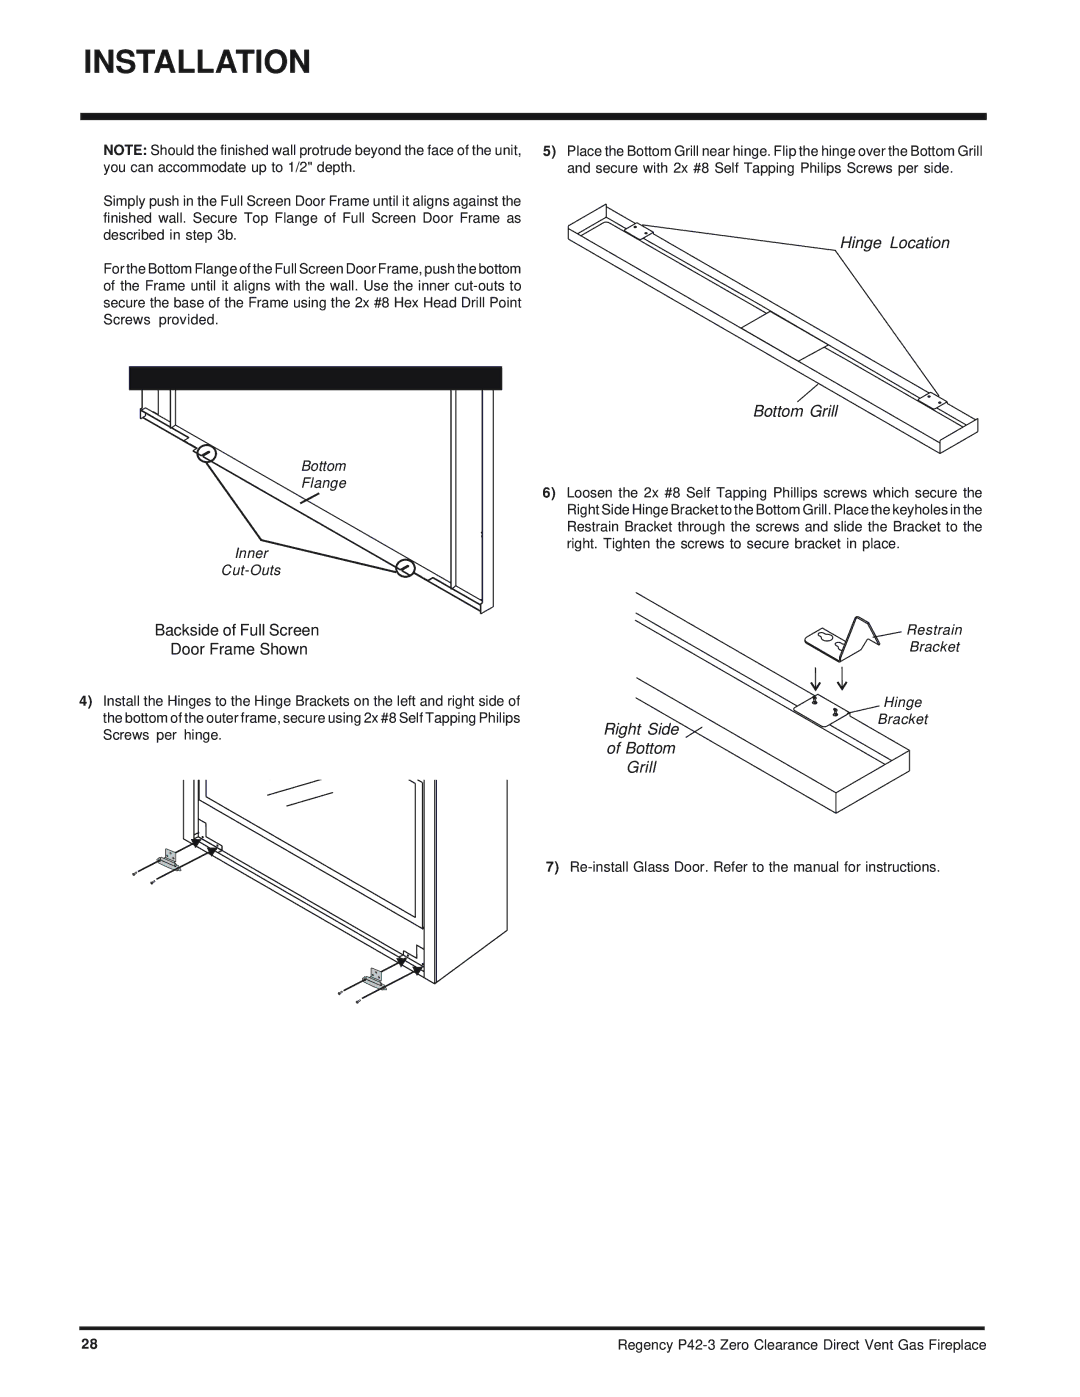
Simply push in the Full Screen Door Frame until it aligns against the finished wall. Secure Top Flange of Full Screen Door Frame as described in step 3b.
For the Bottom Flange of the Full Screen Door Frame, push the bottom of the Frame until it aligns with the wall. Use the inner
5)Place the Bottom Grill near hinge. Flip the hinge over the Bottom Grill and secure with 2x #8 Self Tapping Philips Screws per side.
Hinge Location
Bottom Grill
Bottom
Flange
6) Loosen the 2x #8 Self Tapping Phillips screws which secure the Right Side Hinge Bracket to the Bottom Grill. Place the keyholes in the Restrain Bracket through the screws and slide the Bracket to the
Inner
right. Tighten the screws to secure bracket in place.
Backside of Full Screen
Door Frame Shown
 Restrain
Bracket
4)Install the Hinges to the Hinge Brackets on the left and right side of the bottom of the outer frame, secure using 2x #8 Self Tapping Philips Screws per hinge.
Right Side 
of Bottom
Grill
Hinge
Bracket
7)
28 | Regency |