search & play
Search
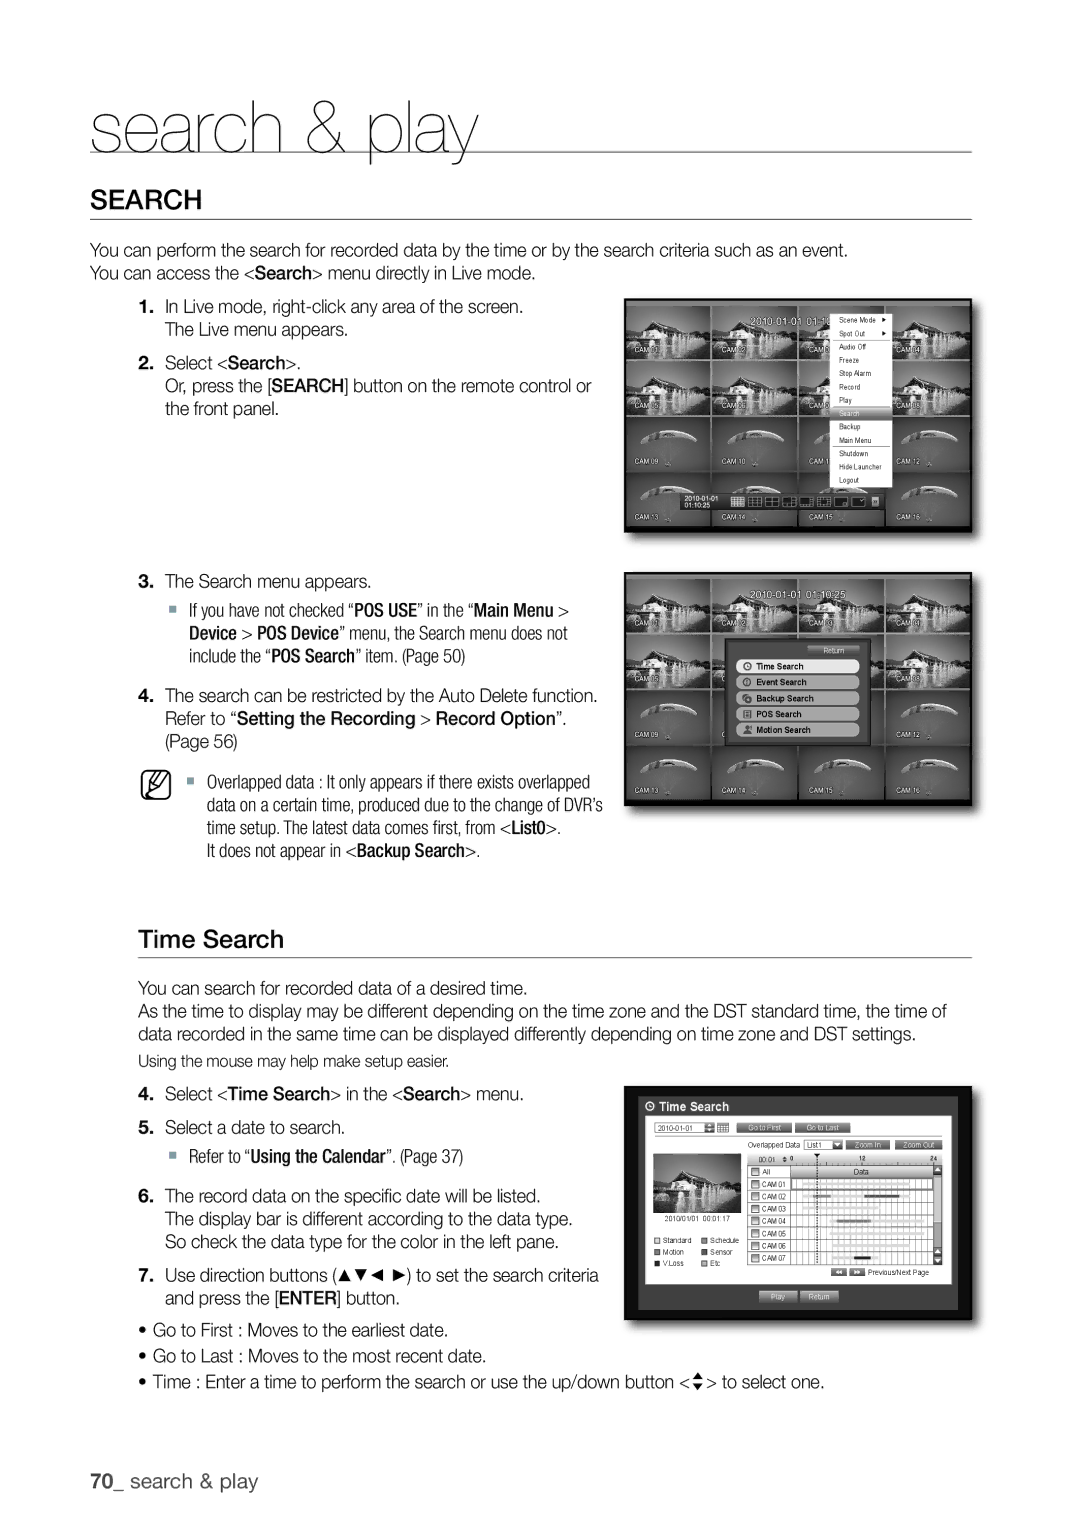
You can perform the search for recorded data by the time or by the search criteria such as an event. You can access the <Search> menu directly in Live mode.
1.In Live mode,
2.Select <Search>.
Or, press the [SEARCH] button on the remote control or the front panel.
3.The Search menu appears.
`If you have not checked “POS USE” in the “Main Menu > Device > POS Device” menu, the Search menu does not include the “POS Search” item. (Page 50)
4.The search can be restricted by the Auto Delete function. Refer to “Setting the Recording > Record Option”. (Page 56)
M | ` Overlapped data : It only appears if there exists overlapped |
| data on a certain time, produced due to the change of DVR’s |
| time setup. The latest data comes first, from <List0>. |
| It does not appear in <Backup Search>. |
Scene Mode | |
Spot Out | |
Audio Off
Freeze
Stop Alarm
Record
Play
Search
Backup
Main Menu
Shutdown
Hide Launcher
Logout
Return
![]() Time Search
Time Search
![]()
![]()
![]() Event Search
Event Search ![]()
![]()
![]()
![]() Backup Search
Backup Search
![]() POS Search
POS Search
![]() Motion Search
Motion Search
Time Search
You can search for recorded data of a desired time.
As the time to display may be different depending on the time zone and the DST standard time, the time of data recorded in the same time can be displayed differently depending on time zone and DST settings.
Using the mouse may help make setup easier.
4.Select <Time Search> in the <Search> menu.
5.Select a date to search.
`Refer to “Using the Calendar”. (Page 37)
6.The record data on the specific date will be listed. The display bar is different according to the data type. So check the data type for the color in the left pane.
7.Use direction buttons (▲▼_ +) to set the search criteria and press the [ENTER] button.
~Go to First : Moves to the earliest date.
~Go to Last : Moves to the most recent date.
Time Search |
|
|
|
| |
| Go to First | Go to Last |
|
| |
|
| Overlapped Data | List1 | Zoom In | Zoom Out |
|
| 00:01 |
|
|
|
|
| All |
| Data |
|
|
| CAM 01 |
|
|
|
|
| CAM 02 |
|
|
|
2010/01/01 | 00:01:17 | CAM 03 |
|
|
|
CAM 04 |
|
|
| ||
|
|
|
|
| |
Standard | Schedule | CAM 05 |
|
|
|
CAM 06 |
|
|
| ||
Motion | Sensor |
|
|
| |
CAM 07 |
|
|
| ||
V.Loss | Etc |
|
|
| |
|
| Previous/Next Page | |||
|
|
|
| ||
|
| Play | Return |
|
|
~Time : Enter a time to perform the search or use the up/down button <>> to select one.