DVD-R128,0/R121R129 DVD-R130, R131
Getting Started
English
Handling Cautions
Precaution
Important Safety Instructions
Maintenance of Cabinet
Disc Storage
Disc Specifications
Using CD-R/-RW
Using MPEG4 disc
Disc Compatibility
Reverse engineering or disassembly is prohibited
Contents
Additional Information
This DVD Recorder can play MPEG4 formats within an avi file
General Features
See
See pages
Format the disc to start recording
Before reading the user’s
Manual Recorder
Select the disc type
Editing a recorded disc
Step
Unpacking
Accessories
Preparing the Remote Control
Setting the Remote Control
72, 73
01, 02, 03, 04, 05, 06, 07, 08
36, 37, 38, 39
67, 73, 75
Front Panel DVD-R128
Description
Front Panel DVD-R129
Front Panel DVD-R131
Front Panel DVD-R130
Rear Panel
Front Panel Display
Tour of the Remote Control
Quick Overview
Connecting Setting Up
TV mode
Connecting the DVD
Recorder
Connect RF antenna cables as shown
Video output cable
Case 2 Connecting to an S-Video output jack
Case 1 Connecting to a Video Composite output jack
Make sure that the colour coded
Case 3 Component Video output jacks
Case 2 Connecting to a stereo amplifier with AV output jacks
If the input is not selected automatically
Connecting to AV3 IN, DV input jack DVD-R130, R131 only
On-Screen Menu Navigation
System Setup
Auto Channel scan will be started
Plug & Auto Setup
Connect the RF cable as indicated on
Plug the DVD Recorder into the mains
If you don’t press the OK button, it will not be saved
Setting the Clock
Press the …† buttons to select On for the Auto Clock
Press the OK button, then the date and time will be saved
Channel scan will be started
Press the OK button to stop the Auto Setup
Country Seletion screen is displayed
CH Tune the channel using œ √ buttons
Presetting Channels with the Manual Setup function
Press the Return or œ button to return
Setting up the Language Options
System menu will be displayed
EP Mode Time Setting
Press the œ √ buttons to select Yes and press the OK button
When you turn the power off
Automatic Chapter Creation
With the DVD Recorder in Stop mode, press the Menu button
DivXR Registration
Setting up the Audio Options
Press the OK or √ button
Press the …† buttons to select Audio, then
Audio setup menu will be displayed
Off Doesn’t output DTS signal
Audio Options
Available Video Output Jack
Setting up Video Output Options
Video setup menu will be displayed
Component mode
If you press the P.SCAN button by
Setting up the Progressive scan
Canceling the Progressive scan
TV remote control
DisplayVideo Options
This function allows you to setup the TV screen settings
‘Create the password’ message will be displayed
Setting up the Parental Control
If you forgot your password
Press the OK or √ button to select Password
About the Rating Level
About the Change Password
Press the …† buttons to select Change Password
See page 37 if you forgot your password
Recordable discs
Before Recording
Recording Formats
Recording Mode
Unrecordable video
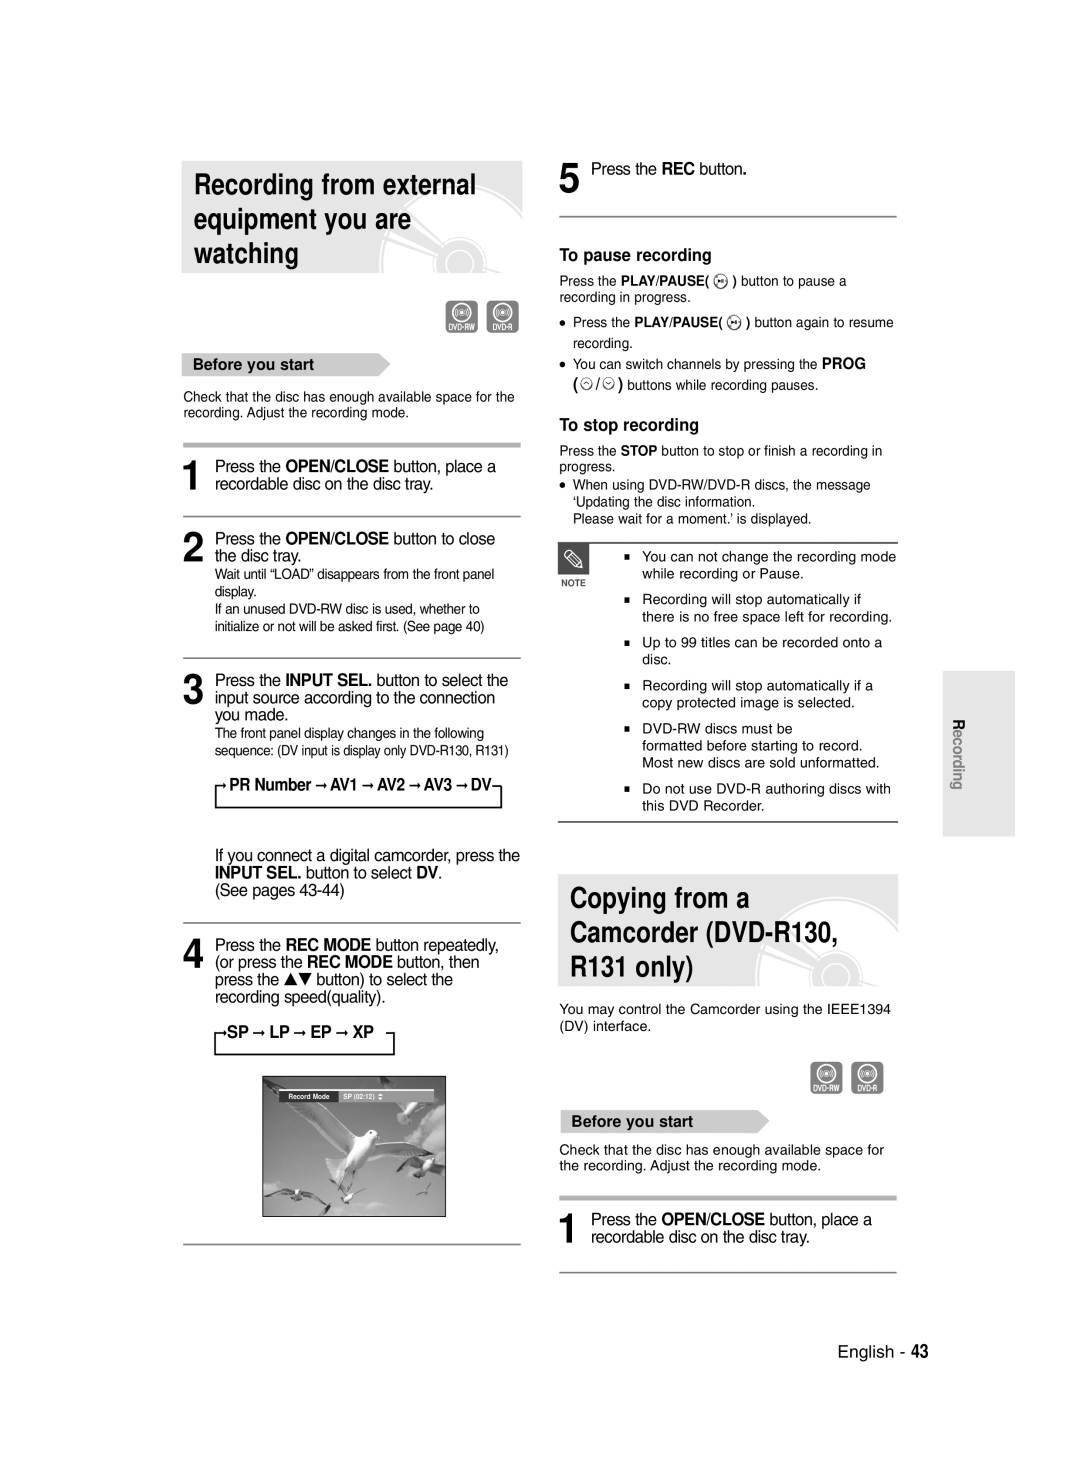
Press the OPEN/CLOSE button to close the disc tray
Recording the current TV programme you are watching
About Info Button
Checking the available disc space Disc Information
REC icon is displayed on the front panel
Press the REC button
Do not use DVD-R authoring discs with this DVD Recorder
Copying from a Camcorder DVD-R130, R131 only
Recording from external equipment you are watching
TV Programme 1 to
Making a One Touch Recording OTR
Press the OK or √ button twice
Making a Timer Recording
With the DVD Recorder in Stop mode, press the Timer button
Set timer recording option
Press the OK button
Flexible Recording For Timer recording only
03 TUE
Follow these directions to edit the timer record list
Press the OK button to confirm the edited setting
Edit and Delete items are displayed
Recording, recording will stop
Selected entry will be deleted from the list
Discs that cannot be played
Before Playing
Region code DVD-Video only
Disc types that can be played
Press the Stop button to stop playback
Playing a Disc
Press the OPEN/CLOSE button
Searching through a Chapter or Track
Using the Disc Menu & Title Menu
Using the Search Functions
Button on the remote control
About Anykey
Moving to a scene directly using the Anykey
Slow Motion Play
Step Motion Play
Press the …† buttons to select Time
Using the Repeat Function
Press the Cancel button to return to normal playback
Playing RepeatedlyRepeat Playback
Repeat playback of the A-B section starts
Unfinalised DVD-RW Video mode do not repeat a chapter
Press the Audio button during playback
Selecting the Subtitle
Selecting the Audio language
Press the Subtitle button during playback
Or pause
Changing the Camera Angle Zooming-In
Playing back a bookmark
Using Bookmarks
Clearing a bookmark
Playing back a Marker
Using Markers
Clearing a Marker
Audio CDCD-DA Screen Elements
Playing an Audio CD/MP3
Playing an Audio CD CD-DA/MP3
Playing an Audio CDCD-DA
Insert an MP3 Disc into the disc tray
Playing an MP3 Disc
Buttons on the Remote Control used for MP3 playback
For MP3 discs, you can select Track, Folder or Disc
Play Option Mode
To Programme Tracks
Playing a Picture
Returns to the Album screen
When MPEG4 file is played, you can use following functions
Playing a MPEG4
Insert a MPEG4 Disc into the disc tray
Press the Menu button
Playing the Title List
Edit menu is displayed on the right
Title List screen is displayed
Selected entry title will be played back
Limited editing function
Title List Screen Elements
Editing
RenamingLabeling a Title
Basic Editing Title List
Rename screen is displayed
Deleting a Title
LockingProtecting a Title
Edit Title List screen is display
Deleting a Section of a Title
Section deletion starting point window
Press œ √ buttons to select Yes, then press the OK button
Playback related buttons
Press the OK button at the start point
Creating a Playlist
Press the OK button at the end point
Playing Entries in the Playlist
Renaming a Playlist Entry
Enter the desired characters using the …† œ √ buttons
Playlist entry to be played is selected
Editing a Scene for the Playlist
Playing a Selected Scene
Edit Scene screen is displayed
Modify Scene screen is displayed
To setup, follow steps 1 to 3
Press the OK button at the start point of the scene
Press the OK button at the end point of the scene
Press the OK button at the starting point of the scene
Adding a Scene
Press the …† œ √ buttons to select
Press the …† buttons to select Move, then
Deleting a Scene
Copying a Playlist Entry to the Playlist
Playlist that has been selected will be copied
You can create up to 999 scenes on one
Deleting a Playlist Entry from the Playlist
Editing the Disc Name
Disc Manager
Formatting a Disc
Disc Protection
All title lists are deleted
Delete All Title Lists
Disc is finalised Once a disc is finalised, you cannot
Finalising a disc
DVD-RW can be finalised or unfinalised in VR mode
Unfinalising a disc V/VR mode
Cannot record TV programmes
Troubleshooting
Power
Recording
Playback
Sound
Video
Forgot my password for parental supervision
Remote Control Unit
Other
Specifications
United Kingdom Republic of Ireland
800-6225
Samsung
0800-124-421
800-10-7267
English Nederlands Français
Gebruiksaanwijzing
Nederlands
Waarschuwing
Onderhoud behuizing
Voorzorgsmaatregelen
Belangrijke veiligheidsinstructies
Waarschuwingen voor gebruik
Informatie DVD/CD-schijven
DVD/CD bewaren
Een MPEG4-schijf gebruiken
DVD-RW Videostand
De volgende schijven niet gebruiken
Geschikte schijven
DVD-RW VR stand
Andere manier voor het aansluiten van
Inhoudsopgave
Antenne + DVD-recorder +
Andere manier voor het aansluiten
Van een camcorder kopiëren
Tv-programma opnemen terwijl
Automatische keuze opnamekwaliteit
Overzicht eigenschappen
DVD-RW opnemen/weergeven
Gebruik van de DVD Recorder
Stap 1 Type schijf kiezen
Stap 2 Schijf formatteren voor opname
Een opgenomen schijf bewerken
Een DVD-R-schijf gebruiken
Batterijen in de afstandsbediening plaatsen
Accessoires
Uitpakken
De afstandsbediening instellen
De code vindt die werkt
Instelbare TV-codes
Voorpaneel DVD-R128
Beschrijving
Voorpaneel DVD-R129
Voorpaneel DVD-R131
Voorpaneel DVD-R130
DV-IN
Gaat branden wanneer er een schijf wordt geladen
Display voorpaneel
Audio/videokabels gebruiken
Afstandsbediening
Overzicht
Aansluiten En instellen
Stel de ingangsmodus in op AV2
Extra aansluitingen
Sluit de RF-kabel aan zoals is weergegeven
DVD-modus
Video, componentvideo en progressieve uitvoerstanden
Antenne + DVD-Recorder + externe decoderbox + TV
Situatie 2 Aansluiten op een S-Video-uitgang
Situatie 1 Aansluiten op een Composite Video-uitgang
Hiermee krijgt u een hogere weergavekwaliteit
Situatie 1 Aansluiten op de TV
Situatie 3 Componentvideo uitgangen
Rood Wit
STB DVD
De toets OK
Menunavigatie op het TV-scherm
De knop Menu
De toetsen
Controleer de datum en de tijd
Sluit de RF-kabel aan zoals op pagina 18 is aangegeven
Sluit de DVD-recorder aan op het stroomnet
Automatisch scannen van kanalen wordt gestart
Druk op de toetsen om Aan
De klok instellen
Klokfunctie
Druk op de toets OK om de datum en tijd op te slaan
Het Landselectiescherm wordt weergegeven
Zie de onderstaande tabel bij het selecteren van uw land
Zenders handmatig instellen
Het menu met taalinstellingen verschijnt Te sluiten
De taalopties instellen
Druk op de toetsen om Taal te
Druk op de toets Menu om het menu af
Het systeemmenu verschijnt
Tijdsinstelling EP-modus
Druk op de toets Stop om het opnemen te stoppen
Automatisch hoofdstuk maken
Druk in de stopstand op de toets Menu
Vervolgens op OK
De geluidsopties instellen
DivXR Registratie
Digitale uitgang
Geluidsopties
Dynamische compressie
Nentingang Selecteer deze optie wanneer de
Beschikbare video-uitgangen
Recorder met een SCART-kabel op uw
Progressief scannen Instellen Annuleren
3D-ruisonderdrukking
De beeldopties instellen
Beeldopties
Breedte/hoogte TV
De stand Stop / Geen schijf
Kinderslot instellen
Als u uw toegangscode vergeten bent
Druk op de toets Menu met het apparaat
Druk op OK of op
Het classificatieniveau
De toegangscode
Druk op de toetsen om Niveau te selecteren
Deze recorder kan opnemen op de volgende schijftypes
Voordat u gaat opnemen
Geschikte schijven
Apparatuur terwijl u er naar kijkt
Kopieerbeveiliging
Kopieerbeveiligingssignalen
Schijfindelingen en formatteren
Opnamekwaliteit
Info toets
Terwijl u er naar kijkt
Voordat u begint
Druk op de REC toets
Opname beëindigen
Het pictogram REC wordt weergegeven op het voorpaneel
Zie pagina
Prog nummer AV1 AV2 AV3 DV
Opname pauzeren
Voordat u gaat opnemen
030 100 .. 500 .. normaal
Met de Menu toets
Een timer-opname maken
Druk in de stopstand op de toets Timer
Opties timer-opname instellen
Snelheid Opnamemodus
Rondt de instelling van de timer-opname
Als timer-opnamen elkaar overlappen
Druk op de OK toets
Druk op OK of op de toets
Timer-opname wijzigen
Timer-opname wissen
Druk op OK of op de toets
De geselecteerde opname wordt uit de lijst verwijderd
Timer-opname starten
Selecteer Ja met de toetsen en druk op de OK toets
De items Bewerken en Verwijder worden getoond
Schijven die niet kunnen worden afgespeeld
Voordat u een schijf afspeelt
Regiocode alleen DVD-Video
Afspeelbare schijftypes
Schijf beschadigd raken
Schijf afspelen
OPEN/CLOSE toets
Voor DVD-VIDEO schijven
Schijfmenu en titelmenu
Zoekfuncties
Hoofdstuk of track versneld weergeven
Hoofdstukken of tracks overslaan
Vertraagde weergave
Beeld-voor-beeld
Anykey functie
Als u naar een bepaald tijdstip wilt om een scène te vinden
Herhalen
Weergave herhalen
Met de Repeat toets
Gedeelte A-B herhalen
Met de Anykey Anykey toets
Met de Anykey toets
Druk tijdens weergave op de Subtitle toets
Taal van ondertitels selecteren
Met de Subtitle toets Met de Audio toets
Taal van geluidsspoor selecteren
Normaal 2X 4X 2X normaal
Beeldhoek kiezen
Inzoomen
Druk tijdens pauze of weergave op de Anykey toets
Druk tijdens weergave op de Marker toets
Favorieten
Favoriet afspelen
Favoriet verwijderen
Gemarkeerde scène afspelen
Markeringen
Markering verwijderen
Audio-cd afspelen CD-DA
Audio-CD CD-DA/MP3 afspelen
Audio-CD CD-DA indeling scherm
Doe een MP3 schijf in de lade
MP3 schijf afspelen
Stop Track stoppen PLAY/PAUSE Track weergeven of pauzeren
Herhaald afspelen
Druk tijdens het afspelen op de Repeat toets
Het normale afspelen hervatten
Te selecteren, en druk op de OK toets
Afspeeloptie
Druk tijdens het afspelen op de Anykey toets
Bij MP3-schijven kunt u kiezen uit Track, Map of Schijf
Plaats een JPEG-schijf in de schijflade
Een foto weergeven
Tracks programmeren afspeellijst
Druk op de toets Play om de afspeellijst af te spelen
Plaats een MPEG4-schijf in de schijflade
Een MPEG4 afspelen
MPEG4 Functiebeschrijving
Met de Title List toets
Met de Menu toets
Druk op de Menu toets
De geselecteerde titel wordt afgespeeld
Hernoemen, Wissen, Bewerken, Beveiliging zie pagina
Het Titellijst scherm wordt getoond
Aan de rechterkant wordt het Wijzig-menu getoond
Een beperkte bewerkingsfunctie
Titellijst indeling scherm
Afspeellijst
Titellijst
Met de Menu toets
Naam van een titel wijzigen
Het scherm Hernoemen wordt getoond
Informatievenster is nu gesloten
Titelbeveiliging vergrendelen
Titel verwijderen
Toets Met de Title List toets
Beschermde titels kunnen niet verwijderd
Deel van een titel verwijderen
Het scherm Titellijst bewerken wordt getoond
Seconden duren
Druk op OK bij Wissen
Indeling van het Titellijst scherm
Het geselecteerde gedeelte wordt verwijderd
Druk bij het gewenste beginpunt op de OK toets
Bewerken, geavanceerd Afspeellijst
Afspeellijst maken
Druk bij het gewenste eindpunt op de OK toets
Het scherm Afspeellijst bewerken wordt getoond
Scènes uit de Afspeellijst afspelen
Druk in de stopstand op de toets Play List
Toets
De gewijzigde naam verschijnt in de kolom Titel
Geef de gewenste tekens in met de toetsen
De af te spelen scène wordt geselecteerd
Afspeellijst scène opzoeken
Geselecteerde scène afspelen
Het scherm Scène bewerken wordt getoond
Druk bij het gewenste eindpunt van de scène op de OK toets
Scène bewerken vervangen
Druk op de pijltjestoetsen om de
Druk bij het beginpunt van de scène op de OK toets
Scène toevoegen
De geselecteerde afspeellijst wordt gekopieerd
Scène verwijderen
Met de Play List toets
Druk bij het eindpunt van de scène op de OK toets
Met de toets Play List
Scène uit de Afspeellijst verwijderen
Ga met de toetsen naar Opslaan en druk op de OK toets
Schijfbeheer
Naam van de schijf wijzigen
Voer de gewenste tekens in met de toetsen
Schijf formatteren
Schijfbeveiliging
Alle Titellijsten worden verwijderd
Alle titellijsten verwijderen
DVD-VR en DVD-V zijn schijfindelingen
Druk vervolgens op de OK of toets
Kunt u geen titels meer verwijderen
Schijf afsluiten
Krijgt nu de vraag Wilt u deze schijf afsluiten?
De schijf wordt nu afgesloten
Krijgt nu de vraag Afsluiten schijf ongedaan maken?
Afsluiten ongedaan maken Video of VR modus
Apparaat inschakelen
Problemen oplossen
Opnemen
Afspelen
Beeld
Timer-opname
Geluid
Overige
Afstandsbediening
Specificaties
Nederlandbelgië
Luxembourgbelgique
Region Country Customer Care Centre Web Site
English
DVD-R128, R129 DVD-R130, R131
Français
Avertissement
Entretien du boîtier
Précautions
Instructions importantes relatives à la sécurité
Précautions relatives à la manipulation
Utilisation du disque MPEG4
Stockage du disque
Spécifications du disque
Utilisation d’un CD-R/-RW
Compatibilité des disques
DVD-RW mode VR
DVD-RW mode Vidéo
’utilisez pas les disques suivants
Table des matières
Gestionnaire de disque
Vérification de l’espace disque
Caractéristiques générales
Étape
Étape 1 Sélectionnez le type de disque
Étape 5 Edition d’un disque enregistré
Étape 3 Enregistrement
Lorsque vous utilisez un DVD-R
En cas de dysfonctionnement de la télécommande
Préparation de la télécommande
Réglage de la télécommande
Insérez les piles dans la télécommande
Codes TV contrôlables
Description
Façade DVD-R131
Panneau arrière
Affichage en façade
Aperçu de la télécommande
Connexion de l’enregistreur DVD Connexions supplémentaires
Présentation rapide
Mode TV
Mode DVD
Sortie de balayage progressif 576p
Modes S-Vidéo, Vidéo composant et Sortie progressive
Cas 2 Connexion à une prise de sortie S-Vidéo
Cas 1 Connexion à une prise de sortie vidéo composite
Vous obtiendrez régulièrement des images de qualité
Cas 1 Connexion à votre téléviseur
Cas 3 Prises de sortie Vidéo composant
Blanc
Sélectionner l’entrée correcte
RemarqueINPUT SEL. pour sélectionner l’entrée correcte
La sélection de AV 3 in Entree AV
Utilisez le bouton Input SEL. pour
Bouton Return
Navigation dans le menu à l’écran
Bouton Menu
Bouton OK
Le balayage automatique des canaux peut démarrer
Branchement et réglage automatique
Connectez le câble RF comme indiqué enpage
Raccordez l’enregistreur DVD au secteur
Appuyez sur les boutons pour
Réglage de l’horloge
Le bouton ou OK
’écran Sélection du pays s’affiche
DVD-RecorderInstallation
Éditer Vous pouvez ajouter ou modifier des PR programmes
’aide des touches puis appuyez sur le bouton OK ou
Le menu de réglage de la langue s’affiche
Configuration des options de langue
Le menu du système s’affiche
Réglage de l’heure en mode
Mode
Création automatique de chapitre
Le menu des chapitres s’affiche
Le menu Système s’affiche
Enregistrement DivXR Configuration des options audio
Sortie Numérique
Options audio
Compression Dynamique
Composant
Mode Composant
Prise Sortie vidéo disponible
Le menu de réglage vidéo s’affiche
’appuyez pas sur le bouton P.SCAN si
Pour activer le réglage Pour annuler le réglage Progressif
Lorsque vous appuyez sur ce bouton
Ou sur OK
Options d’affichage Vidéo
Retirez le disque
Configuration du contrôle parental
Le message ‘Créer le mot de passe’ s’affiche
Oublié votre code secret
Propos du niveau d’évaluation
Propos du Changement de mot de passe
Reportez-vous à la page 37 si vous avez
Disques enregistrables
Avant l’enregistrement
Propos des signaux anti-copie
Mode enregistrement
Formats d’enregistrement
Films non enregistrables
Vérification de l’espace disque disponible Disc Information
Enregistrement du
Vous regardez
Propos du bouton Info
’enregistrement
Mode puis sur la touche pour choisir la
Appuyez sur la touche REC
Enregistrement ou en pause
PR Numéro AV1 AV2 AV3 DV
Pour mettre l’enregistrement en pause
DVD-R130, R131
Le bouton ou
AV1, AV2, AV3 ou DV.DVD-R130, R131 uniquement
030 100 .. 500 .. normal
Remarqued’enregistrement
Paramétrez l’option enregistrement par minuterie
Appuyez sur le bouton TIMER, appareil en mode Arrêt
Utilisation du bouton Menu
Appuyez deux fois sur le bouton OK ou
Appuyez sur la touche OK
Les éléments Editer et Supprimer s’affichent
Appuyez sur OK ou sur le bouton
’écran de saisie des enregistrements programmés s’affiche
’enregistrement s’arrête
Les éléments Éditer et Supprimer s’affichent
Code de région DVD-Video uniquement
Avant la lecture
Type de disques pouvant être lus avec cet appareil
Disques ne pouvant être lus avec cet appareil
Puis rallumez-le en utilisant le bouton Play
Lecture d’un disque
Appuyez sur la touche OPEN/CLOSE
Appuyez sur la touche Stop pour arrêter la lecture
Cas des disques DVD-VIDEO
Utilisation des chapitres ou des pistes
Cas des disques DVD-RW/-R
Sauter des chapitres ou des pistes
Ralenti
Propos de la fonction Anykey
Lecture image par image
Lecture
Utilisation de la fonction Repeat
Lecture de manière répétée Repeat Playback
Utilisation de la touche Repeat
Pour revenir à la lecture normale
Utilisation de la touche Anykey
Utilisation de la touche Anykey
Appuyez sur la touche Anykey en cours lecture
Utilisation de la touche Audiio
Sélection des sous-titres Sélection de la langue audio
Utilisation de la touche Subtiitle
Appuyez sur la touche Subtitle en cours de lecture
Ne pas fonctionner avec tous les DVD
Changer l’angle de la caméra
Zoom avant
Taille normale 2X 4X 2X taille normale
Appuyez sur la touche OK lorsque la scène désirée apparaît
Utilisation des signets
Effacer un signet
Appuyez sur la touche Marker en cours de lecture
Skip
Utilisation des marqueurs
Lire un marqueur
Effacer un marqueur
Appuyez sur la touche Search / lecture rapide X2, X4
Lecture d’un CD audio CD-DA
Éléments de l’écran Audio CDCD-DA
Insérez un CD audio CD-DA dans le plateau
Insérez un disque MP3 dans le plateau
Lire un disque MP3
Appuyez sur les touches pour
Pour revenir à une lecture normale
Lecture répétée Répétition
Utilisation du bouton Repeat
Appuyez sur le bouton Repeat en cours de lecture
Utilisation du bouton Anykey
Mode Options de lecture
Appuyez sur le bouton Anykey en mode Arrêt
La fenêtre Play Mode s’affiche
Insérez le disque au format Jpeg dans le tiroir disque
Lecture d’une image
Programmer des pistes
En cas d’erreur lors de la création de votre
Lecture d’un fichier
Et sélectionnez un mode d’affichage
Insérez le disque au format MPEG4 dans le tiroir disque
Appuyez sur la touche Menu
Lecture de la liste de titres
Utilisation de la ttouche Tiitle Liist
Utilisation de la touche Title List
Le menu Edition s’affiche à droite
’écran Liste de titres s’affiche
Enregistré en appuyant sur la touche
Écran de Lecture des entrées enregistrées
Éléments de l’écran Liste de Titres
Les disques DVD-R/DVD-RWVidéo
Liste de lecture
Liste de titres
Utilisation de la touche Menu
Renommer Étiqueter un titre
’écran Renommer apparaît
Sélectionner Oui, puis appuyez sur la touche
Verrouiller Protéger un titre
Supprimer un titre
Appuyez sur la touche Menu
LI est impossible de supprimer une entrée
Supprimer une section d’un titre
Un DVD-R ou un DVD-RW finalisé ne peut être supprimé
Appuyez sur les touches Suppr
Appuyez sur la touche OK au point de démarrage
Éléments de l’écran Éditer la liste de titres
Appuyez sur le bouton OK dans le menu Faire
Appuyez sur le bouton MENU, appareil en mode Arrêt
Créer une Liste de lecture
Appuyez sur la touche OK au point de fin
Vous revenez à l’écran Éditer une liste de lecture
Appuyez sur le bou Play LIST, appareil en mode Arrêt
Renommer une entrée dans une liste de lecture
Appuyez sur le bouton Play LIST, appareil en mode Arrêt
Entrez les caractères désirés à l’aide des touches
Lire une scène sélectionnée
Éditerunescènepourunelistedelecture
Appuyez sur la touche OK au point de démarrage de la scène
Pour la configuration, suivez les étapes 1 à 3 de la
Appuyez sur la touche OK au point de fin de la scène
Bouton OK
Ajouter une scène
Sélectionner Dépla, puis appuyez sur la
Touche OK
La liste de lecture sélectionnée sera copiée
Supprimer une scène
’écran Éditer la liste de lecture s’affiche
Utilisation de la touche Menu
Science Dolphin
Un nom est donné au disque
Gestionnaire de disque
Éditer le nom d’un disque
Entrez les caractères souhaités en utilisant les touches
Mauvaise manipulation
Protection du disque Formater un disque
La Protection du disque vous permet de protéger vos
Disques d’un formatage ou d’une suppresion due à une
Protéger dans la rubrique Verrouiller
Supprimer toutes les listes de titres
’affiche de nouveau
Le disque est formaté
Finaliser un disque
Le disque n’est pas finalisé
Ne pas finaliser un dique mode V/VR
En mode Vidéo
En mode VR
Alimentation
Dépannage
Enregistrement
Français-87
Lecture
Enregitrement par minuterie
Vidéo
Son
Français-89
Télécommande
La télécommande ne fonctionne pas
Autres
Sortie audio
Caractéristiques techniques
France
Samsung Service Consommateurs Rue des Vanesses
Contact Samsung wereldwijd
Contact Samsung World Wide
Comment contacter Samsung dans le monde
Cet appareil est distribué par