Connecting to a PC
This PDP is not compatible with Macintosh PC.
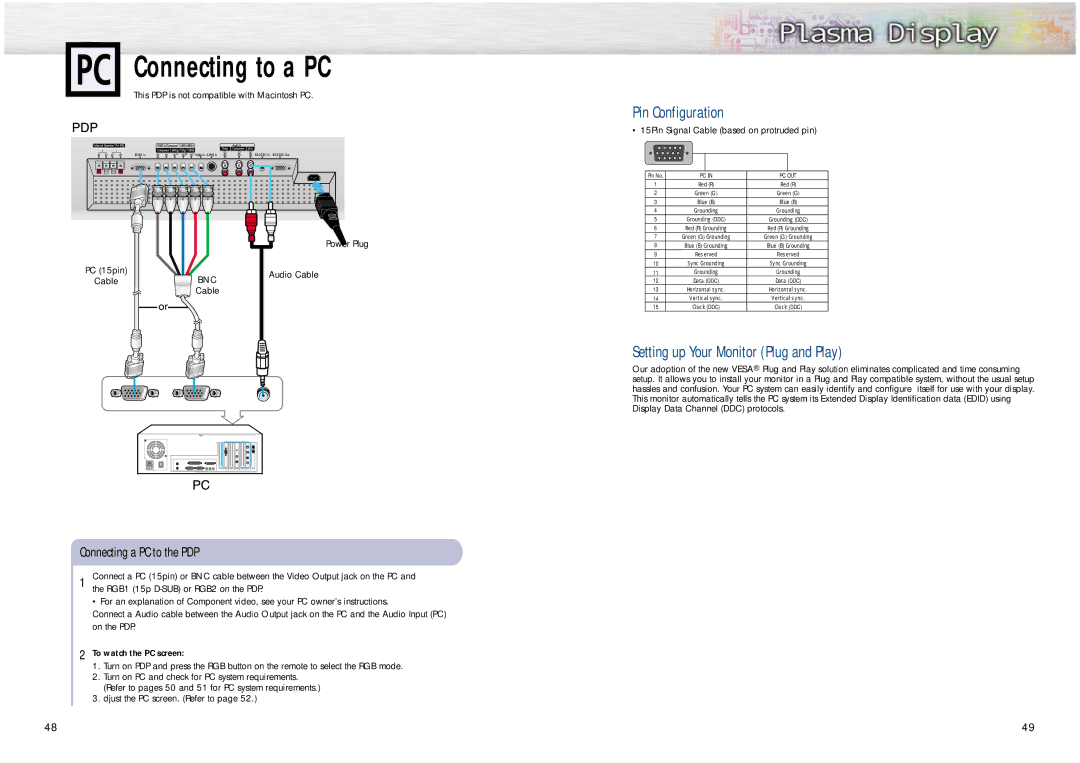
Power Plug
PC (15pin) | BNC | Audio Cable | |
Cable | |||
| |||
| Cable |
|
Connecting a PC to the PDP
1 Connect a PC (15pin) or BNC cable between the Video Output jack on the PC and the RGB1 (15p
•For an explanation of Component video, see your PC owner’s instructions.
Connect a Audio cable between the Audio Output jack on the PC and the Audio Input (PC) on the PDP.
2To watch the PC screen:
1.Turn on PDP and press the RGB button on the remote to select the RGB mode.
2.Turn on PC and check for PC system requirements. (Refer to pages 50 and 51 for PC system requirements.)
3.djust the PC screen. (Refer to page 52.)
48
Pin Configuration
• 15Pin Signal Cable (based on protruded pin)
1 | 2 | 3 | 4 | 5 |
6 | 7 | 8 |
| 10 |
11 | 12 | 13 | 14 | 15 |
Pin No. | PC IN | PC OUT |
1 | Red (R) | Red (R) |
2 | Green (G) | Green (G) |
3 | Blue (B) | Blue (B) |
4 | Grounding | Grounding |
5 | Grounding (DDC) | Grounding (DDC) |
6 | Red (R) Grounding | Red (R) Grounding |
7 | Green (G) Grounding | Green (G) Grounding |
8 | Blue (B) Grounding | Blue (B) Grounding |
9 | Reserved | Reserved |
10 | Sync Grounding | Sync Grounding |
11 | Grounding | Grounding |
12 | Data (DDC) | Data (DDC) |
13 | Horizontal sync. | Horizontal sync. |
14 | Vertical sync. | Vertical sync. |
15 | Clock (DDC) | Clock (DDC) |
Setting up Your Monitor (Plug and Play)
Our adoption of the new VESA Plug and Play solution eliminates complicated and time consuming setup. It allows you to install your monitor in a Plug and Play compatible system, without the usual setup hassles and confusion. Your PC system can easily identify and configure itself for use with your display. This monitor automatically tells the PC system its Extended Display Identification data (EDID) using Display Data Channel (DDC) protocols.
49