Maintenance and Care
Maintaining the AMC unit
1 | Press the |
or the | |
| the Main On/Off Switch off, and then unplug the AC |
| power cord from the AC outlet. |
2 | Remove the dust on the projector and air vents. |
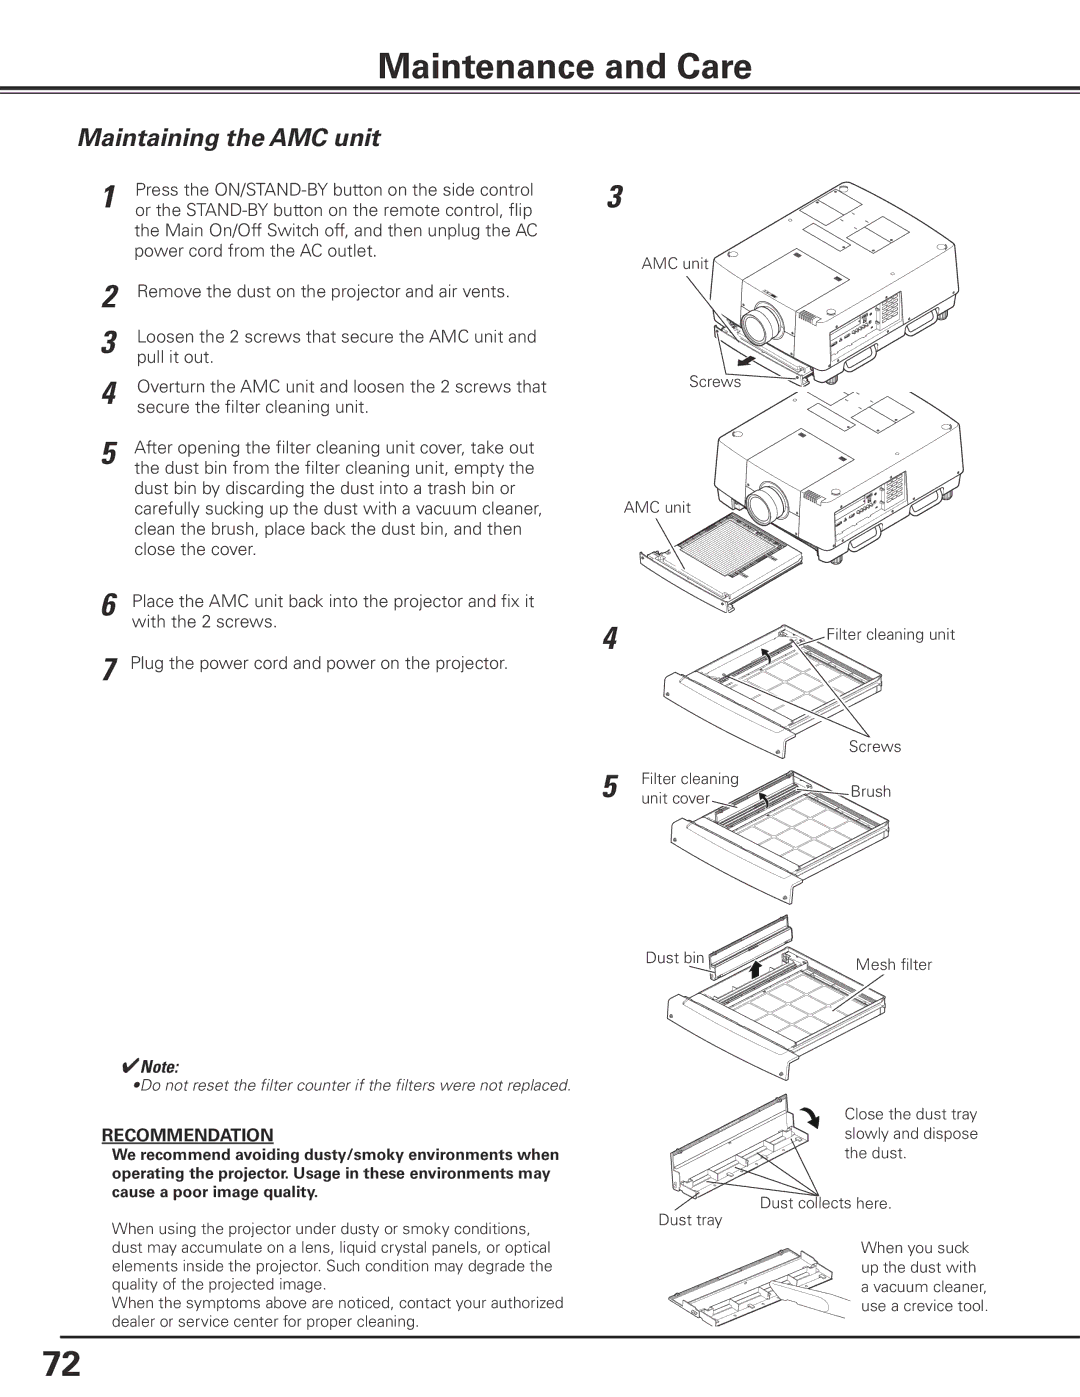
3 | Loosen the 2 screws that secure the AMC unit and |
| pull it out. |
4 | Overturn the AMC unit and loosen the 2 screws that |
secure the filter cleaning unit. | |
5 | After opening the filter cleaning unit cover, take out |
| the dust bin from the filter cleaning unit, empty the |
| dust bin by discarding the dust into a trash bin or |
| carefully sucking up the dust with a vacuum cleaner, |
| clean the brush, place back the dust bin, and then |
| close the cover. |
6 | Place the AMC unit back into the projector and fix it |
| with the 2 screws. |
7 | Plug the power cord and power on the projector. |
3
AMC unit
Screws
AMC unit
4 | Filter cleaning unit |
|
|
| Screws |
5 | Filter cleaning | Brush |
unit cover |
Dust bin | Mesh filter |
|
✔Note:
•Do not reset the filter counter if the filters were not replaced.
RECOMMENDATION
We recommend avoiding dusty/smoky environments when operating the projector. Usage in these environments may cause a poor image quality.
When using the projector under dusty or smoky conditions, dust may accumulate on a lens, liquid crystal panels, or optical elements inside the projector. Such condition may degrade the quality of the projected image.
When the symptoms above are noticed, contact your authorized dealer or service center for proper cleaning.
Close the dust tray slowly and dispose the dust.
Dust collects here.
Dust tray
When you suck up the dust with a vacuum cleaner, use a crevice tool.
72