Basic Operation
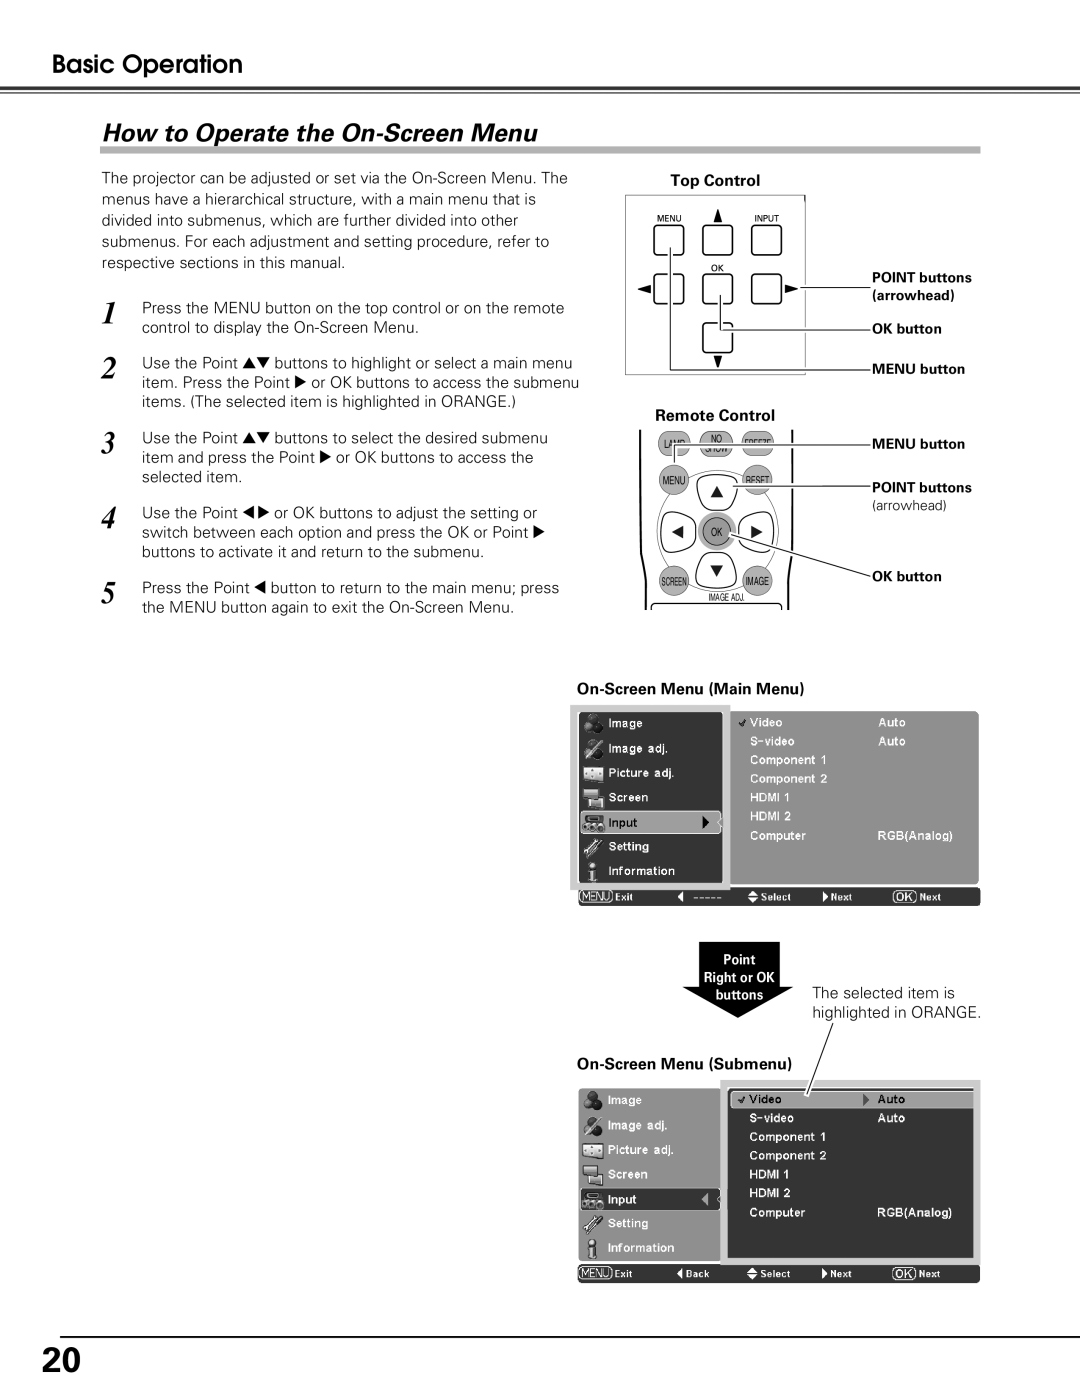
How to Operate the On-Screen Menu
The projector can be adjusted or set via the
1 | Press the MENU button on the top control or on the remote |
| control to display the |
2 | Use the Point ed buttons to highlight or select a main menu |
| item. Press the Point 8 or OK buttons to access the submenu |
items. (The selected item is highlighted in ORANGE.)
Top Control
Remote Control
POINT buttons (arrowhead)
OK button
MENU button
3 | Use the Point ed buttons to select the desired submenu |
| item and press the Point 8 or OK buttons to access the |
| selected item. |
4 | Use the Point 78 or OK buttons to adjust the setting or |
| switch between each option and press the OK or Point 8 |
| buttons to activate it and return to the submenu. |
5 | Press the Point 7 button to return to the main menu; press |
| the MENU button again to exit the |
LAMP | NO | FREEZE | MENU button |
SHOW | |||
MENU |
| RESET | POINT buttons |
|
|
| |
|
|
| (arrowhead) |
| OK |
|
|
SCREEN |
| IMAGE | OK button |
| IMAGE ADJ. |
|
|
On-Screen Menu (Main Menu)
Point
Right or OK
buttons The selected item is highlighted in ORANGE.
On-Screen Menu (Submenu)
20