Maintenance and Cleaning
Cleaning the Air Filters
The air filters prevent dust from accumulating on the surface of the optical elements inside the projector. Should the air filters become clogged with dust particles, they will reduce cooling fan’s effectiveness and may result in a buildup of internal heat and adversely affect the life of the projector. Clean the air filters by following the steps below.
Cleaning the Air Filter 1 and 2
1
2 | Pull out the air filters. |
| When taking out the Air Filter 2, put your finger on the air |
| filter’s tab and pull. |
3 | Remove dust and dirt with a soft brush or a vacuum cleaner. |
| Be careful not to damage the air filters and do not clean |
| them with water. |
| When the Air Filter 1 gets dusty and dirty, replace it with a |
| new one. For ordering the replacement filter, contact your |
| sales dealer. |
4 | Put the air filters back into the position and close the filter |
| covers. Do not push the delicate filter part. Make sure that |
the air filters are properly and fully inserted.
RECOMMENDATION
We recommend avoiding dusty/smoky environments when operating the projector. Usage in these environment may cause a poor image quality.
When using the projector under dusty or smoky conditions, dust may accumulate on a lens, LCD panels, or optical elements inside the projector degrading the quality of a projected image.
When the symptoms above are noticed, contact your authorized dealer or service station for proper cleaning.
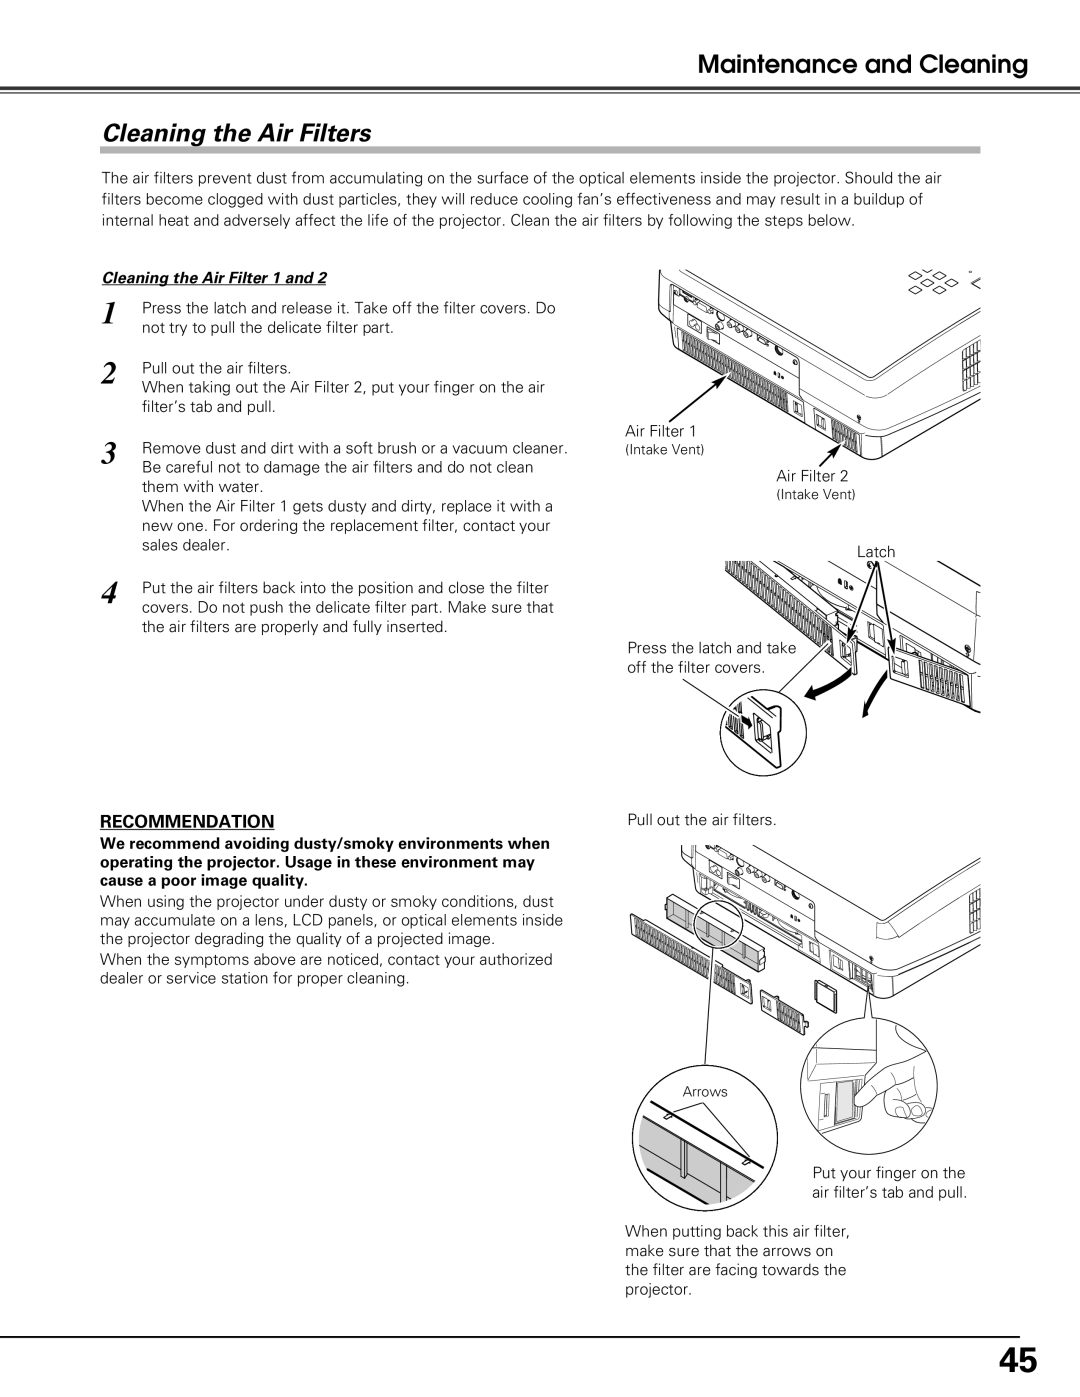
Air Filter 1
(Intake Vent)
Air Filter 2
(Intake Vent)
Latch
Press the latch and take off the filter covers.
Pull out the air filters.
Arrows
Put your finger on the air filter’s tab and pull.
When putting back this air filter, make sure that the arrows on the filter are facing towards the projector.
45