Setting
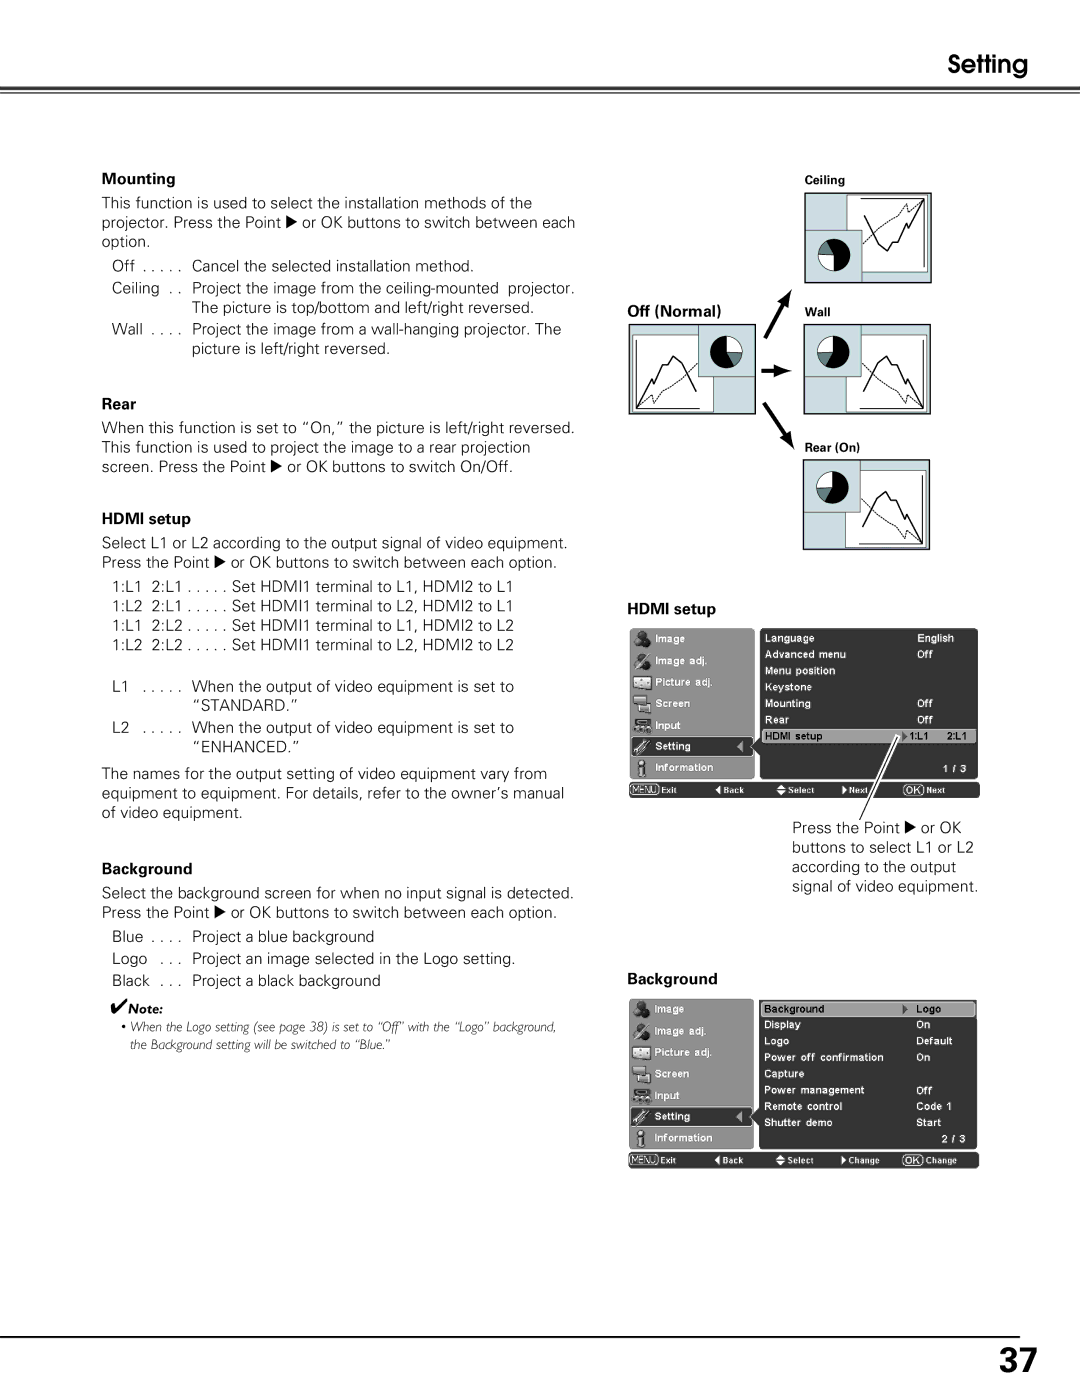
Mounting
This function is used to select the installation methods of the projector. Press the Point 8 or OK buttons to switch between each option.
Off . . . . . Cancel the selected installation method.
Ceiling . . Project the image from the
Wall . . . . Project the image from a
Rear
When this function is set to “On,” the picture is left/right reversed. This function is used to project the image to a rear projection screen. Press the Point 8 or OK buttons to switch On/Off.
HDMI setup
Select L1 or L2 according to the output signal of video equipment. Press the Point 8 or OK buttons to switch between each option.
1:L1 2:L1 . . . . . Set HDMI1 terminal to L1, HDMI2 to L1 1:L2 2:L1 . . . . . Set HDMI1 terminal to L2, HDMI2 to L1 1:L1 2:L2 . . . . . Set HDMI1 terminal to L1, HDMI2 to L2 1:L2 2:L2 . . . . . Set HDMI1 terminal to L2, HDMI2 to L2
L1 . . . . . When the output of video equipment is set to “STANDARD.”
L2 . . . . . When the output of video equipment is set to “ENHANCED.”
The names for the output setting of video equipment vary from equipment to equipment. For details, refer to the owner’s manual of video equipment.
Background
Select the background screen for when no input signal is detected. Press the Point 8 or OK buttons to switch between each option.
Blue . . . . Project a blue background
Logo . . . Project an image selected in the Logo setting. Black . . . Project a black background
✔Note:
•When the Logo setting (see page 38) is set to “Off” with the “Logo” background, the Background setting will be switched to “Blue.”
Off (Normal)
HDMI setup
Background
Ceiling |
Wall |
![]() Rear (On)
Rear (On)
Press the Point 8 or OK buttons to select L1 or L2 according to the output signal of video equipment.
37